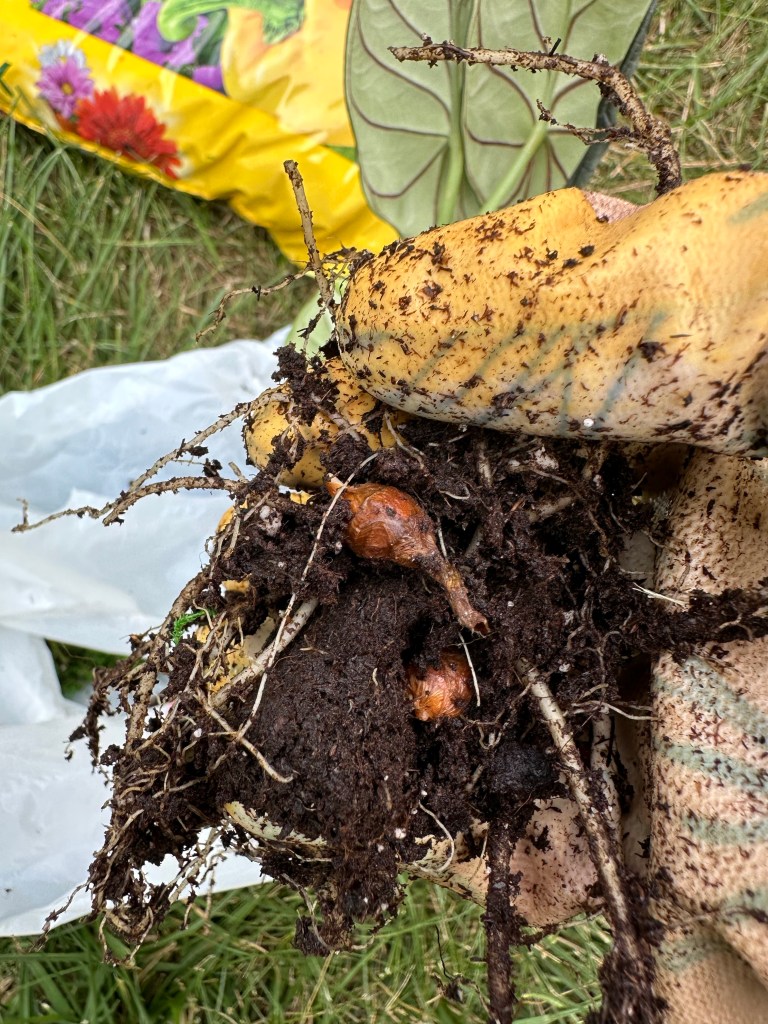
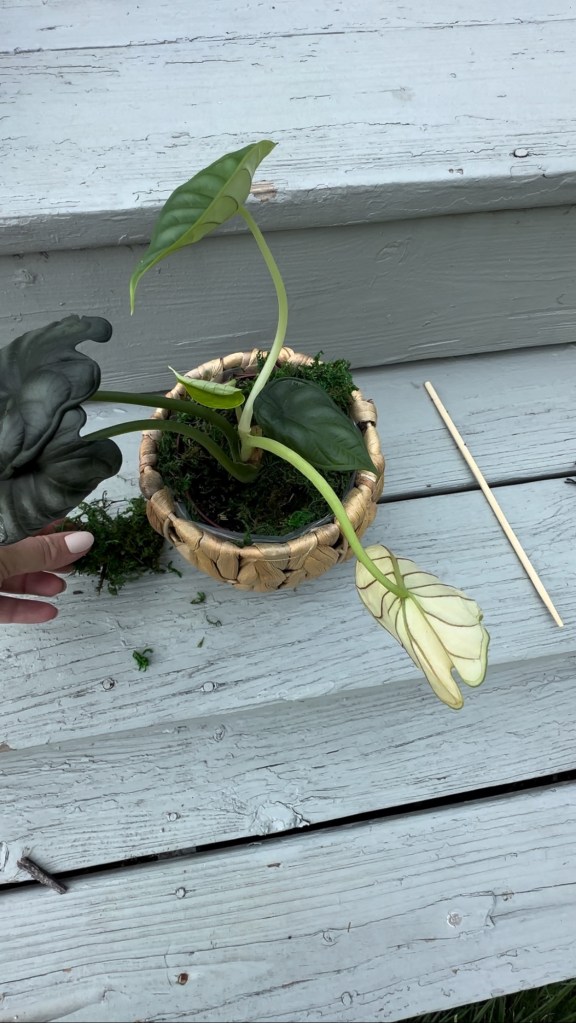
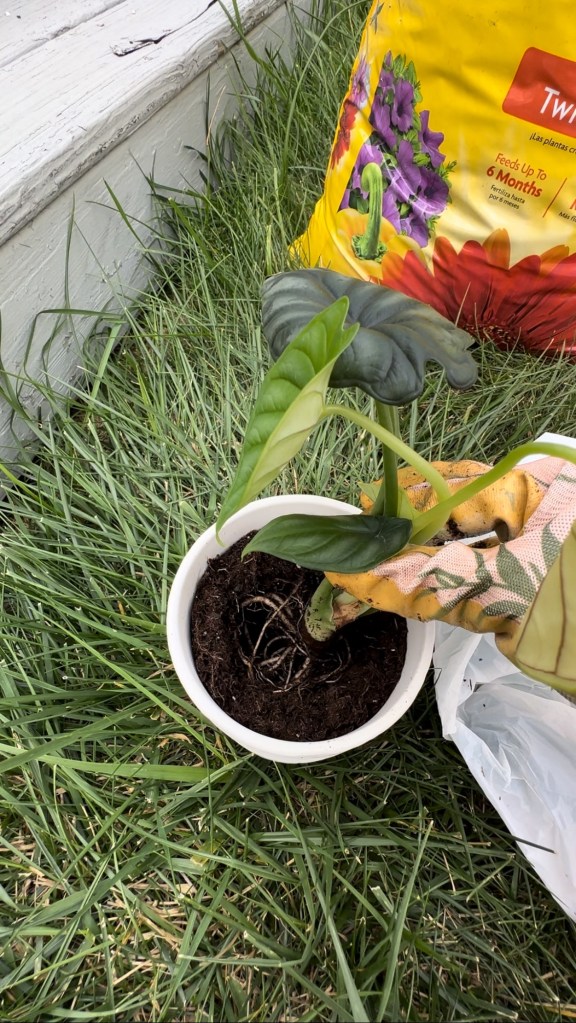
One thing I’ve learned about alocasias is that they HATE having their roots disturbed. I attempted to rehab this grocery store clearance find with utter failure. The good news? It had a TON of corms! Here’s a step-by-step guide to growing your own alocasia from a corm. It’s easier than you think!
Locate and Remove Corms
Find corms by gently checking the soil during repotting. Alocasias hate having their roots disturbed, so be very careful and try not to break up the root ball.
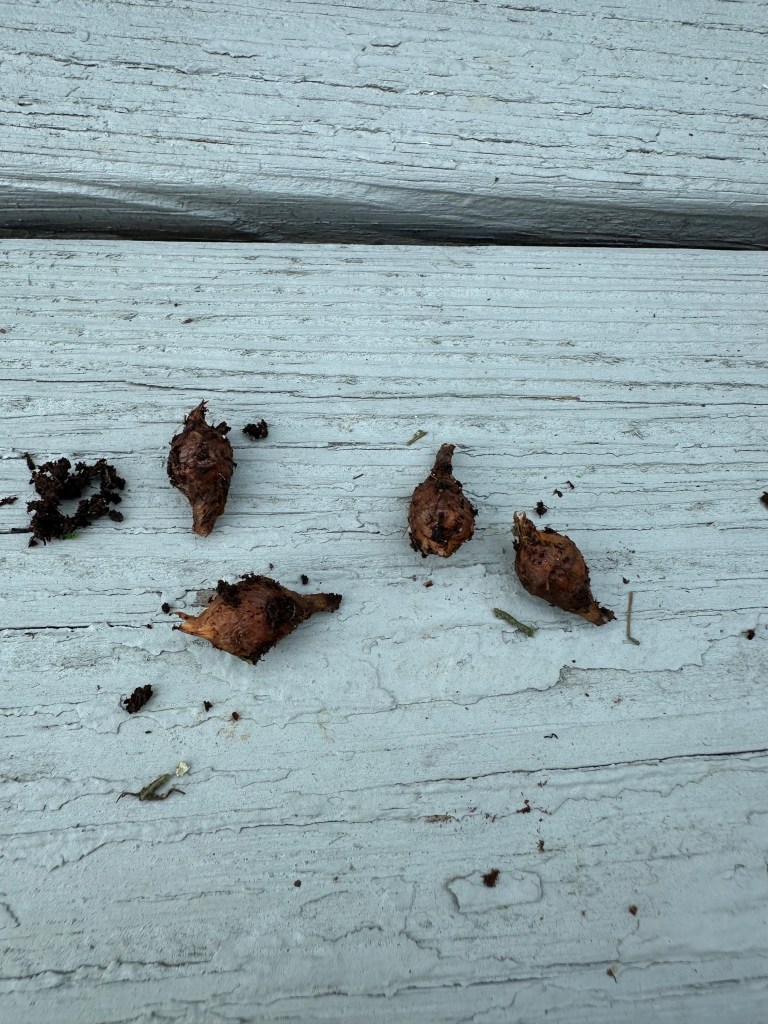
Remove the corms from the soil and allow them to dry for a day or so.
Germinate the Corms
Gently scrape the outside shell of the corms away from the inner portion. They’re kind of like a root vegetable, so be very gentle.
Once the outer peel is removed, place the corns in a Ziploc bag with a slightly damp paper towel. Allow the corms to germinate or in other words, to sprout just slightly.
Plant Corms
Place the corms that are starting to sprout into soil in a pot. Don’t allow them to get too damp, but don’t allow them to completely dry out. They will eventually begin to sprout. I plant several in one pot as not all will make it. I usually have one corm per every four that I pot make it through.
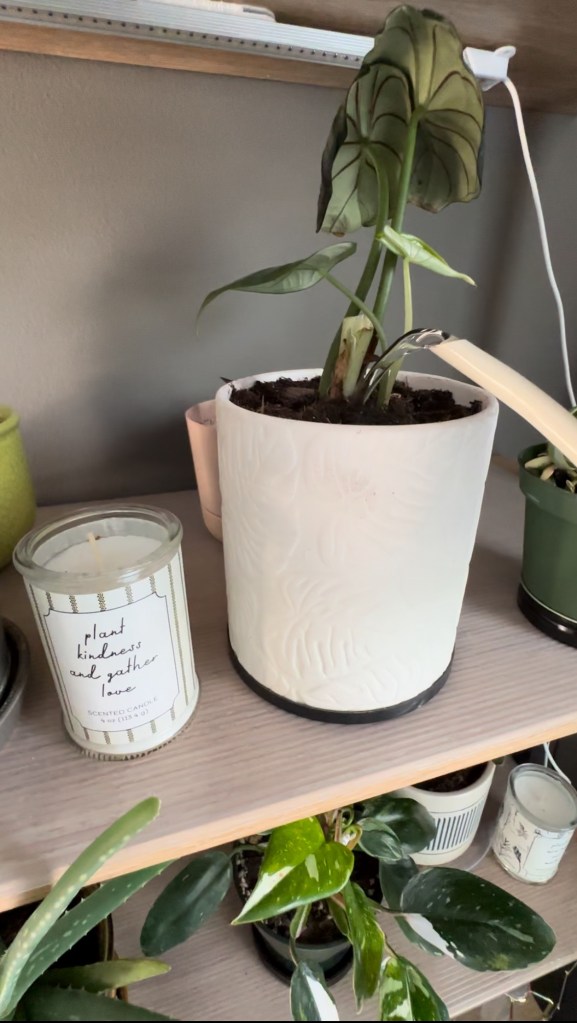
Corms have been the saving grace of my poor alocasias that don’t make it. It’s fun to see them har beautiful leaves come from corms!
If you love your plants as much as I do, I’m sure you also get excited to share your amazing plant care finds with friends. This list has some of my tried and true plant care products. Whether you’re fighting pests, chopping and propping, or need something for your foliage to climb, this list will be sure to cover your plant needs. Happy growing, all!
Shiny leaves. Pest control. Smells great. What’s not to love?! All of my plants are happy to see this bottle coming their way. I love using this for aesthetic and functional proposes. Pest free plants are happy plants!
This is my tried and true product for pest control of ALL kinds! Mealy bugs, spider mites, fungus gnats, you name it, this product eliminates and protects against it! It is systemic, so it works for 8 weeks if applied correctly. I use this for any new plant I bring home since a new plant with pests can create an infestation (no one wants that!).
These garden clippers are excellent for trimming dead leaves or roots for regular plant maintenance or chopping plants that have a lot of overgrowth so you can propagate them. I carry them with me as I water so I can trim any dead or dying leaves as I go.
This insect trap is fantastic for areas with a large number of plants. The light attracts flying insects and the gentle fan sucks them down onto sticky paper. You can empty the bottom of the trap into the trash can easily and replace with a new sticky trap to catch more pests. This trap is particularly great for fungus gnats and thrips (aka my worst enemies!).
Again with the thrips and fungus gnats-these are a lifesaver! If you are struggling with fungus gnats or thrips, lining pots with these is a great, inexpensive solution to catch the insects as they leave the soil.
Just like the Katchy, this trap attracts insects by the blue light then traps them with a replaceable sticky film. I love using these in the kitchen, bathroom with plants, and any room I seem to be having issues with fungus gnats or thrips.
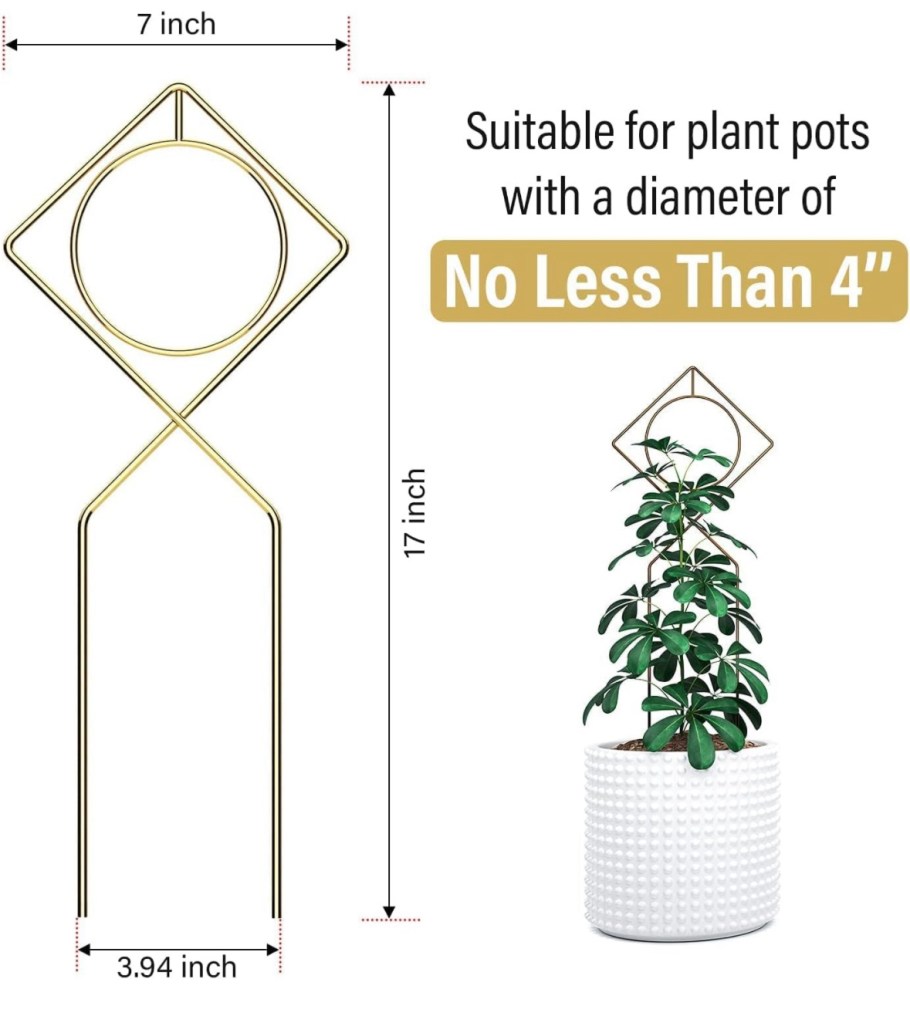
These moss poles are excellent for larger plants like monsteras or bird of paradise. The thicker base and sturdy nature of these make them my favorite. They also come with Velcro tape that is reusable and customizable for any size or shape plant.
If you have a smaller plant, these moss poles are excellent. They are lightweight and sturdy and are excellent for plants like pothos or philodendrons.
This wooden trellis looks great and is functional. I love using this trellis for Hoyas and other smaller climbing plants. Bonus-it comes with two in a pack!
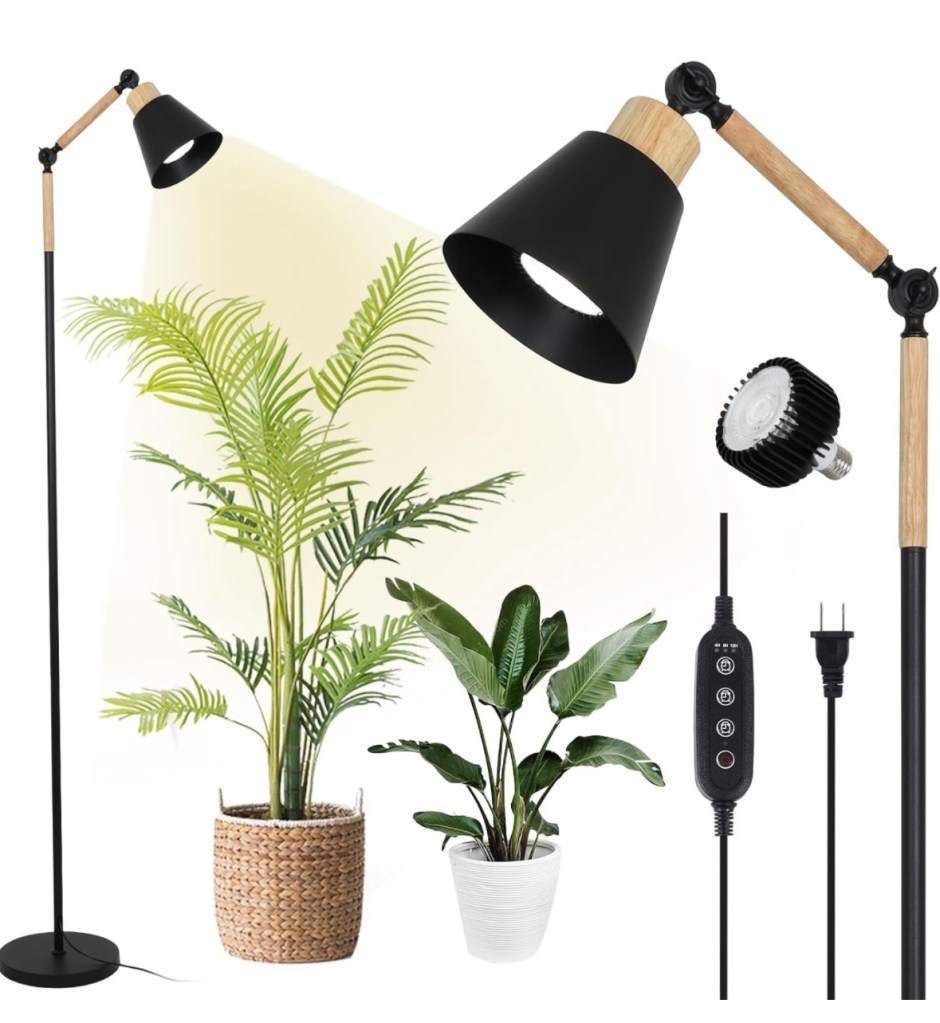
These grow lights are excellent for places like bookshelves or smaller areas. They have a small footprint, don’t use much power, and have an easy to use timer and dimmer function.
These clip-on grow lights have a timer and dimmer function like their stick-on counterparts. I use mine for the top of a bookshelf that doesn’t get much light and it’s an excellent option to keep plants with higher light needs happy.
This one is for all of my plant lovers who care greatly about the aesthetic of their home AND their plants. Some grow lights can ruin the look of a room. This one, however, adds to the functional design element. I love this lamp in back of my living room where there isn’t much light.
These are excellent for plants like Alocasia and orchids. They love bottom watering and these clay pebbles hold just enough water to keep them happy, but their roots won’t be too damp.
Since I recommended leca, I also recommend these clear, plastic nursery pots. They have excellent draining and you can easily check the roots of any plants potted in leca with these pots.
I absolutely love a good bargain plant, but I don’t love the root rot, pests, and other dun surprises they come with. There are steps you can take to help eliminate these issues when buying big box store and bargain plants.
Remove Decorative Moss or Tags
Remove all decorative moss topping the soil as well as any tags or other decorative items. If the plant comes in a decorative pot ensure that it has drain holes. If the pot doesn’t have drainage holes remove the nursery pot from the decorative pot to allow for better drainage if not repotting immediately.
Check the Roots
Check the bottom of the nursery pot to see if any roots are visible. If roots are visible, repot in a larger, well draining pot.
If the roots aren’t visible and the soil doesn’t feel saturated it shouldn’t need to be repotted right away. If you choose not to repot the plant, make sure to use bonide granules to ensure no pests will affect your new plant. Also make sure to isolate it away from other plants in case there are any pests on the plant.
Clean and Inspect Roots
If the root ball is densely packed or overly saturated, completely remove all soil and inspect the roots thoroughly. Check for mushy or black roots and remove them gently. Inspect the root ball for a fine mesh surrounding the base of the plant. If your plant contains a mesh “death plug”, gently cut it off of the plant.
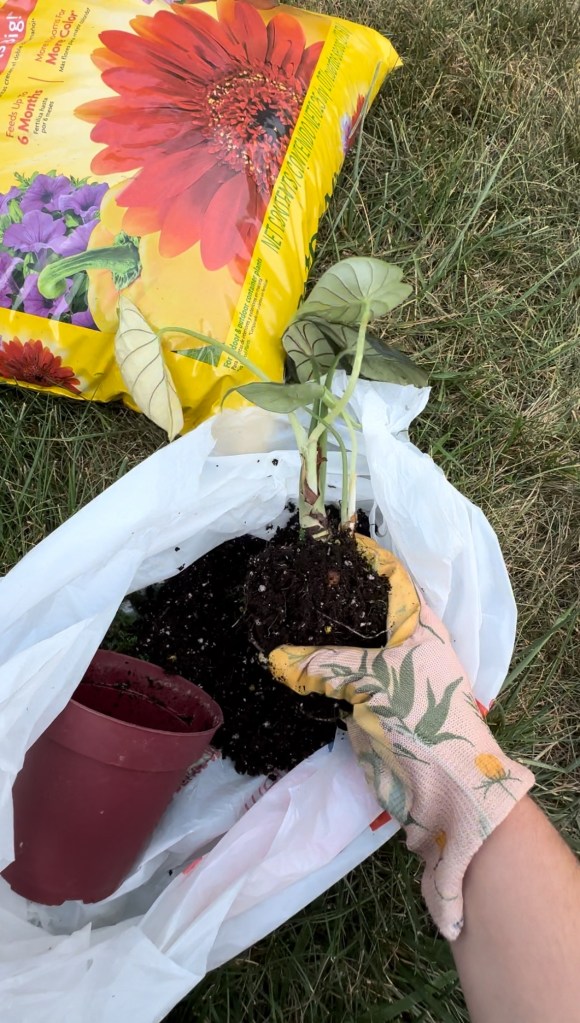
Repot Plant
Repot your plant in a well draining pot with well draining soil. Gently place the roots of the plant in the center of the soil and gently pack soil around the plant.
Trim Dead or Damaged Leaves
Trim any dead or dying leaves off of the plant. This will allow the plant to use its energy for new growth instead of dead or dying leaves.
Add systemic insect control granules to the top layer of the soil and mix into the first inch or so of the soil. This will prevent fungus gnats and will help control any infestation that may already exist on your plant.
Water Plant
Water the plant thoroughly. This will help the plant receive the moisture it needs while activating the bonide granules to ensure pests are kept at bay.
Treat Leaves and Foliage
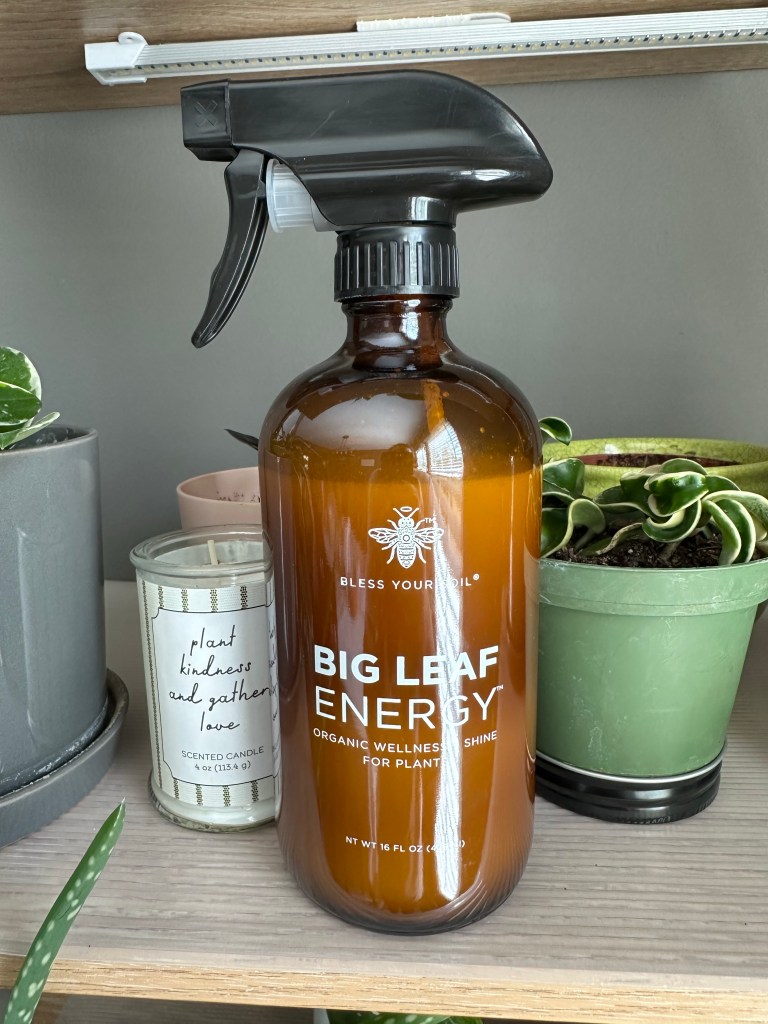
Treat leaves and foliage with a Neem oil product such as Bless Your Soil’s Big Leaf Energy. This organic blend helps keep leaves and foliage shiny and healthy and helps eliminate pests.
Every philodendron I’ve loved has unfortunately suffered from these nasty brown spots. Guess what? They’re a fungus! These spots are likely fungal leaf spot disease or rust spots. Fortunately, I’ve had great success at helping eliminate or stop this fungus in its tracks as long as it’s caught fairly early. The largest cause for this fungus is soil that is too damp or doesn’t drain well. Preventing these issues as well as using some great products to help eliminate the fungus should have your philodendrons thriving in no time!
Repotting and Root Trimming
The most likely cause of the fungus is improper drainage and wet roots. Remove the plant from its current soil and thoroughly rinse the roots while checking for any black or mushy roots. Trim away any roots that seem to be rotting or mushy and sterilize any tools used by wiping them down with rubbing alcohol thoroughly to prevent the spread of any fungus. Once the roots are rinsed well, dry the roots well with paper towels. Repot the plant in a well-draining soil mix and ensure the pot being used has adequate drainage. Using a chunky mix works well for philodendrons so the soil doesn’t stay damp too long for the plant.
Trim Affected Foliage
Trim any leaves that have been severely affected by fungal leaf spot disease to avoid reinfecting this plant or others around it.
Treat with Organic Blend
I treat my plants with Big Leaf Energy from Bless Your Soil. It’s made with a blend of organic Neem and other oils to help plants thrive pest and fungus free. Shake the bottle well and spray on a paper towel. Wipe the front and back of each leaf of the plant well and spray on all stems and stalks to ensure the fungus will be treated.
Isolate and Monitor Soil
Isolate the plant away from other plants to avoid infecting neighboring plants. Monitor the soil weekly and water the philodendron sparingly to avoid the plant sitting in continually damp soil.
So, you found webbing all over your plant and leaf edges are browning and dying… now what? There are fuzzy little white things all over your plant and new leaves are suffering… now what? Nearly every plant I’ve brought home from Lowe’s has been infested with mealybugs or spider mites, but don’t panic! I have several options that will eliminate soft bodied pests and keep them away.
Identifying the Pest
Spider Mites
Usually spider mites create tiny webbing on the tips of leaves or where the leaf meets the stem. These pests are very, very tiny and are typically on the back of leaves in these locations.
Spider Mite Webbing after Misting
The pests may even create webbing on the pot or basket in which the plant is contained. The photo above shows webbing that appeared after being misted with water.
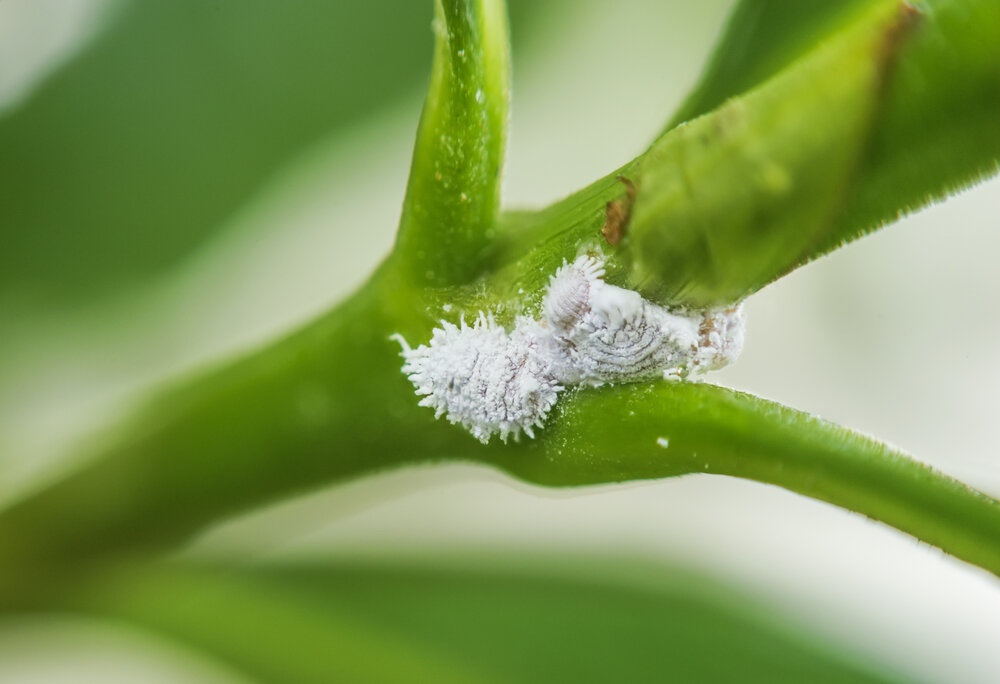
Mealybugs look like fuzzy little dots on plants and can be found on the underside of leaves and the stem. They sometimes clump on the stem at new leaf growth.
Step 1: Physical Removal
Remove all webbing and spider mites using a damp paper towel or lint roller. Remove a sheet of lint roller sticky tape and gently press it on the back of leaves to remove all spider mites.
Remove mealybugs by soaking a cotton ball with 70% isopropyl alcohol and dabbing each bug. This will kill them in contact.
Wash hands thoroughly after removing pests to ensure no other plants are affected.
Be sure to keep the affected plant(s) away from all other houseplants until all spider mites are eliminated.
Step 2: Elimination and Prevention
There are several methods for this part. I’ll provide the 3 options that seem to work best for me: chemical pesticide, natural soap wash, and alcohol and water wash.
Each method has its pros and cons. While chemical insecticide works well, there are drawbacks as well. It is, after all, a chemical that isn’t safe around pets or children and should be used according to the instructions. When I have used this method, I was able to eliminate the spider mites in one use.
The soap wash and alcohol and water wash are also effective and safe to use around pets and children. These methods do sometimes take several applications if there is a large infestation.
Physically remove any pests with the method described earlier, then apply the Garden Safe product. This should be sprayed outdoors all over the front and back of leaves, on stems, and on the top of the soil to kill any pests.
Move the plant to a spot indoors to fully dry away from the sun, as direct light after application of this product could cause burning of leaves (as me how I know… oops!). Wash hands thoroughly after application.
Check the plant weekly for pests after application and physically remove any pests and follow with insect killer application weekly if any pests are found.
Do not leave plant in direct sunlight as the leaves could burn after product application.
Soap Wash
This happens to be one of my favorite methods, although not as effective as the other two. If it’s not as effective, why is it my favorite, you ask? Well, because it’s easy, has no odor, and I can do it quickly weekly without worrying about chemicals or ruining anything else in the house like rubbing alcohol could if there’s a spill.
I also bring my plants inside and allow them to dry on a potting tarp to avoid leaf burn in direct sunlight outside. This is one of my favorite plant care items and you can find it here on Amazon!
Materials Needed:
1 quart warm water (tap water will work fine, but may spot your plant leaves when dry, so use distilled water if you want to avoid hard water spotting on your plants)
1 Tbsp Castile soap (I prefer Dr. Bronner’s, but any pure Castile soap will work fine as long as it has no dyes or fragrances)
Physically remove pests using the previously described method.
Mix ingredients well in a spray bottle.
Move the affected plant outdoors and spray leaves (front and back), stems, and top of soil thoroughly.
Move the plant back inside to dry on a surface that won’t be damaged by drilling soap mix, such as a tarp or repotting mat. Do not leave the plant outside as direct sunlight could burn leaves.
Keep the affected plant away from other plants to endure spider mites do not spread to other houseplants. Wash hands thoroughly after completing this process.
Repeat this process weekly to ensure pests are completely eliminated.
Isopropyl Alcohol as Insecticide
This method works well and kills pests on contact. Namely, mealybugs. If you have fuzzy white bits on your plant, this method may be for you. This will also help eliminate fungus gnats and spider mites.
Remove any spider mites with the previously described physical removal method. Remove mealybugs by soaking a cotton ball in 70% isopropyl alcohol and dabbing any visible mealybugs. This will kill them in contact.
Mix 50/50 water and 70% isopropyl alcohol in a spray bottle. Add 1 tsp Dawn dish soap and mix well.
Spray entire plant, front and back of leaves, stems, and top of soil with alcohol, water, and soap mixture.
Allow plant to dry inside, away from direct light in an area that won’t be damaged by the dripping alcohol mixture such as a tarp or repotting mat.
Wash hands thoroughly to avoid spreading pests and chemicals to other houseplants.
Inspect plant daily for pests. If mealybugs are found, remove by dabbing with alcohol soaked cotton balls.
Repeat this process weekly until all pests are eliminated.
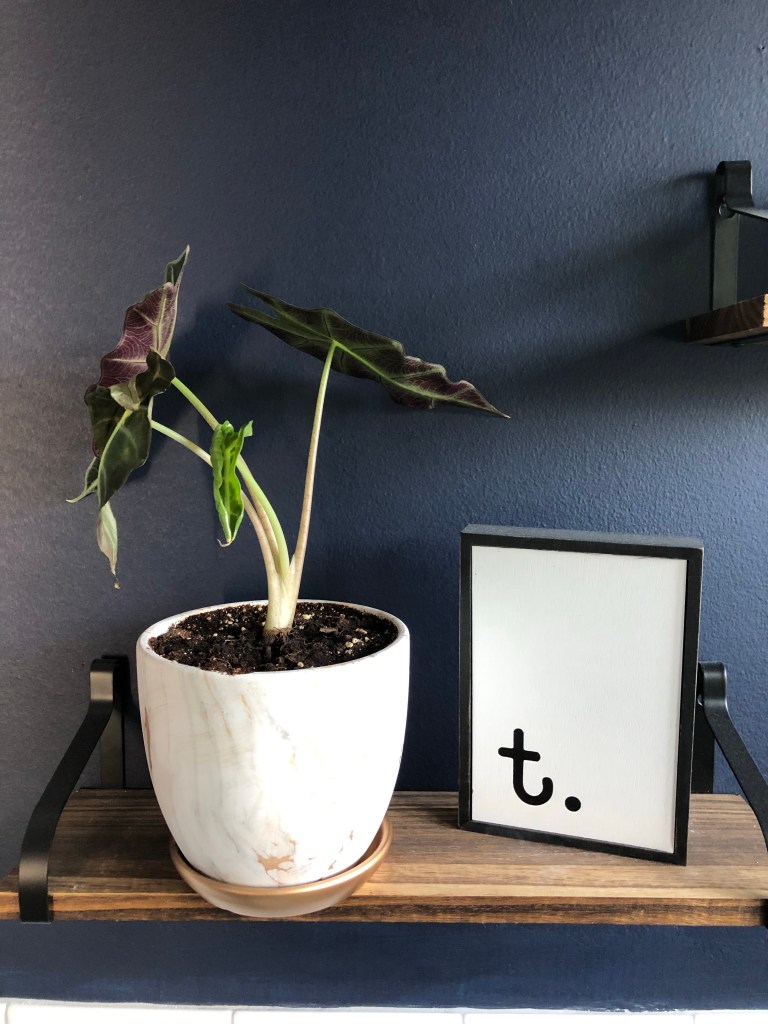
I’ve never even given much thought to rubber tree plants, what they looked like, or if they were great plants to have. I happened to see a beautiful variegated plant that had some pink/ruby hues and thought it was one of the prettiest plants I had ever seen-surprise! Variegated rubber tree plant (ficus elastica ruby).
I purchased one from Rooted on Amazon. It arrived packaged perfectly and in perfect condition. I’ll share a few tips I’ve learned along the way about how to care for the Variegated rubber tree plant.
Water: This plant likes to always have moist soil, but not saturated. When in doubt, let it dry out! Overwatering is not good for this plant, so avoid over watering and if you’re not sure, give it a little more time before watering. Overwatering is the most common reason these guys bite the dust, so pay attention to its soil!
Light: The variegated rubber tree plant thrives in bright, indirect light. Variegation, which contains colorless portions of leaves, means that the colorless portions do not have chlorophyll. This means this portion of the plant cannot photosynthesize, so the more light the other portions of the plant can get, the better. Also, the more indirect light this plant receives, the more the beautiful, pink hues will begin to come through.
Yellowing/Dropping Leaves: If your plant’s leaves start to yellow or drop, this could be due to overwatering. Old leaves will also yellow and drop, so check which leaves are yellowing and dropping and check the soil to determine the cause.
Rotate Your Plant: Make sure to rotate your variegated rubber tree regularly to ensure that it receives adequate light to photosynthesize.
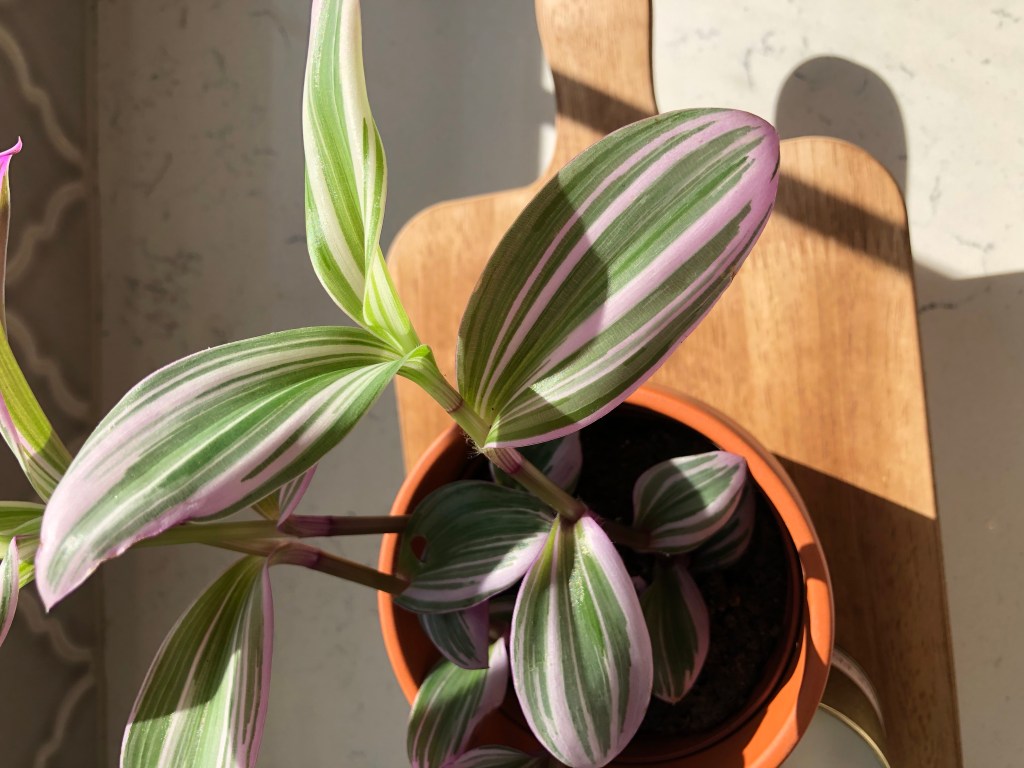
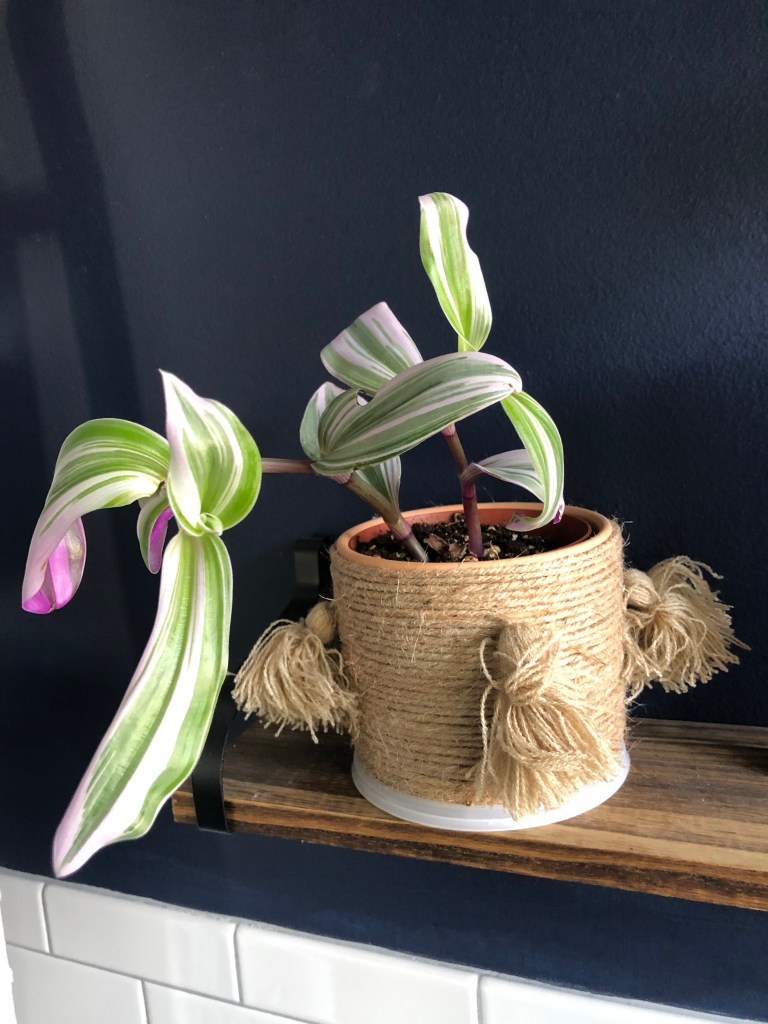
I’ve seen these beautiful, purple and green (two of my favorite colors, I might add) plants and figured they were difficult to care for. Well, I was TOTALLY wrong! I now have two of these little guys and they have taken off over the last few months. Their color is so vibrant they brighten up a room. They’re very easy to care for and easy to propagate (definite bonus in my book!). I bought one of these from Rooted on Amazon and the other I picked up at Meijer, because… plant section, guys. Plant section. Here are a few things I’ve learned about Inch Plants while caring for them-enjoy!
Light: The plants enjoy medium to bright light. Be sure to keep them out of bright light and avoid dark or low light or they will become very leggy.
Water: These plants don’t like to become dry, but they also don’t like to have continually wet soil. Allow the soil to dry partially before watering again. Water these plants less in the winter, since this is their resting period.
Other Care: Aphids can become a pest issue for these plants. If your Inch Plant happens to have an aphid infestation, remove the infested leaves/stems and spray the entire plant down with water.
Propagation: Inch Plants can be very easily propagated. Cut a 2-3 inch piece of the plant and place it in water. The cutting will produce roots in about a week. Plant the rooted cutting in potting soil and voila! New plant!
I bought this adorable little Bird’s Nest Fern (Asplenium Nidus) at Meijer for $6. I’ve seen them here and there but never really paid much attention to them, but this one caught my eye in its little terra cotta pot. I thought its color was beautiful, its shape was so interesting, and it would brighten a room no matter where I placed it. So, I decided to put it in the kitchen to add a little homeyness.
I really didn’t know anything about these plants, but I noticed when its potting soil became extremely dry it would lose all of its color suddenly. Pretty handy watering reminder! Here are a few things I’ve found about this plant:
Light: Bird’s Nest Ferns do best in medium indirect sunlight, but will also tolerate low indirect light.
Water: These ferns should be watered every 1-2 weeks. Avoid watering in the center of the fern, but instead water around the base of the fern. Let the soil dry out about halfway down before watering.
Humidity: Bird’s Nest Ferns can tolerate a typical home’s humidity, but come from a tropical environment, so they prefer high humidity.
Size: In a home environment, Bird’s Nest Ferns can grow to approximately 2 feet in size.
If you ever come across a Bird’s Nest Fern, pick it up! You’ll be surprised how easy these little guys are to care for and what a statement they are. No one ever believes that mine is real – they’re that distinct!
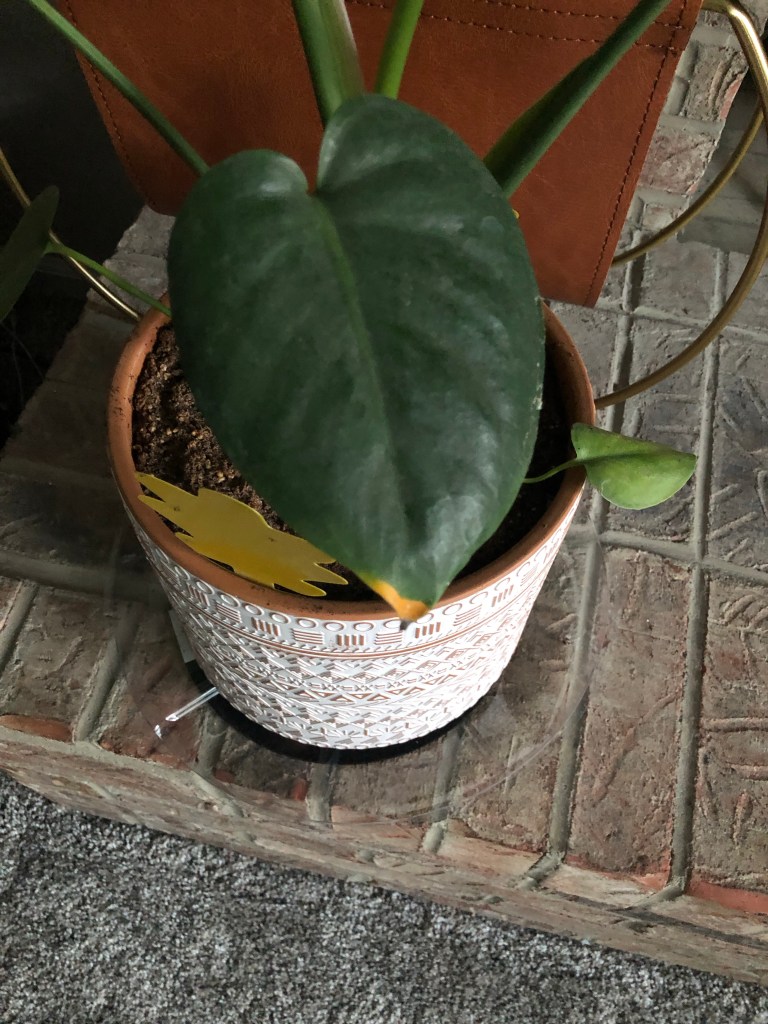
Alright, this post isn’t ENTIRELY about alocasia pollys losing leaves, but more about their general care and things I find fascinating about them. I bought my alocasia polly from Amazon… yes, Amazon! The convenience always gets me and the price was fair for the convenience ($18.99 for a 4″ pot and $31.99 for a 6″ pot). I’ve purchased several plants from the Rooted company on Amazon and the plants have always arrived in excellent condition and have thrived since they arrived carefully packaged on my doorstep. In fact, most of them have had new leaf shoots or leaves ready to unfurl when they’ve arrived.
Ok, anyways… back to alocasia polly care. Since I’ve never had an alocasia polly, I had to do a little research. They can trick you into thinking they’re dying, but I promise they’re not! Here are a few care tips and some things you might find fascinating about your alocasia polly:
Water
These guys are a little strange when it comes to water. They store all of their water in their large stem or base. This means you should only water your alocasia polly when it is completely dry. They store all of their water in their stem and use the water from their stem, so they don’t like to have constantly moist soil. Water them when they’re completely dry only, usually every two weeks.
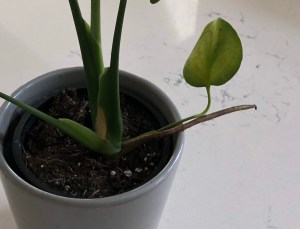
Unfurling Alocasia Polly Leaf
Light
Alocasia polly leaves tend to burn, so they don’t care for bright, direct light. While they love being in a well lit room, they thrive out of direct light. If your alocasia polly’s leaves are starting to become crispy, it might be in too much direct light.
Unfurling Leaves
Alocasia polly’s leaves unfurl similar to a monstera. It’s one of the reasons I LOVE this plant! I love watching them sprout new leaves and unfurl.
Dropping Leaves
Alocasia polly don’t have many leaves at one time. If your alocasia polly begins dropping leaves, don’t panic! It could be growing a new leaf or it could be going into its dormant winter stage.
Dormancy
Alocasia polly go dormant in the winter. Some alocasia pollys lose all of their leaves in the winter months. Water them less than you typically would and don’t feed them with fertilizer as much.
I’ve learned so much about alocasia polly and it’s definitely one of my new favorite plants. Remember-indirect light, water only when its soil is COMPLETELY dry, and it’s not dead, it’s just dormant! If you want to learn a little more about this variety, check out some more info from Plant Care for Beginners!
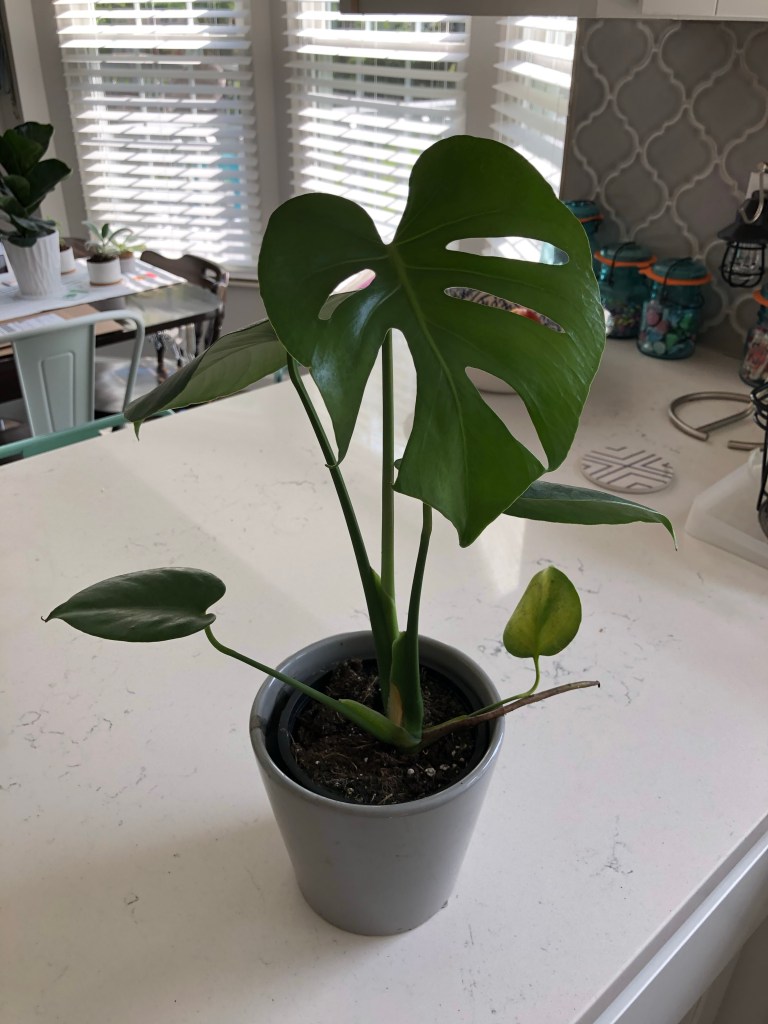
Happy Monstera Monday! I’ve always loved monsteras, but figured they had to be extremely difficult to care for because of their size and beautiful split leaves. Man, was I wrong! When monsteras became the “it” plant everyone had to have, I figured I’d wait to see what the hype was about. Now that they’re EVERYWHERE, I’ve added two to my indoor jungle and they have not disappointed! I’ll give a brief history of my monsteras and if you really couldn’t care less about my plants, but want some care info and fun facts about monsteras, scroll on down to the care section.
When Target rolled out their Hilton Carter live plant collection I couldn’t wait to see what plants they would be carrying, but I knew they would have monsteras. I mean, come on… it’s Target! They have all the trendy things… heck, they MAKE all the things trendy! Well, thanks to work and kids and cooking and cleaning and you know, all the things, it took me forever to even get to our Target to see what they had in stock. Of course, by the time I was able to run into the store they only had one pathetic, broken monstera left. In hindsight, I should’ve scooped that one up while I had the chance.
Before (left) and after (right) of the little Home Depot monstera
Fast forward a week or so and I took a quick trip to Home Depot to pick something up. Since I can’t pass up a good plant, I always browse their little corner plant section-by the way… never pass up their indoor plant section! They have all the trendy plants for a great price! Anyways… sitting there right in the middle was one lonely monstera. He was little, but he was perfect! Since I bought him he’s been repotted and aside from a bit of overwatering while in his tiny pot, he’s thriving and getting new leaves!
Target Carter Hilton live monstera before (left) and after (right)
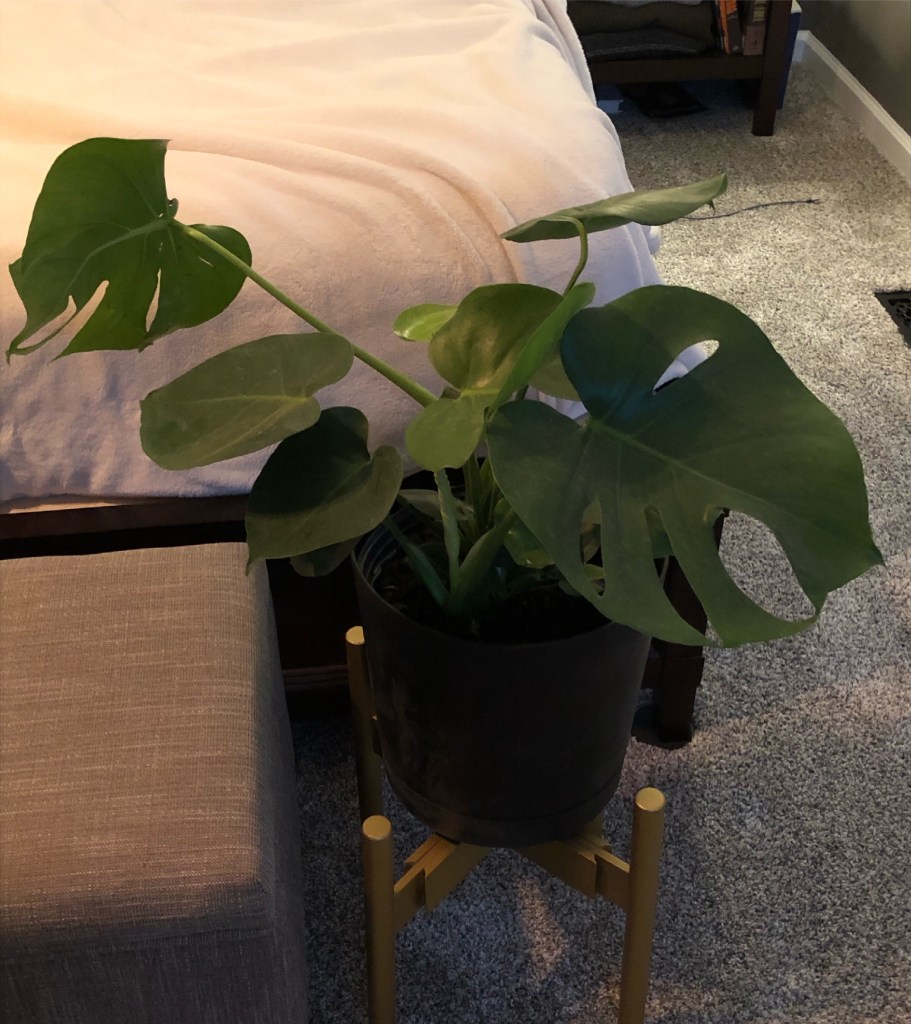
I had to run to another local Target for something our Target didn’t have and they FINALLY restocked their live plants. I grabbed that monstera and put it in my cart so fast! This one has done so well and loves its sunny spot at the end of our bed. At this point I don’t even know how many new leaves “Monty” has at this point. Oh yeah… that’s his name… Monty the Monstera. By the way, the small one is now named Monty Jr. We get mad creative with names in this house, folks (that was sarcasm if you didn’t catch it… subtle…). Now that you’ve been introduced to the Montys, I’ll add some information that I’ve found very helpful.
Monstera Care
Monsteras are rather forgiving plants. Light, water, pot size, and soil type don’t need to all be perfect for them to thrive.
Light: They love light, so find them a sunny spot.
Yellow leaves due to overwatering
Water: Water them when approximately the first 2 inches of soil is dry. Make sure not to over water them or their leaves might yellow on the edges. Make sure their pot has drainage holes to make sure they drain properly.
Pot Size: They don’t seem to become root bound very easily. They don’t need to have a huge pot to be happy, but if you see roots coming out of the drainage holes, repot that sucker! Their leaves and stems seem so large that sometimes it seems like they need much larger pots than they actually do.
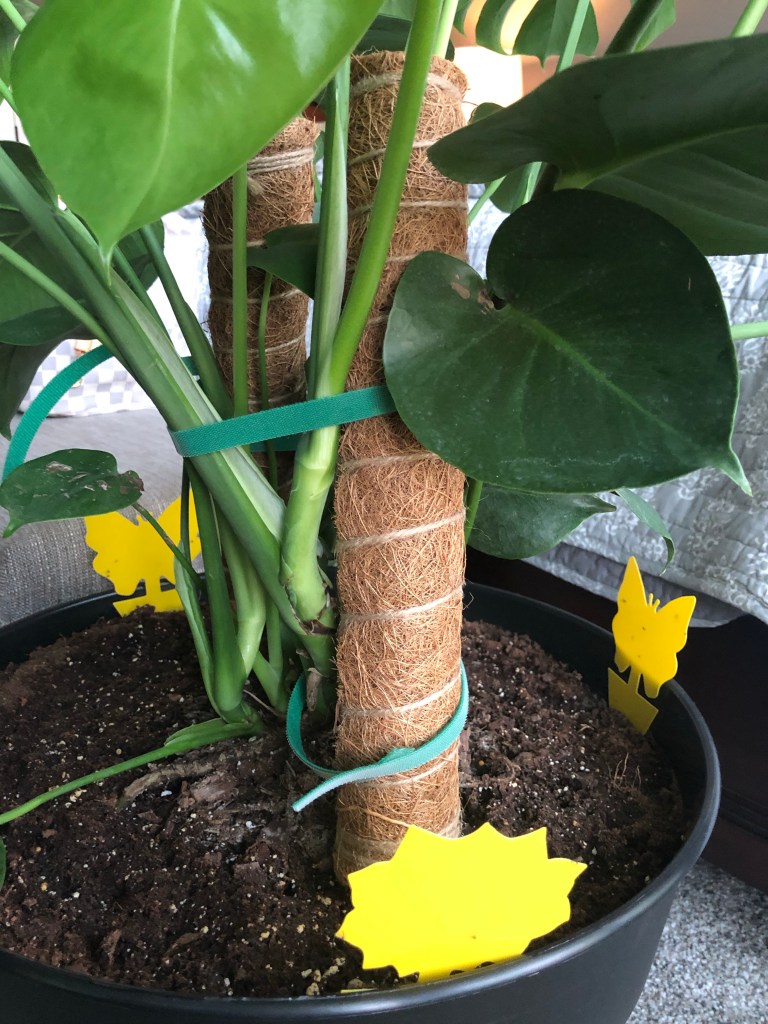
Moss pole to support monstera leaves
Climbing: Monsteras naturally find things to climb in the jungle. If your monstera starts to lean or flatten out, you may need to find something to support it or allow it to climb. Amazon has great moss poles that are cheap, sturdy, and do the trick.
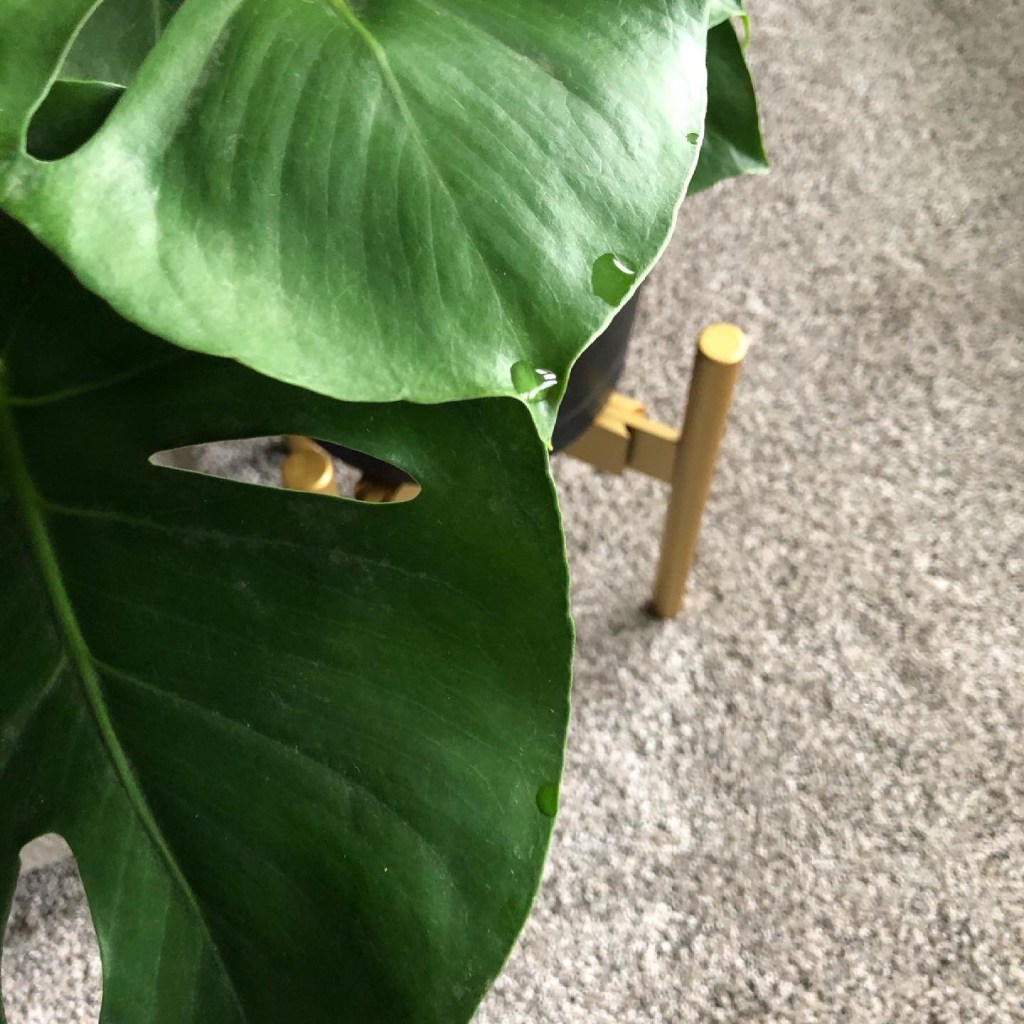
Dripping: Sometimes monstera leaves drip. No, your monstera isn’t crying-it is getting rid of excess water or moisture.
Dripping monstera leaves due to excess moisture
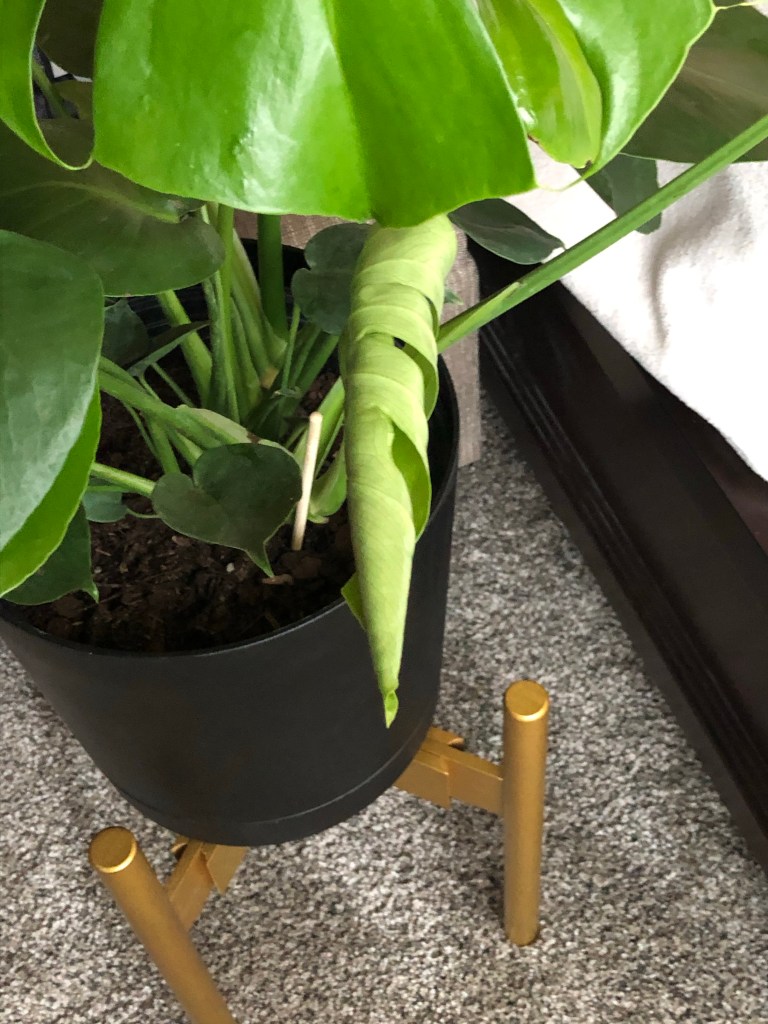
Unfurling monstera leaf
Unfurling Leaves: I had NO idea how monstera leaves grew. It’s the craziest looking thing I’ve ever seen! They appear as a shoot and unfurl over a few days. When you see new shoots, be patient! It takes several days for them to unfurl, then they’ll be a light green color for some time.
Aerial roots: This one is bizarre… roots that aren’t, well, in the dirt. There will be roots that don’t root into the dirt, but kind of hang in the air. This is for stabilization and these roots reach for water in the jungle. You can stick these roots back into the dirt or leave the be. Either way will be fine for your monstera. If you plan to propagate your monstera, these aerial roots are great! I’ll create a new post on that sometime soon!