Want a Real Anti-Bullying Campaign? Stop Being a Bully on Social Media, Moms

Want a Real Anti-Bullying Campaign? Stop Being a Bully on Social Media, Moms

thumbs downYes, adults. This is directed at you, social justice warriors.  I’m climbing on my soapbox, so hold on, y’all.  I prefer to keep my blogging lighthearted, fun, sometimes informative (for those who care about clothes, food, and wiping tiny butts all day), and generally a pleasant read, but I’m so over it.

Social media posters hide behind their iPhones and their MacBooks (yes, I’m generalizing, Apple users… don’t be offended… I’m an iPhone, iPad, and MacBook Pro snob, so hang with me here) and scream “Stop bullying!  Protect our children!  Teach them to be kind, accepting, and tolerant!”, then five minutes later post their OPINION, yes OPINION, on what another mother should feed her child and pick a fight with someone who doesn’t agree, use the F-word, then condemn them for feeding them something they would NEVER feed their precious, perfect child.  Key word, sheeple, O-P-I-N-I-O-N.  Moms are the worst.  The absolute worst.  Honey, it’s none of your business what another mother feeds her child.  Is she giving them crack cocaine?  No? Ok, then keep your opinion to yourself because no one cares.

Opinions are great.  Discussions are great.  Let me rephrase that: CIVIL discussions are great.  That’s how we learn.  That’s how we grow.  That’s how we support one another, stimulate intelligent thought, and in general operate as an informed adult.  How in the world does using the F-word toward another mother help her to become a better mom or support her in any way shape or form?  Ooooh-me! Me!  I can answer that one!  IT DOESN’T. So. Don’t. Do. It.

Alright… *dismounts from soap box*.  Keep keepin’ on, awesome mommas.  I see you-you’re doing great.  Feed your child what you want to feed them because, guess what?  They’re YOUR child and YOU know what’s best for them.  Gluten free?  All the carbs? Organic?  Vegan?  Fruit roll up that fell on the floor?  Breast milk?  Formula?  Go on with your bad self, girl!  I salute you-you’re awesome.  Never forget that and never let that bully momma telling you what not to feed your child get in your way of doing your thing.

Advertisement
New Makeup Favorites… and They’re DRUGSTORE Brands!

New Makeup Favorites… and They’re DRUGSTORE Brands!

I’ve ditched a few makeup favorites for drugstore brands (hey… they’re cheaper… and most ended up being better overall for the most part), had to make some changes due to discontinued products (boo!), and added a few newbies to the makeup routine over the past year or so (because, mom skin, y’all… it’s just totally different).

This post will walk you through my typical full coverage makeup regimen, my daily makeup regimen, what has been working well, what could use some improvement, and what products I’d like to try next.

Full Coverage Makeup Regimen

So, since I have been blessed with adult acne, it makes it much harder to get rid of any acne marks quickly.  Aging skin and acne just don’t mix, guys.  That being said, now add skin that is beginning to wrinkle and the fun begins.  Most days I wear fairly minimal makeup, but when I have time I LOVE to play with new trends and see what’s out there that works.  Lately I’ve been all in on drugstore dupes.  I’ve found that I can usually find drugstore brands that work as well (or better… heck yes!) than pricier brands.  I’ve also found that the pricier brands I grew to love changed their lines CONSTANTLY.  So, once I found something I loved they discontinued it.  Bummer.  Here are the steps I take for a full coverage face, what I use, what works, and what isn’t my favorite, but is currently what I use.

Oval Brushes

oval brushes.jpg

And I thought I loved my beauty blender.  You guys.  Oval brushes are a thing and they are LIFE CHANGING.  Now, I’ll have to say they’re not great for everything, but here is what I find them most effective for:

  • foundation
  • blush
  • powder

I think my favorite has to be the foundation brush.  It makes foundation go on so smoothly without clumping, streaking, or absorbing all of the foundation.  I do love the blush and powder brushes for the same reason-effortless blending.

I still use my beauty blender for concealer, highlighter, and contouring.  I also use my eyeshadow brushes for eye makeup.  I found it extremely hard to use the eye makeup flat brushes as they were hard to get an even application with a flat brush.

African Black Soap for Brush and Beauty Blender Cleaner

african black soap

I have tried so many products and different methods to clean my brushes and beauty blenders over the years and NOTHING has come close to African Black Soap.  It even gets my beauty blender completely clean.  The price also can’t be beat!  The. Best. Hands. Down.

Maybelline Master Prime Primer

primer.jpeg

Maybelline’s Master Prime Primer has something for everyone.  They have options for dry skin, redness, large pores, you name it, they’ve got you.  When I’m using full coverage makeup I typically use the redness control because I tend to have a little more redness in my cheeks as I get older.  All of these that I’ve tried have worked better than all expensive primers I’ve tried.  A great primer can go a long way to make your foundation look smoother, which helps provide such great coverage.

Maybelline Superstay Better Skin Foundation

cac2967e-0dc1-41a3-be3e-fd11a4eed1c3_1.cfc5a7389070199c1dc07c6211ed0c39

So, this stuff is magical.  I follow primer up with this foundation.  It’s a great full coverage foundation, is extremely light, goes on smoothly, and stays.  All. Day. Long.  It also doesn’t cause my skin to break out after wearing it like some heavier full coverage makeup I’ve tried.  It also has many different shades, so matching a color is fairly easy.

My only beef with this foundation is that I’m pretty sure it’s being discontinued.  They do however make a non “better skin” version that is still awesome.  I believe the only difference is the normal Superstay version doesn’t contain salicylic acid, which dries your skin anyway.

Maybelline Superstay Concealer

concealer

Might as well keep with the Superstay theme…  I figure if I’m going to use a a Superstay foundation, I might as well follow it up with a Superstay concealer.  This concealer works just as well as the foundation.  I use it on blemishes, redness, and sometimes I even use it as an under eye concealer.  It’s pretty awesome.

This also seems to be discontinuing, however.  I will more than likely replace it with the non-salicylic acid version, which should be just fine.

Maybelline Instant Age Rewind Eraser Dark Circles Concealer

under eye

The Superstay concealer works for under eye circles, but I’ve notice that the older I get the worse my dark circles get (yay!).  This concealer seems to help combat the dark circles, but my only complaint is that my eyeliner and mascara seem magnetically attracted to this concealer.  Like, they’re besties…

I’m still using it for now until I find something that doesn’t stick to my mascara and eyeliner so much.

Too Faced Shadow Insurance (Replaced by Urban Decay Shadow Primer)

I have used Too Faced Shadow Insurance in Champagne for years.  I loved it because it doubled as a shadow.  It has a slightly shimmery nude base color that’s great for everyday wear or as a shadow primer.  Well, in true Too Faced fashion they discontinued it.  Fail, Too Faced, huge fail.  I’m pretty much on a rally against Too Faced since they’ve discontinued every product of theirs I love.

I received Urban Decay Shadow Primer in a gift from Ulta and it’s serving its purpose well, but I’m not about to shell out a fortune for this stuff.  I’m keeping my eye out for a great drugstore dupe and if I find one, you’ll be the first to hear about it!

Maybelline Master Contour Stick

contour

As a contour newbie, I chose this version because 1. it was cheap 2. it had awesome reviews.  I was NOT disappointed.  It has great color, is easy to blend, and did I mention it’s cheap? Oh… I did?  Ok.

If you’ve never contoured you need to try it-it’s not as hard as it sounds, guys and a little goes a long way.  Find a YouTube video and try it once-I promise it’s not hard!

What I love about this product is it has great pigmentation, blends fairly easily, but doesn’t just blend away.  You know what I mean… I know you’ve all had a product at least once that you put it on, it looks great, then you try to blend it and then think “wait… I just wanted to blend it, where did it go?!”.

My only complaint with this one is that it’s rather odd having a two sided product.  It just keeps getting pointier and pointier as I use it.  How do you fix that?  If you figure it out, let me know…

Maybelline Master Strobing Stick

highlighter

Meh.  I can take or leave this one.  It highlights alright, but I always add powder to my finished face anyhow, so it kind of defeats the purpose.  I don’t typically use highlighter, so I just figured I’d give this one a try since I was using other Maybelline products.

Urban Decay Naked 2 Basics Eyeshadow Pallette

eyeshadow

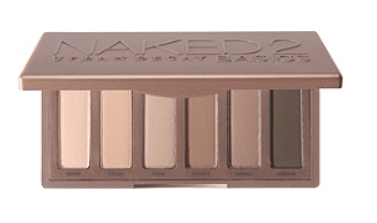
I know, I know… another pricey one.  I can’t help it-I have searched high and low for a drugstore dupe for Urban Decay’s Naked pallets and it just doesn’t exist.

The high pigmentation, last-all-day wear, and awesome shades don’t exist for a drugstore price.  Sorry, guys, I promise I tried!

Milani Baked Blush in Luminoso

blush

I’ve actually used a cream blush for a few years, but secretly hated it.  Why did I keep using it?  I paid so dang much for it.  It was a Tarte cream blush that I tried to talk myself into liking.  Well, it is now discontinued, so apparently I’m not the only one that couldn’t stand it.

Replacement?  Milani Baked Blush in Luminoso.  Thanks to my awesome sister-in-law (you know, the one that got me hooked on Poshmark…) I have found the holy grail of blush.  It’s cheap, it has high pigmentation, and the shades are gorgeous.  Best of all?  It’s cheapest on Amazon.  Winner, winner, chicken dinner.

Maybelline Shine Free Oil Control Loose Powder & Maybelline FIT ME! Matte and Poreless Powder

When I’m doing full coverage makeup I usually reach for a loose setting powder.  Maybelline’s oil control powder is awesome and seems to last nearly all day.  My sister-in-law also suggested the Maybelline FIT ME!  powder in a compact.  It’s. Awesome.  It gives a flawless finish weather you’re wearing full coverage makeup or just an every day look.  I highly recommend both!

COVERGIRL Perfect Point Plus Eyeliner in Charcoal

eyeliner

I’m not a fan of liquid eyeliner because it tends to look way too harsh around my eyes.  I have used this eyeliner for over 10 years.  Yeah… that’s a long time.  When something works, it works!

Benefit Roller Lash Mascara

roller lash

I’ve tried sooooooooo many different mascaras.  My favorite?  Chanel.  Well, I have expensive taste on a drugstore budget, so Benefit’s Roller Lash is my compromise.  It has what I like about Chanel’s mascara at more of a wallet friendly price.  No, it definitely isn’t cheap, but I have yet to find a drugstore brand that compares.

What I love about this mascara is that it feels almost waxy when being applied rather than a crunchy spider lash feel.  What I don’t like about it is that it always seems to leave marks under my eye later in the day.  But, overall I reach for this one every time.

Garnier Micellar Cleansing Water All-in-One Mattifying

micellar

Since I rarely wear waterproof mascara I’ve been using Garnier Micellar Cleansing Water for makeup remover.  It’s gentle, not oily, and seems to help remove most of my makeup before I was my face at night.  It doesn’t, however, remove stubborn waterproof makeup.  You’ll have to take more drastic measures for that one, ladies.

Daily Makeup Regimen

I don’t have time for a full coverage face every day.  What I do make sure to do is have a moisturizer and at least some eyeliner and mascara so my eyes still look like they exist.

Burt’s Bees BB Cream

BB cream

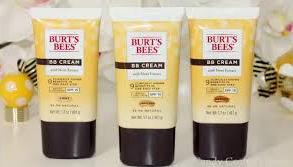
The first step I take is a moisturizer followed by a BB cream.  I feel like my skin never looks good enough to be naked, so this BB cream always does the trick.  Does it cover everything?  Nope, but that’s not the point.  This moisturizes and has an SPF 15 sunscreen while being slightly tinted to give a little smoother complexion.  To further smooth my complexion I add a thin layer of the Maybelline FIT ME!  powder I previously mentioned.

I follow up with the Urban Decay Eyeshadow Primer.  This gives my lids some color and smoothness without having to apply layers of eyeshadow.  Add the COVERGIRL eyeliner and Benefit Roller Lash mascara and BAM!  A less than five minute effortless day-to-day look.

New Products I’ve Tried

Some products were suggested to me, so I figured why not give them a shot.  My current full coverage foundation is getting low, so I might as well see if something might be a better replacement.

Maybelline FIT ME! Matte and Poreless Foundation and Maybelline FIT ME! Concealer

My sister-in-law/s makeup always looks flawless, so I figured I would try the other FIT ME! products she suggested from Maybelline.  As drugstore products go these were great, but I’m not ready to replace my Superstay with them.  I felt they lacked a little coverage compared to the Superstay line.  It did however feel a little lighter than the Superstay version if that’s what you’re looking for.

Bottom line: I’m still not ready to switch from Superstay.  Yes, it’s still a pretty good foundation, but I still prefer the Superstay from Maybelline.

What I’m Pumped to Try Next

COVERGIRL Clean Matte BB Cream

covergirl bb

My Burt’s Bees BB cream is running low, so I’m tempted to try something different.  While I love the Burt’s Bees BB cream it has a very oily feel to it.  This COVERGIRL version has amazing reviews and is less than half the price of the Burt’s Bees version.  I’ll keep you posted on how it holds up!

CC Cream

I’m also ready to try a real CC cream.  I have funky things going on with my skin and could really use a little more coverage and correction.  I haven’t really found one that is getting great reviews, so I’m open to suggestions!  Anyone have any luck with CC creams?  Let me know!

Easy Shepherd’s Pie (Freezable!)

Easy Shepherd’s Pie (Freezable!)

I have always wanted to make Shepherd’s Pie, but figured it was way too difficult for my level of expertise (aka… pull something out of the freezer and stick it in the oven…).  So… Pinterest to the rescue!  I came across this recipe while scrolling through Pinterest and adapted it a bit according to ingredients I had on hand as well as some substitutions that made my life MUCH easier (hey… this was already an easy recipe and I did you a solid and made it even easier…).  I also increased all of the original ingredients to make a large back quickly to freeze a few and have one for dinner.

Take a look at the original recipe from About a Mom.  She has A TON of other great recipes, so be sure to check her out!

Ingredients

  • Bob Evan’s Original Mashed Potatoes (refrigerated-I usually use about 2-3 regular size containers)
  • 2 Tbsp olive oil
  • 1 cup frozen, chopped onion, thawed
  • 1 cup frozen peas and carrots
  • 1 cup frozen corn
  • 3 lbs lean ground beef
  • 2 Tbsp Worcestershire sauce
  • 4 tsp allspice seasoning
  • 2 tsp salt
  • 1.5 cups beef stock
  • 2 Tbsp flour
  • Shredded Cheddar (for topping)

Directions

  1. Heat a large frying pan over medium heat. Add the olive oil and onions. Cook for 2-3 minutes until onions start to become translucent.
  2. Add the ground beef and cook until no longer pink. Drain off any excess fat.
  3. Add the Worcestershire sauce, salt and allspice seasoning into the cooked meat mixture and stir until incorporated.
  4. Sprinkle flour over the top of the mixture and pour in the beef stock. Stir together and allow sauce to bubble and thicken some. Once the sauce has thickened, add the frozen vegetables. Give it a quick stir to combine and remove from the heat.
  5. Spread the meat mixture out evenly along the bottom of 2 9×13 or 3 (I am usually able to fill 3-4 full with this recipe) 8×8 casserole dishes or foil pans. Spoon the mashed potatoes over top of the meat. Use enough of the mashed potatoes to make about 1/2 inch layer on top of the meat.
  6. Add 1 cup of shredded Cheddar over mashed potatoes (if desired).  Cook in the oven at 350 degrees F until heated through and the potatoes are golden brown on top, about 20 to 25 minutes. Or, prepare for the freezer by wrapping in aluminum foil and plastic wrap. Store in the freezer for up to one month. Defrost overnight in the refrigerator before baking.

A little prep goes a long way in this recipe.  By double the recipe I can usually get 4 full meals out of this one!

T-Shirt Quilt On the Cheap?

T-Shirt Quilt On the Cheap?

I have wanted to make (ok… have one made… me sew something that complicated?  Nope!) a t-shirt quilt practically since the day I graduated high school and realized I had a billion t-shirts I would never wear again, but couldn’t possibly part with.  After college I decided I REALLY needed to have a few quilts made.  Sorority shirts. Will. Be. The. Death. Of. Me.  If we had an event, we had a shirt.  Bid Day? Shirt. Formal? Shirt. Recruitment? A shirt for every round of recruitment.  You get the idea. Shirts for days. And months. And years.  I always see people post their awesome quilts on social media and often inquire as to where they had their quilt made.  Many were family members and those that weren’t didn’t really make quilts for just anyone-just for special occasions.  If they did do them as a side business they were INSANELY expensive and rightfully so.  It takes so much work to create a quilt and t-shirt material is not forgiving.  With the number of t-shirts I’ve amassed I might as well have a large tent built out of my shirts.

So, my search continued as a sorted and separated shirts I would want on my quilts.  After checking my Amazon lists for price drops on items I may purchase, I remembered that there are hand-made items listed on Amazon.  It hit me-maybe, just MAYBE there might be someone out there who makes t-shirt quilts on Amazon. Well, my wish came true.  Enter Project Repat.

Any size quilt may be purchased from Project Repat.  You choose the size, the size of squares on each quilt (12×12 or 14×14), and backing color.  All quilts are backed with PolarTec fleece.  Easy peasy, right?  Well, sort of.  Pricing is much, much lower than traditional quilts, but there is some work involved and any mistakes or additions you make can add up fairly quickly.  Prices are very competitive because Project Repat has streamlined the t-shirt quilting process.  These quilts have no batting like a traditional quilt, but t-shirts are pieced together and backed by fleece, making a much more cost effective product.  The reviews on Amazon are very high (5 stars across the board) and all customer images of their quilts look great. Now that I’ve been through the process, I have cost-saving, as well as time-saving, steps for creating your best Project Repat T-Shirt quilt.

Before You Order Your Quilt

Once you’ve decided you have enough shirts to create a quilt (the least number of “squares” a quilt can have is 16), head on over to Amazon.  I have found this is the cheapest way initially to create your quilt.  The price on Amazon is typically $99, but I have seen them go on sale frequently for at low as $59.99 (heck, yeah!).  When you purchase a Project Repat quilt on Amazon, you’ll receive a $110 gift card ($110 discount code on Project Repat, which doesn’t include the cost of shipping your quilt to you), a shipping bag, and a FedEx label to ship your shirts to Project Repat.  This is a great deal, considering you would normally have to get your own packaging to ship your shirts in addition to paying to ship the shirts to Project Repat.

img_3519

Once you’ve ordered your gift card, start gathering shirts you would like to include in your quilt.  You are able to use the front and back of t-shirts, which is great for shirts that have slogans that begin on the front and finish on the back or for shirts that have a name on the front or back and a larger logo on the opposite side.  However, just know that if you plan to include both the front and back of a shirt, it is not guaranteed that these squares will be placed next to each other.  If you’re like me and you really want certain squares next to each other, Project Repat will accept shirts shipped with a large, color photo of the desired placement of shirts for an extra fee (I’ll explain the fee later in my price breakdown).

Ordering From Project Repat

Once you’ve gathered your shirts, here are sizes that are available at Project Repat:

  • Lap (16 panels)
  • Twin (24 panels)
  • Full (30 panels)
  • Queen (49 panels)
  • King (64 panels)

I went with the size that was the closest to the number of “squares” I decided on, then shifted front and back panels around to make the number of squares I needed.  You also have the option of 12″x12″ panels or 14″x14″ panels.  They require 0.5 inch extra for each size square chosen, otherwise a $5 fee will be added for each panel that is not large enough.  For example, if you choose 14″x14″ panels there must be 14.5″x14.5″ available.  I chose 14″x14″ due to several shirts that had very large sayings on the back.  Head over to Project Repat’s website and select the size of squares, size of quilt (number of squares), backing color, and add the quilt to your cart.  Once your quilt is added to your cart, enter your gift card number to receive the $110 promotion.  The promotion will not cover shipping your quilt to you (the lowest shipping option is $9.99 for a 4-5 week turnaround).  Pay the remaining balance for your quilt and Project Repat will send you a confirmation email where you can view instructions on t-shirt preparation and a packing slip.  Print your packing slip and make sure that the details on the slip are exactly the specifications you ordered.

Preparing Your Shirts

Next, Project Repat requires that shirts be sent in a very specific condition: cut in half.  Simply cut down each side of the shirt to make two haves of a shirt.  I will say this is the most labor intensive part of preparing shirts to send to Project Repat.  When I ordered my quilt I thought “Awesome… I order the quilt, box up my shirts, and someone else will do the hard part!”.  Wrong.  So, so wrong.  Yes, I will say the “hard part” is definitely cutting the squares and quilting the shirt, but man… when you’re preparing shirts for THREE quilts, your pour little cutting fingers get pretty darn tired.

After your shirts have been cut, lay them out to get a good idea of what the layout will look like and to make sure you have the exact amount of squares you need for your quilt.  If you prefer to choose the layout of your quilt, snap picture and print that bad boy out.  Make sure it is a large, clear, color photo so there is no confusion when the quilt is assembled.


Packaging and Shipping Your Shirts

Next, you’ll have to package your shirt halves to be sent to Project Repat.  I found the easiest way to package the shirts to make sure they fit in the shipping bag is to fold your t-shirt in half vertically, fold the sleeves over, then roll the shirt as tight as possible.  Once all shirts are in the shipping bag, include the packing slip (make sure all check marks have been completed and it is signed and dated) and large color photo of the quilt layout (if you have decided to determine the layout yourself), seal the bag, and add the shipping label.  Head over to FedEx to ship your shirts and wait for your awesome quilt to arrive!

Cost Breakdown

If the quilt is ordered from Amazon, the initial cost is $99 for a $110 discount code.  This is a great deal if you get the quilt on sale at Amazon.  Otherwise, Project Repat offers 40% off discount codes for first time buyers.  Compare the two to see which deal is best!

  • Shipping cost: minimum of $9.99 for 4-5 week turnaround
  • 12″x12″ vs 14″x14″ – extra $15+
  • Size difference (based on 12″x12″ squares)
    • Lap (16 squares) – $74.99
    • Twin (24 squares) – $109.99
    • Full (30 squares) – $129.99
    • Queen (49 squares) – $189.99
    • King (64 squares) – $239.99
  • Select layout ($20)
  • Miscellaneous changes or “fixes” Project Repat makes during production

I was able to purchase my $110 discount code on Amazon for $59, so it made it worth it for me to purchase it there.  I paid a total of $129.97 for a 14″x14″ square Full quilt where I chose the layout.

Project Repat Review

Price

I think for the price you receive a quality project.  Compared to the time it would take yourself or a loved one to create a custom quilt for you this is definitely a deal.  No, it is not “quilt” quality, but all I wanted was a memory that wasn’t sitting in a storage tub.

Ease of Ordering

I do think ordering from Project Repat is as easy as it possibly could be for such a custom product.  Options are clearly defined and as long as you follow instructions clearly you should end up with a product you love.

Preparing Shirts

I will say that I was not prepared for the amount of work involved in cutting, piecing together, and packaging the shirts would take.  It was a challenge ensuring that I had the required number of squares (front and back, front, or back of shirts) and had an order that made sense.  I think this is part of what makes Project Repat’s pricing competitive.  You only ship the sides of the shirts you decide to use and they’re already halved to prepare for production.

Would I Recommend Project Repat?

Absolutely.  For the price this is a great way to get those old shirts out of storage bins and create a memory you can actually use.  Pulling my old shirts out to prepare my quilts brought back a lot of great memories.  Go Beavers!  Go WSU!  Go Greek!

img_3891

Not to mention, look how awesome they turned out!  I think they quality is great for the price, but there is a lot of work involved in preparing your shirts to be assembled.


Slow Cooker Texas Pulled Pork

Slow Cooker Texas Pulled Pork

I love pulled pork, but never really knew how to make tender pulled pork in the crock pot.  I always used pork tenderloin, which never yielded good results.  I mentioned this to my mom one day and she said “oh!  You need a shoulder butt!”.  Never knew that was a thing.  Well, it is a thing… and it makes for awesome pulled pork!  They had them on sale this week, so… pulled pork all around!  It made for a hearty meal everyone loved.  It cooked all day and was ready for dinner with minimal prep beforehand.  Thumbs up for a weeknight meal.

I found this recipe on allrecipes and I think it made for a pretty good flavor for the pulled pork.  Check out the original recipe on allrecipes!

Ingredients

  • 1 tsp vegetable oil
  • 1 (4 pound) pork shoulder (butt) roast
  • 1 cup barbeque sauce
  • 1/2 cup apple cider vinegar
  • 1/2 cup chicken broth
  • 1/4 cup light brown sugar
  • 1 Tbsp prepared yellow mustard
  • 1 Tbsp Worcestershire sauce
  • 1 Tbsp chili powder
  • 1 extra large onion, chopped
  • 2 large cloves garlic, crushed
  • 1 1/2 tsp dried thyme
  • 8 hamburger buns, for serving
  • slaw, for serving (optional)

Directions

  1. Pour the vegetable oil into the bottom of a slow cooker. Place the pork roast into the slow cooker; pour in the barbecue sauce, apple cider vinegar, and chicken broth. Stir in the brown sugar, yellow mustard, Worcestershire sauce, chili powder, onion, garlic, and thyme. Cover and cook on High until the roast shreds easily with a fork, 5 to 6 hours.
  2. Remove the roast from the slow cooker, and shred the meat using two forks. Return the shredded pork to the slow cooker, and stir the meat into the juices.
  3. Spread the inside of both halves of hamburger buns with butter. Toast the buns, butter side down, in a skillet over medium heat until golden brown. Spoon pork and slaw onto the toasted buns.
I skipped the toasted buns part… ain’t nobody got time for that.  I did, however, add slaw to the ingredient list because I love slaw with my pulled pork!

Maybe Not a Ritual, But Definitely a Habit

Maybe Not a Ritual, But Definitely a Habit

ritual vitaminWell, I did it.  I bought a multivitamin from a Facebook ad.  I must officially be a… *gulp*… millennial. What are my thoughts on them?  They’re absolutely amazing.  Best decision.  Ever.  Ok, maybe not my best decision ever, but it definitely was a good one.

I’ll be starting my third month of these vitamins tomorrow and I have nothing but good things to say about them.  They’re called Ritual and yes, you’ve seen them plastered all over your Facebook, Instagram, and Twitter, and, in my opinion (whatever that’s worth), they definitely live up to the hype.  Yes, it is a subscription, but when I know I’ll be taking them every day, I know how long a bottle will last (30 days-there are 60 vitamins, 2 per dose), and I know what I will be charged every month ($30-S$1 per dose), I’ll take it for the sheer convenience of it arriving at my door.  To add to the convenience, all of the ingredients in these essentials couldn’t be purchased separately for a cheaper price.  Not to mention you’d be taking nine different pills every day just to get what these babies pack in two little capsules.

ritual ingredients

Bonus?  They’re minty.  Yes!  MINTY.  Pretty awesome.  These vitamins are backed by scientific evidence of the validity of every ingredient and it’s all laid out on Ritual’s website.  I see a lot of reviews that claim that they have given people more energy and I’ll have to agree, I’ve never felt this rested (feel rested… not that I am rested… I’m a mom, you know…) with other multivitamins I’ve taken.  I forgot to take them for about three days in a row and man, was I feeling it.  These vitamins are awesome.  Go. Check. Them. Out.


Caramelized Baked Chicken Legs (Slow Cooker Option!)

Caramelized Baked Chicken Legs (Slow Cooker Option!)

Caramelized chicken legs honey soy sauce baked easy edited
Photo Credit: Bless This Mess.

These chicken legs are absolutely amazing.  They’re sweet, savory, juicy, and tender.  Heck, even my four-year-old says “you make the best chicken, mom!” when I make these for dinner.  I love making them on a weeknight because I can sit out all of the ingredients the night before, mix the sauce, pour it over the chicken, and BOOM-delicious protein with very little prep.  Our oldest loves to do the “ingredients” when I cook, so he usually adds all of the ingredients of the sauce to the bowl, mixes it all up (or “mixa mixa mixa” if you’re privy to Danielle Tiger… if you are, I’m sorry :/), then I add the mixture to the chicken.  I got this recipe from Bless This Mess.-check out the original recipe here!

There is even a slow cooker option for these chicken legs.  I typically prefer chicken legs in the oven because they get a little crispier, but since these are in a sauce anyway it makes for a great slow cooker recipe.

Ingredients

  • 2 1/2 lbs chicken legs
  • 3/4 cup honey
  • 1/2 cup soy sauce
  • 1/4 cup ketchup
  • 2-3 cloves garlic, minced
  • salt and pepper, to taste

Directions

Oven Directions

  1. Preheat the oven to 350 degrees. Lay the chicken legs out and give them a good sprinkling of salt and pepper on both sides. Put them in a foil-lined baking dish with high sides (the foil is to make clean up easier – it’s not essential). A high-sided sheet pan is the best option because it has sides to keep everything in, but it is big enough that the chicken isn’t drowning in the sauce. It will caramelize best if half of the chicken is poking out of the sauce while cooking.
  2. In a glass measuring cup measure out the honey, soy sauce, and ketchup. Add the minced garlic and stir. If the mixture doesn’t combine well, microwave it on high for thirty seconds and stir again. Pour the honey mixture over the chicken legs.
  3. Put the chicken legs in the oven and bake for 45 minutes. Take the chicken out of the oven and rotate it so that the bottom that was in the sauce is now on the top out of the sauce. Put the legs back in the oven. Raise the heat to 425 degrees and bake until the sauce is bubbly and starts to caramelize on the chicken legs. This should take about 15 minutes. Remove the chicken from the oven and allow to rest for 5 minutes before serving.

Slow Cooker Directions

  1. Place all of the chicken legs in the bottom of a slow cooker. Pour the sauce over the chicken legs. Slow cook on low for 6 hour or on high for 4 hours, until the largest piece of chicken registers 165 degrees on an instant read thermometer.

Enjoy!  Be sure to check out Bless This Mess. for more awesome recipe ideas!

[Disney] Pin Display DIY

[Disney] Pin Display DIY

When I went to Disney World for the first time as a child, I wore my favorite denim hat full of pins that I had collected (yeah… I was so. darn. cool.).  When I arrived at Disney World I became obsessed with finding pins to add to my hat.  This was before Disney trading pins were a thing (Wikipedia says Disney pin trading started in 1999… in case you’re curious).  You guys, I’m a trend setter.  Ok, I know I didn’t start this, but hey, I was doing it before it was cool, so just give me that, alright?  Everyone in my family knew about my pin hat and would save their pins for me and even looked for pins to bring me from vacations, their jobs, anywhere they could find them.

Well, recently my mom dug up a few things from my childhood including my famous pin hat (and an N*SYNC bucket hat, which is still cool no matter what anyone says…).  Nostalgia took me straight back to walking down Main Street in  Magic Kingdom for the first time.  I looked at my little denim cap and started thinking that would be pretty awesome to have a way to display my little pins so I could enjoy them every day.  So, naturally I Googled “Disney Pin Display” and, naturally, a lot of insanely expensive, hideous options came up.  Nope.  Next…

Pinterest!  Of course… there has to be something I could make to hold my pins.  Well, that was also a fail.  I found several options, but decided on creating my own.  I think it turned out pretty cute for what I wanted-a simple pin display I could glance at and be taken straight back to my childhood that didn’t stick out like a sore thumb (why is this a saying, anyway?).

If you’d like to create your own, here’s a short tutorial:

Materials:

  • An empty frame (can be an old picture frame, mirror frame, or even a frame you make yourself out of wood scraps)
  • plastic canvas (see below for example… I had no idea what they were called, but the Google did… you’re welcome)

plastic canvas

  • Burlap (any fabric will do as long as your pins have a point to pierce fabric)
  • Hot glue gun

Directions:

  1. Remove any backing from your frame.
  2. Trace the inside of your frame onto the back of the fabric as well as the plastic canvas.  So there is an edge to fold over to make nice, clean edges, trace a larger version of your traced edge onto the back of the fabric so it can be folded over when glued.  img_3523If you’re using a picture frame like I did, mark the plastic canvas based on the inner  portion of the frame (the portion where the glass would go) so there is something structurally sound to glue the fabric and plastic canvas to.  Think of it this way… if you cut the plastic canvas smaller than the hole, it’s going to fall right through.  K? K.
  3. Place the plastic canvas on top of the fabric. Add hot glue to the frame and place the fabric and plastic canvas onto the hot glue and hold until set.  Next, fold the fabric over the plastic canvas and glue all edges down.
  4. Next, I added a ring of hot glue around all edges to make sure everything stayed in place.
  5. Add your pins for an adorable pin frame!


img_3515-e1533573170914.jpg

You could probably skip the plastic canvas as long as the fabric you choose has a fairly rigid stricture in your frame.  I knew that burlap is fairly forgiving fabric, so I chose to add the plastic canvas for structural rigidity (yep… the engineer in me is coming out… sorry)

Now, it’s time to take our littles to Disney to add to the collection!