Homemade Apple Pie

Homemade Apple Pie

We went apple picking this weekend and our youngest decided we didn’t have enough apples in our already full basket. My first thought was applesauce, but neither of the kids LOOOVE applesauce that much. Then I thought apple crisp. Then I thought apple pie. So, apple pie it was!

I’ve made pumpkin pie from scratch and I remember it being, well, an experience. It was a Monday holiday and I only had our youngest home with me that day, so I figured, why not? I have a whole day, right? For some reason I could only find good recipes for the filling OR the crust, but not both combined, so I took what I liked from two I found and compiled them for you here. The crust recipe came from New York Times cooking and the filling recipe comes from Allrecipes.

Crust

Ingredients

  • 1 1/4 cups all-purpose flour
  • 1/4 tsp salt
  • 10 Tbsp unsalted butter, cold and cut into cubes
  • 2 -4 Tbsp ice water, as needed

Directions

  1. In a food processor, pulse together the flour and salt. Add butter and pulse until the mixture forms small pieces. Slowly add ice water, 1 Tbsp at a time and pulse until the dough comes together. The dough should be moist, but not wet.
  2. Turn dough out onto a lightly floured surface and gather into a ball. Flatten into a disk with the heel of your hand. Cover tightly with plastic wrap and refrigerate for at least 1 hour and up to 2 days.

Filling

Ingredients

  • 8 Granny Smith apples (or other tart, firm variety), peeled, cored, and sliced
  • 1/2 cup unsalted butter
  • 3 Tbsp all-purpose flour
  • 1/4 cup water
  • 1/2 cup white sugar
  • 1/2 cup packed brown sugar

Directions

  1. Preheat oven to 425 degrees F.
  2. Melt the butter in a saucepan. Stir in flour to form a paste.
  3. Add water, white sugar, and brown sugar and bring to a boil. Reduce temperature and let simmer.

Preparing Crust, Filling, and Baking

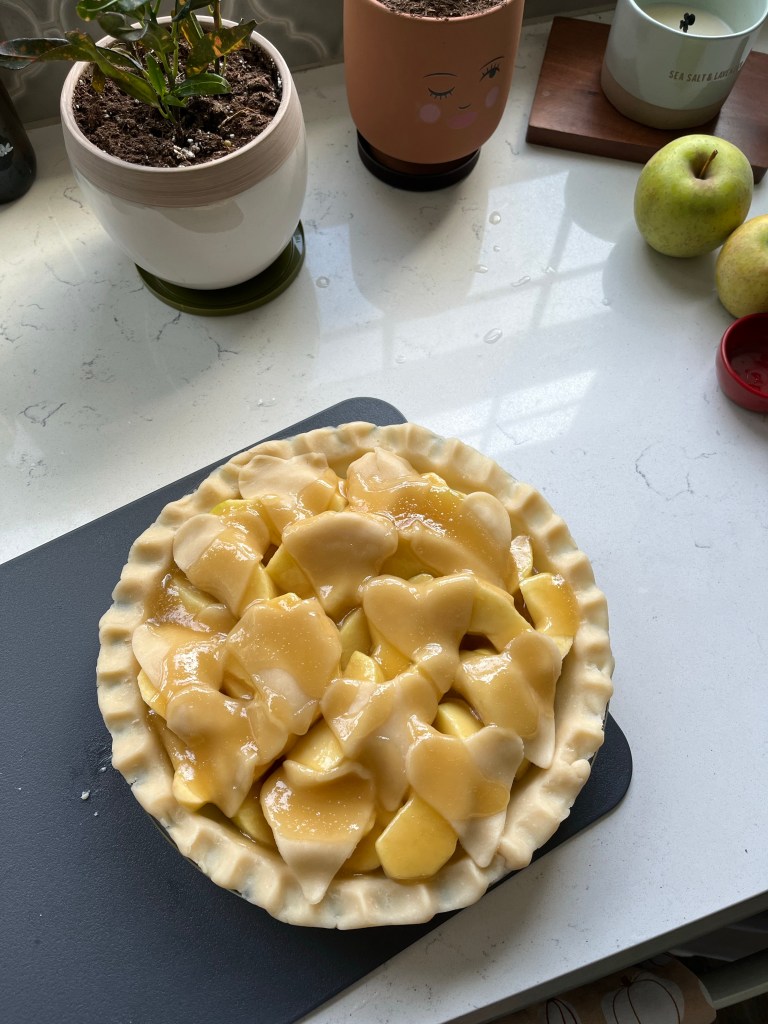
  1. Once the crust has refrigerated for at least an hour, remove it from the refrigerator and place on a lightly floured surface. Roll the dough out with a flour coated rolling pin to approximately 1/8″ thickness. Roll the dough onto the floured rolling pin, then gently unroll over the pie crust. Cut excess dough approximately 1″ away from the rim of the pie pan. Fold the excess dough under and pinch the crust using an index finger and thumb all around the pan. Combine excess dough together and roll out with the floured rolling pin to 1/8″ thickness. If the dough becomes too warm to work with, refrigerate for 15 minutes or until firm enough to work with. Slice the dough into strips to later create a lattice crust or cut into shapes using a cookie cutter.
  2. Place apples into the center of the pie crust. Allow the apples to slightly mound in the pie crust. Add lattice crust or crust shapes over apples.
  3. Slowly pour filling mixture over the crust and apples making sure it doesn’t overflow, but is covered evenly.
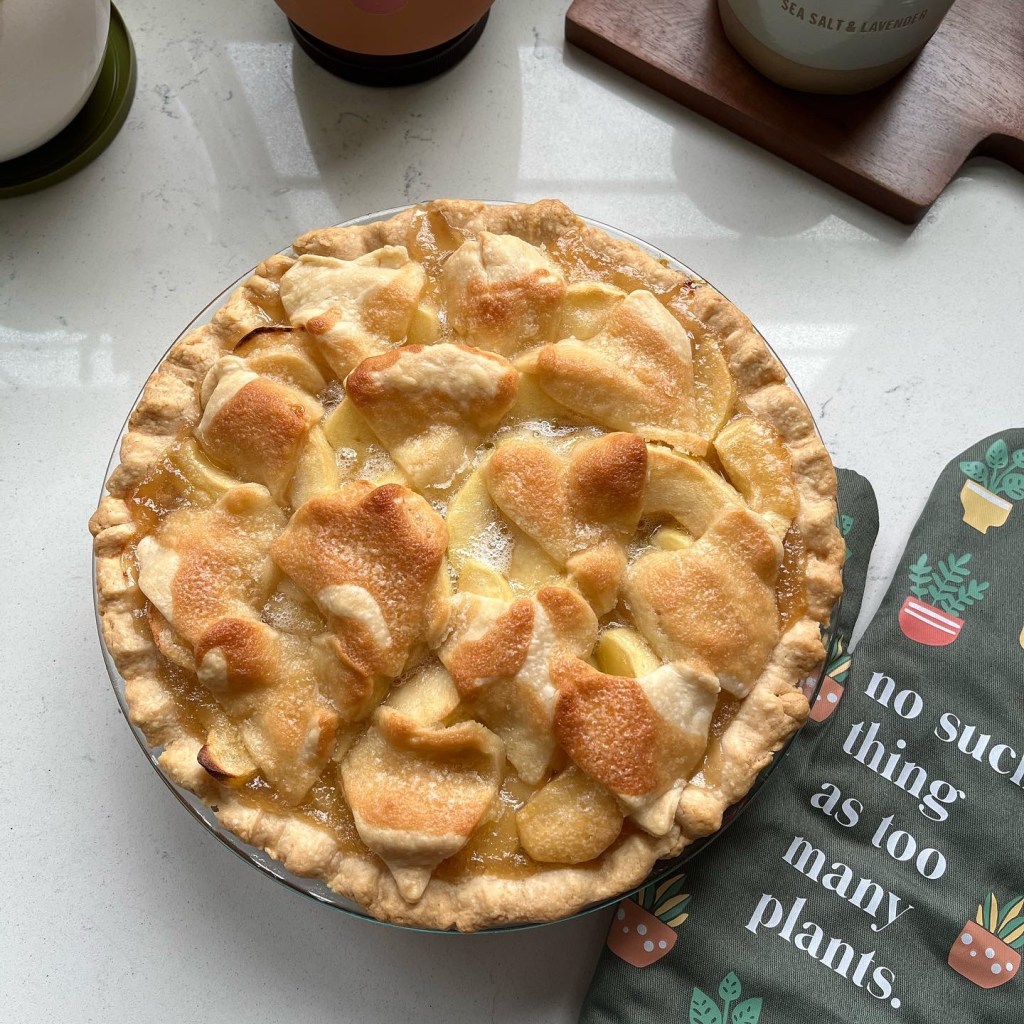
  4. Bake in the oven 15 minutes. After 15 minutes, reduce the temperature to 350 F and bake for 35-45 minutes or until apples are soft and crust is golden brown.
Advertisement
Oops, there goes another rubber tree plant

Oops, there goes another rubber tree plant

I’ve never even given much thought to rubber tree plants, what they looked like, or if they were great plants to have. I happened to see a beautiful variegated plant that had some pink/ruby hues and thought it was one of the prettiest plants I had ever seen-surprise! Variegated rubber tree plant (ficus elastica ruby).

I purchased one from Rooted on Amazon. It arrived packaged perfectly and in perfect condition. I’ll share a few tips I’ve learned along the way about how to care for the Variegated rubber tree plant.

Water: This plant likes to always have moist soil, but not saturated. When in doubt, let it dry out! Overwatering is not good for this plant, so avoid over watering and if you’re not sure, give it a little more time before watering. Overwatering is the most common reason these guys bite the dust, so pay attention to its soil!

Light: The variegated rubber tree plant thrives in bright, indirect light. Variegation, which contains colorless portions of leaves, means that the colorless portions do not have chlorophyll. This means this portion of the plant cannot photosynthesize, so the more light the other portions of the plant can get, the better. Also, the more indirect light this plant receives, the more the beautiful, pink hues will begin to come through.

Yellowing/Dropping Leaves: If your plant’s leaves start to yellow or drop, this could be due to overwatering. Old leaves will also yellow and drop, so check which leaves are yellowing and dropping and check the soil to determine the cause.

Rotate Your Plant: Make sure to rotate your variegated rubber tree regularly to ensure that it receives adequate light to photosynthesize.

Easy Naan Pizzas

Easy Naan Pizzas

This is definitely one of my weeknight go-tos when I don’t have anything thawed or planned. I buy naan when it’s on sale and keep them in the freezer. They go from freezer to oven and bake for 5 minutes. YES… 5 minutes from frozen! You can customize them any way you like-my favorites are traditional and Mediterranean or Greek. You can find mini naan or regular sized naan in most grocery stores in the bread/deli section. The best part about naan pizzas is you can use anything you already have on hand!

Ingredients

  • Naan (frozen or fresh)
  • tomato sauce (I use Basil Garlic pasta sauce because I usually have it on hand, but pizza sauce will work, too)

Toppings

You can use any toppings you typically like on your pizza. Here are some combinations we’ve tried that have become our favorites!

Traditional

  • Shredded mozzarella
  • Pepperoni (we prefer turkey-it’s less greasy than traditional)
  • Black olives
  • Mushrooms

Mediterranean/Greek

  • Fresh sliced mozzarella
  • Fresh basil
  • Kalamata olives
  • Artichoke hearts
  • Feta cheese
  • Dried oregano

Directions

  1. Preheat oven according to naan package instructions.
  2. Place all pieces of naan on a baking sheet (fresh or frozen).
  3. Add sauce to each piece of naan. Top each piece of naan with desired toppings.
  4. Bake naan pizzas in oven according to package heating instructions or until cheese is melted and slightly browned.
  5. Enjoy!
The Beautiful and Easy to Grow Inch Plant (Wandering Jew)

The Beautiful and Easy to Grow Inch Plant (Wandering Jew)

I’ve seen these beautiful, purple and green (two of my favorite colors, I might add) plants and figured they were difficult to care for. Well, I was TOTALLY wrong! I now have two of these little guys and they have taken off over the last few months. Their color is so vibrant they brighten up a room. They’re very easy to care for and easy to propagate (definite bonus in my book!). I bought one of these from Rooted on Amazon and the other I picked up at Meijer, because… plant section, guys. Plant section. Here are a few things I’ve learned about Inch Plants while caring for them-enjoy!

Light: The plants enjoy medium to bright light. Be sure to keep them out of bright light and avoid dark or low light or they will become very leggy.

Water: These plants don’t like to become dry, but they also don’t like to have continually wet soil. Allow the soil to dry partially before watering again. Water these plants less in the winter, since this is their resting period.

Other Care: Aphids can become a pest issue for these plants. If your Inch Plant happens to have an aphid infestation, remove the infested leaves/stems and spray the entire plant down with water.

Propagation: Inch Plants can be very easily propagated. Cut a 2-3 inch piece of the plant and place it in water. The cutting will produce roots in about a week. Plant the rooted cutting in potting soil and voila! New plant!