After having kids, having COVID, having a major surgery, my once insanely thick, extremely healthy hair took a major hit. I felt like I’d never see it come close to its once thick and healthy self, but now that I’ve been hair and scalp oiling things are definitely turning around! I was extremely skeptical since it takes little time, the products are fairly inexpensive, and the technique couldn’t be easier.
I’ll provide you with all the steps you need to oil your way back to a healthy scalp and hair, help prevent further fallout, and regrow lost hair!
Step 1: Brush hair thoroughly
I know, I know… it sounds simple enough, but brushing your hair helps stimulate the scalp and remove any hair fallout. I prefer a boar bristle brush to help prevent damage to hair.
Step 2: Apply rosemary mint oil to scalp
This part is as simple as it sounds. Apply 12-24 drops (I empty 2-3 droppers full) of rosemary mint oil evenly to scalp. Make sure to cover all parts of the scalp you’d like to see regrowth and improve hair and scalp health.
Massage the scalp oil into the scalp using a scalp massager for 10 minutes to stimulate the scalp and help the scalp absorb the oils.
Gently twist oiled hair into a loose bun and secure using a silk scrunchy to help prevent breakage and excess hair fallout. Keep hair in this protective style 2-4 hours.
Their Ghost line of products is also excellent and I sometimes prefer Ghost Shampoo to remove all of the oils and soften hair with a clean feeling.
Step 6: Apply hair mask
After thoroughly rinsing, apply a hair mask. I love Verb products and prefer their Ghost Hair Mask for its silky, light feel.
Step 7: Style hair as normal using a light oil
Apply a very light hair oil and style as usual. I love Verb Ghost Oil because it is so light it’s hardly noticeable in hair, but protects extremely well.
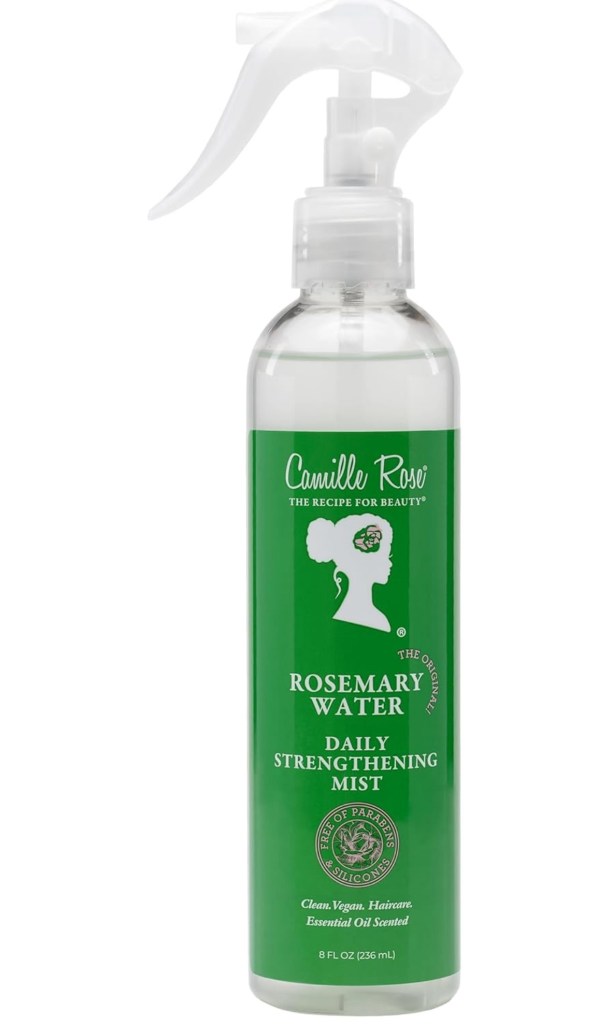
Step 8: Daily scalp massage and rosemary water
Follow up scalp oiling with 2 minute scalp massages daily and a light rosemary water mist.
You guys… YOU GUYS! I haven’t blow dried or straightened my thick, wavy hair since our oldest child was 2… that was over 6 years ago. Why? My hair is THICK… like, thick thick. And wavy. Not a good combination. Sometimes it looks great air-dried with an oil (slight, loose curls) and other times it’s just like, “nope… you ain’t looking cute today without effort”. It takes 45 minutes (and sometimes longer) for me to blow dry it myself and when I do it’s a frizzy hot mess, which requires product, straightening, and a lot of crossed fingers and prayer to make it look somewhat decent. You know what? Ain’t nobody got time for that, so it’s usually a piled bun on top of my head as soon as I exit the shower, or air dry and hope it curls well (which it typically does, so I am thankful for that). If it doesn’t curl well, I add some loose waves and curls with my curling wand or straightener. If you want to see that technique and the products I use, I gotcha covered! Check it out here.
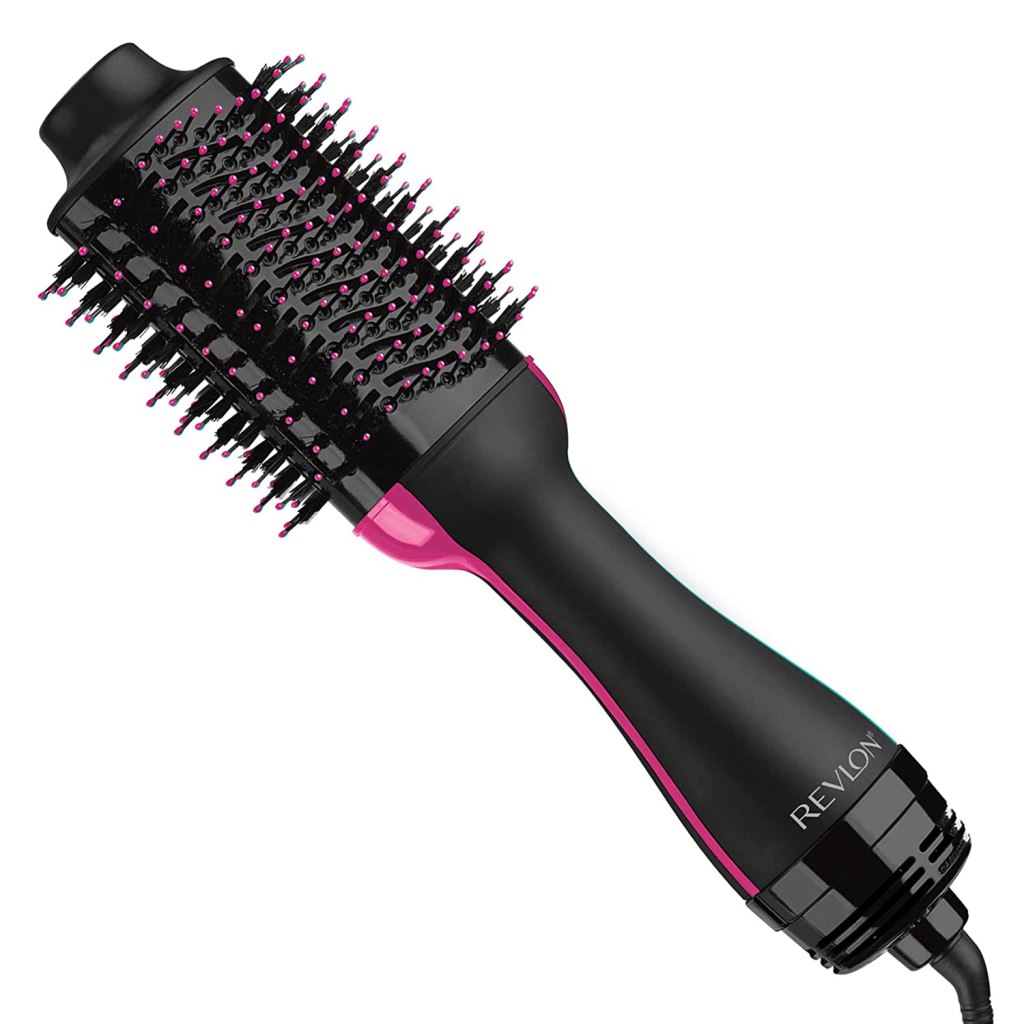
Enter the REVLON One-Step Hair Dryer and Volumizer Hot Air Brush. GAME. CHANGER. I’ve tried hot air brushes in the past and not one has met my expectations, so I was very skeptical on this one. Man… not only were my expectations met, but they were exceeded! The total style/dry time was around 30-45 minutes and it was sleek and perfect at the end. I think if I was going anywhere in public (thanks, COVID… I sit and rot at home even when I’m having a great hair day…) I would’ve run a flat iron through a few portions that I didn’t hit that well, but I was experimenting and going quickly, so overall, I’m definitely a fan! Here are some style tips and products I used for an (almost) effortless blow-out style:
Styling Tips
Pre-Styling
To start, shampoo and condition your hair as you normally would. If you need suggestions on great products, check out some Verb products I reviewed here. Towel dry your hair to remove any excess moisture.
Apply a good heat protector or blow-out product. I’m a fan of John Frieda for protection/volume. I also love a flat-iron spray to help protect my hair and eliminate flyaways post-style. I recommend Garnier’s products for heat protection. Comb these products through your hair with a wide-tooth comb to evenly distribute product and remove any large tangles or knots prior to styling. Allow your hair to air dry approximately 30 -45 minutes if you have thick hair. The air dry time will depend on the thickness of your hair. Allow it to dry until it’s still damp and you’ll be able to style/blow dry it. Don’t allow it to dry too long, otherwise the blow-dry heat won’t style it if it’s dry.
Separate your hair into three sections if it’s very thick: bottom (style this first), middle, and top/crown. Clip the top two sections up and focus on small sections of the bottom layer of hair. If you want your hair to curl under, start with the REVLON brush under the roots of your hair, concentrating for 2-3 seconds to fully dry the roots while pulling tightly through your hair slowly to fully dry/straighten. Curl the brush out down to create an under curl on ends. Do the same for the following two layers.
If you prefer a flipped out style on the bottom, do the reverse and use the REVLON brush on top of the section of hair you’re drying/styling and curl the brush up to create a flipped style.
If you have very long hair and want the loose wave, blowout style, use the brush on the side of the hair and alternate flipping directions to create loose waves.
When you’ve completed your style, finish the look off with a small pump of Verb Ghost Oil. Pump a small amount onto your fingertips and run it through your hair to prevent flyaways or frizziness.
I’ve tried some great haircare in the past, but nothing has compared to Verb. I guess I have what would be considered “curly” hair. It’s more or less wavy, but if I twist it while wet, it will curl and I can wash and wear with no styling, so I’ll call it a hair win. I’ll tell you what I love about Verb products, give a review of each of the products I’ve tried, where I purchase them and the purchase options available, and provide you with some super low maintenance hair tips. I mean, what mom has time to style her hair? Mom buns get old after a while, guys, let me tell you…
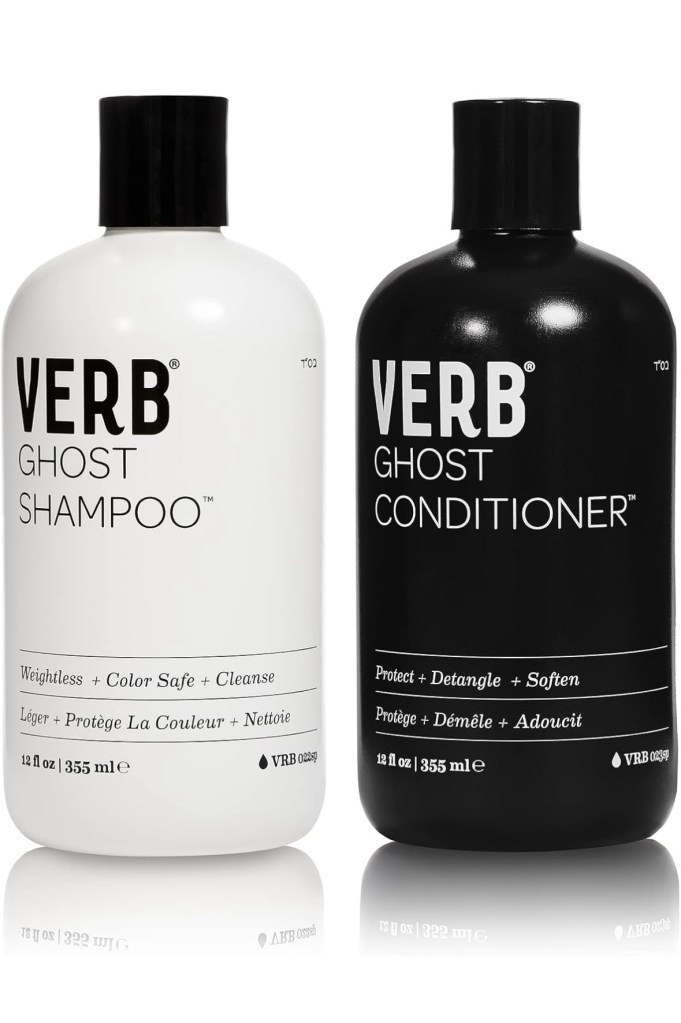
Verb Ghost Shampoo and Conditioner
My love of Verb products all started with my mom (shoutout to all of the amazing moms who know what their daughters want when their daughters don’t even know themselves… you know who you are!). She bought me a Verb Ghost set for Mother’s Day a few year’s ago. I had never herd of Verb and thought “Ooooh-new hair products, niiiiice!”. Little did I know how much I would love these hair products. If you’re not sure what type of hair you have, Ghost products are for you. I have wavy, soft, thick hair, but these products are great for any hair type. They clean hair well and my roots don’t get oily too quickly, but it also doesn’t dry my hair out with regular use. My hair stays soft and shiny and styles very easily. Ghost is great for color treated hair and helps your color last without being too harsh. If you’re not sure where to begin, Ghost products are for you!
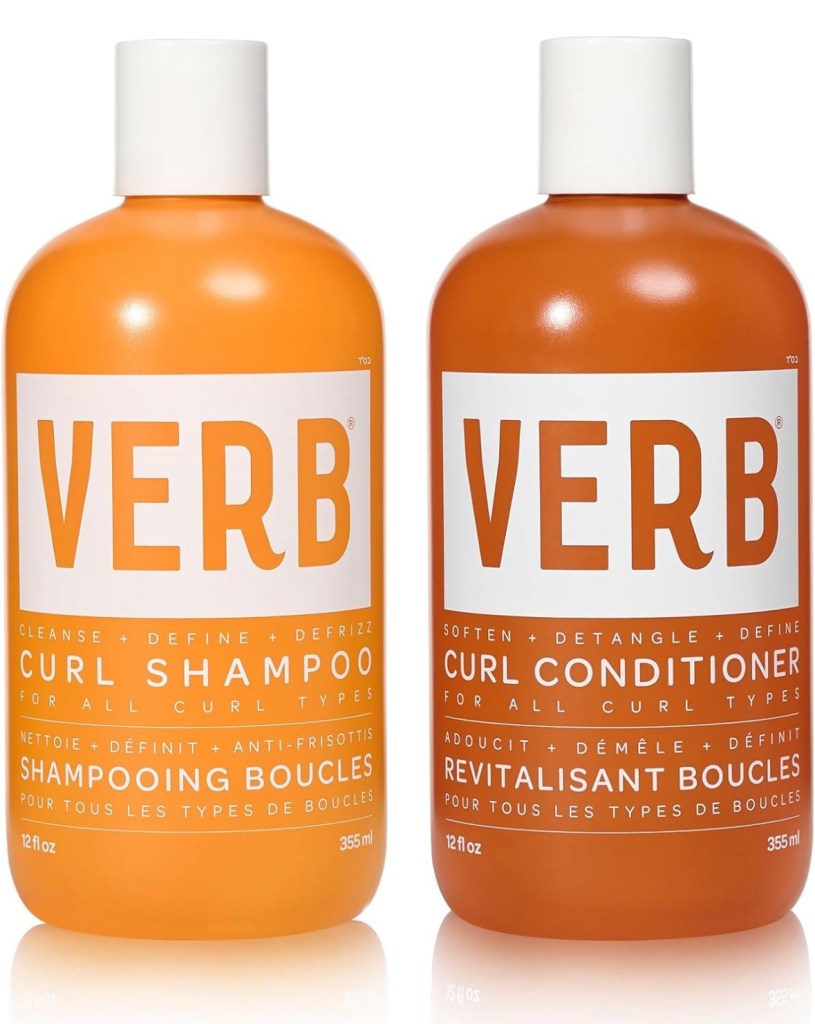
Verb Curl Shampoo and Conditioner
After Verb products became much easier to purchase (Ulta and direct from Verb’s website), I decided to try their curl shampoo and conditioner. I’m definitely a believer after using these. My hair seems to maintain curl or wave much better than any regular shampoo, doesn’t get oily, and the roots don’t just lay flat after shampooing, but maintain some volume (win, win!). If you have curly or wavy hair, you’ll love the curl shampoo and conditioner.
Verb Ghost Oil
Yes, it’s an oil… don’t be afraid of it-it’s weightless! Since I have wavy/curly hair I use it after finger combing my damp, microfiber towel dried hair so it doesn’t become frizzy after air drying or styling. A little goes a long way. It’s not sticky and doesn’t make my hair look greasy. I make sure to concentrate on my hair several inches from my scalp to make sure I get some extra non-hair washing days in (yeah… I said DAYS… I’m a mom… give me a shampoo break pass, ok?). If you want to eliminate fly aways or give your hair a smoother look before styling it with curing or straight irons, you’ll love Ghost Oil.
Verb Ghost Mask
I’ve never understood the point of hair masks. My hair usually stays soft, I don’t tend to get many split ends because I never use heat on my hair (not because I’m afraid, but because it’s a time suck due to my thick, THICK hair), and it’s not colored. Verb had a sale on their website for different sets and the set that had curl shampoo and conditioner with Ghost Oil came with a Ghost Hair Mask, so I figured I might as well try it. It is a GAME CHANGER! I never thought I needed a hair mask, but this mask is super easy, super quick, and super effective. Use it once a week after shampooing your hair for 5 minutes, rinse, and voila! Soft, manageable hair!
Where to Find Verb Products
Verb products were a little difficult to find for a while and could only be purchased in some salons or on Amazon from an authorized salon. Now their products are easy to purchase directly from their website and yes, they have sales… GREAT SALES! I like to purchase their package sales because they tend to create packages with products you’ll actually use. Shocker, I know! If you’d like to try several of their products I suggest waiting for one of their sales and purchasing direction from them. They also have great sales on larger bottles of Verb products. So, you get the advantage of a discount due to a bulk product AND a great sale on top of that (usually around 20% when they have their large product sales).
If you prefer to walk into a store and purchase Verb products, Ulta has a great selection. They don’t typically have sales on any of their Verb products, but you can purchase for pickup online and walk into the store and take your products home that same day. You can also have them shipped if you’re like me and the thought of walking into a store is too much to bare any longer. Bonus? ULTA POINTS, GUYS… ULTA POINTS. Ulta also usually has a $3.50 coupon or some type of promotion going on with samples, so there’s always that.
Effortless Hair Styling Tips
Like I said earlier, I have wavy/curly hair that is soft, but SUPER thick. I have found the most effortless way (besides the mom bun piled on top of my head) is to let my hair air dry, but frizz, guys… frizz. Here is my process for frizz-free waves/curls:
Shampoo and condition hair as normal.
Use a hair mask once a week to help lock in moisture and shine.
Finger comb wet hair to remove any knots, then towel dry briefly with a microfiber hair wrap like this one from Amazon. Don’t have one or want to purchase one? Use an old t-shirt!
After briefly drying with a microfiber towel or t-shirt, twist some strands of hair to encourage curl. Apply a small amount of Ghost Oil on all hair, concentrating mostly on the ends and scrunching to encourage curl/wave.
Let hair air dry.
Let me know what your favorite Verb products are so I can try some new ones!
essence has done it again, people! Their products never cease to amaze me. They’re as affordable as it gets, yet they can compete with the super duper expensive brands. How do they do it?!
I always see Thrive mascara ads on Facebook (thanks, Facebook ad people, but you’re not getting me this time!) and wonder if it is REALLY that great. I have friends who have tried it and didn’t really care for it all that much, although they said the results were great-long, thicker lashes. So, I went on the hunt for a dupe. I found one… for $5. Actually, less than $5! I was able to score this mascara for $3.75 on Prime Day, BUT… it’s only $4.99 regularly, so win-win.
I couldn’t add to cart fast enough on this one. essence’s Lash Princess False Lash Effect Mascara adds insane length to lashes, but doesn’t feel stiff or brittle. I would compare it to Benefit’s Roller Lash mascara (yes… one of my favorites!). One of my all time favorite drugstore brand mascaras is Lash Paradise and I honestly think essence’s formula blows it out of the water… especially because of the price! It’s also gluten and cruelty free, you know, in case you’re overly concerned about the gluten in your mascara…
The only complaint I have is that because the formula is a little waxy like Benefit’s Roller Lash you have to bake under the eye like crazy so it won’t transfer and give you that raccoon look. They do have a waterproof version, but I honestly think it’s a little stiff and brittle for my liking. It does stay put a little better and is hard to remove even with eye makeup remover. It’s vegan and cruelty free, which is also great. For $4, you CANNOT beat it!
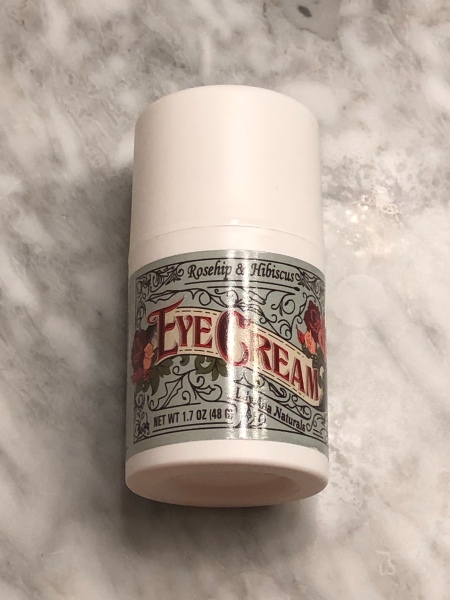
I’ve been setting my alarm earlier and earlier lately (I know… it’s quarantine… I should be sleeping in…). When I finally get out of bed I have very little time to get ready, but I NEED to look awake since I’ll be on camera teaching students. My tricks? Eye brightener, highlighter, and my trusty eye cream that even graced the list of Best Eye Creams from ConsumersAdvocate.org. So quick and easy! The three products I always use are also affordable AND on Amazon. Win-win!
I’ve written about this eye cream before and it seems to have a cult following. It has great ingredients, is never greasy, is affordable, and is convenient since it’s on Amazon. The awesome people at ConsumersAdvocate.org have placed this eye cream at number 2 on their Best Eye Cream Based on In-Depth Reviews list!
I’m a firm believer in concealer because… kids. I’ve always loved Maybelline’s Instant Age Rewind‘s concealer, but lately I haven’t even had time for that. The TONYMOLY Panda’s Dream Brightening Eye Base is so easy to use that it’s fool-proof! Since it’s not really a concealer, but an eye base, you don’t have to match shades of skin tone, you can swipe it on, smooth it, and GO! I usually finish the under eye area off with powder, otherwise my mascara does stick to the base after a few hours and no one likes the raccoon look.
This base does a wonderful job of neutralizing dark circles and when paired with a little powder almost works as good as a concealer.
I keep seeing Facebook ads for Thrive Cosmetics highlighters. I can’t tell you how many freaking times I’ve clicked on those things! I just don’t want to become addicted to a product that I have to order from a company directly. Amazon, Target, and Ulta are my go-tos, so I figured they had to have something similar. Of course Amazon came though for me. The jane iredale Highlighter Pencil does everything the Thrive pencil does, has two different shades in one pencil, and came with a great sharpener. I use the pink toned color under the brow as a highlighter, under the lower lash line, and along the inner portion of the lid. The white color is great in the lower lash line and inner corner of the eye to open up the eyes. It makes my eyes appear so much more awake and open.
Alright… go open your eyes! Moms, I know you can identify with the lack of time and dark circles. You’re welcome!
You read that right-Shape Tape concealer is HALF PRICE! Holla!!! Ok, I’ll stop saying holla now. But, really-it’s on sale! Treat yo self, people!
I still haven’t tried Shape Tape since it’s blown up as the best selling concealer, but I have found a pretty good dupe. Not having tried shape tape, the reviews for this dupe compare to those of Shape Tape, so Ill take their word for it.
I’m talking about NYX Can’t Stop Won’t Stop concealer. It is full coverage and lasts all day. It doesn’t get cakey or settle in lines. It does dry down pretty quickly, so if you plan on baking with this concealer have your loose powder on hand. This is probably my favorite full coverage concealer.
My other go to concealer doesn’t really compare to Shape Tape or Can’t Stop Won’t Stop, but I use it almost daily. I typically wear a BB cream, so since it’s not full coverage, full coverage concealer looks a little crazy. I use Maybelline Instant Age Rewind for everyday use. It blends well, covers dark circles, and stays put with a little light powder.
Check out these concealers-you won’t be disappointed!
My sister-in-law asked what foundation I’ve been using lately and it hit me: I have SO many foundations and I have so many that I love for many different reasons. I call foundation a love/hate relationship because while it can make a look awesome, it can also look plastered on if you don’t use a good primer or if your skin is too dry. I figured I’d share a few of my favorite full, medium, and light coverage options I use often and some tips that help get the most wear time out of each of them. I’d love to know some of your favorites!
After applying these foundations with a beauty blender, I follow up with a loose powder (I use Coty Airspun) and a setting spray (NYX Matte Finish is my go to) to get the most wear time out of any foundations I use.
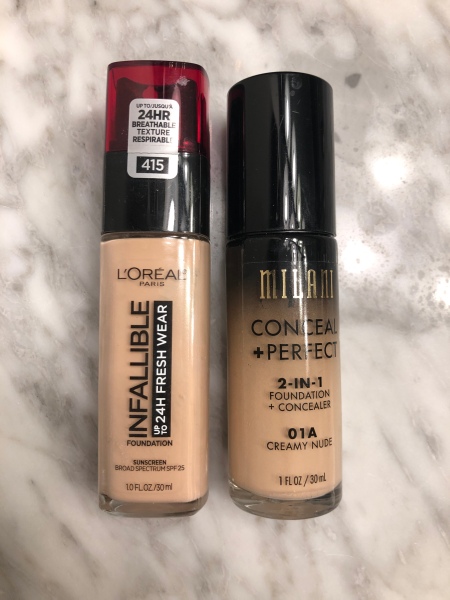
I’m starting with this one because it conceals EVERYTHING and doesn’t look very cakey. Make sure to use a great moisturizer before applying and maybe a light primer. It looks pretty natural considering how well the coverage is. I also always follow up immediately with a loose powder and setting spray to make it last as long as possible.
This is probably my favorite and most used foundation. It goes on smoothly, covers very well without looking like you’ve caked 10 lbs of concealer on your face, and wears ALL day. It’s also easy to build up if you need more coverage. A little primer before applying goes a long way and finishing with loose powder and setting spray will get you an entire day of wear easily.
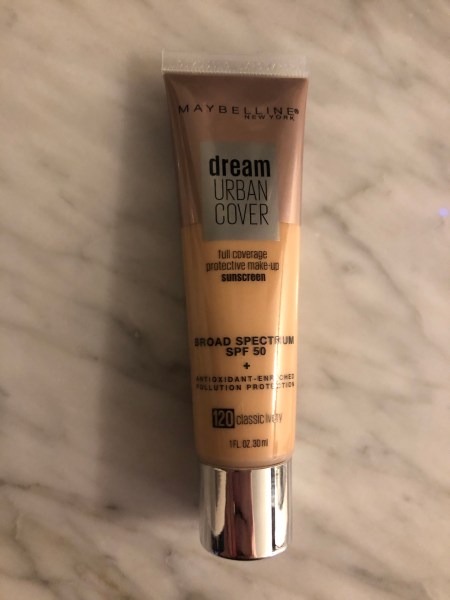
This is a great foundation if you’re looking for high coverage with an SPF. It goes on pretty well, but I chose a horrible shade for my skin tone. I’m sure if I get the right shade for my skin it will look A LOT better. It’s still a great foundation and I’m able to make it work with some blending when I want a good SPF foundation.
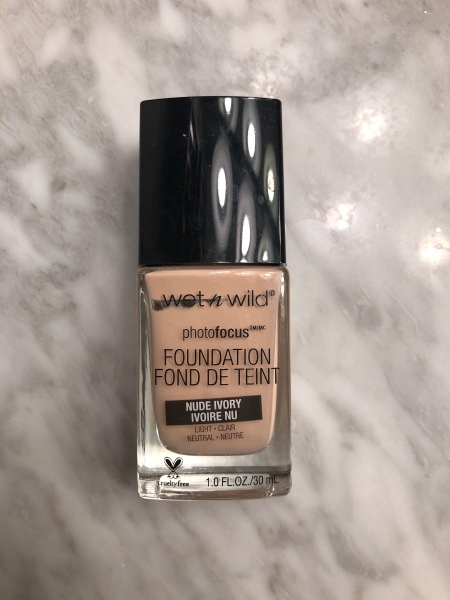
You guys… this foundation doesn’t even cost $5 and it’s one of my FAVORITES of all time. It really could be considered full coverage because it’s easily buildable. The color match is awesome, the formula is pretty thin, so it’s easy to apply, and it looks SO good on. You can’t go wrong with this one!
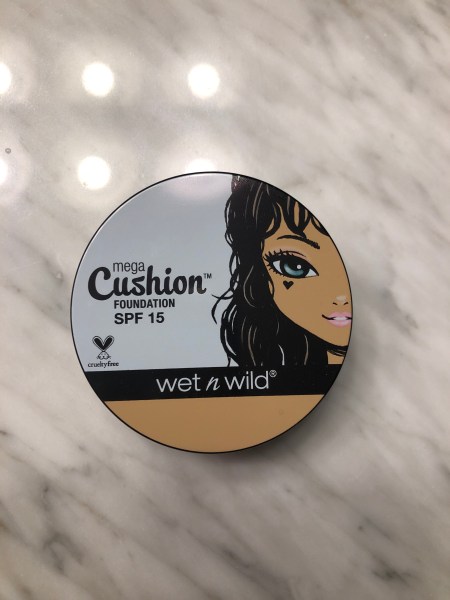
I love this foundation for something different. It kind of gives my skin a dewey look without looking like I have an oily face. Paired with a little loose powder it goes a long way. The only down side to this foundation is that since it is a cushion foundation, I feel like there is a lot less product in the container.
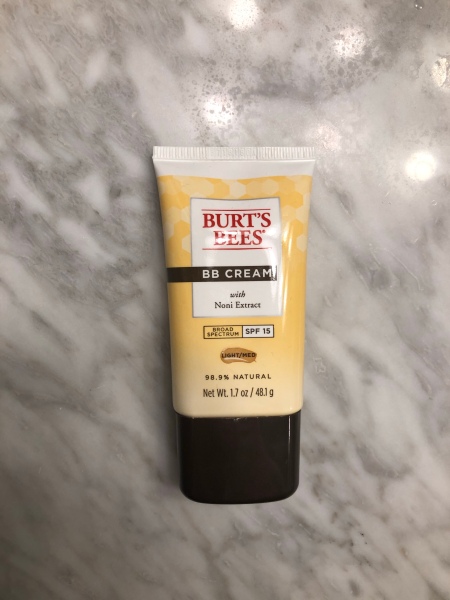
Last, but definitely not least, Burt’s Bees BB Cream. I use this nearly every day, so I don’t have to be careful when I apply it. It goes on smoothly and is practically a tinted moisturizer. It doesn’t break out my face and usually doesn’t look super oily by the end of the day if I use loose powder after applying. I don’t usually use a beauty blender with this and it blends great. Don’t bother with a primer because it lasts FOREVER. Primer usually makes this foundation settle in lines and look a little thicker than it should. A little goes a long way and as long as I have a great under eye concealer, this is great for everyday wear.
I have what I would consider normal lashes, but I always ask people what type of mascara they’re wearing when their lashes look great and they always tell me they’re wearing false lashes. Fail. I’m not a false lashes person. Don’t get me wrong… I love makeup and think it’s fun to play with and try new products, but years of dance has practically landed me in false lash trauma therapy. I HATED false lashes during competition season. They were easy enough to apply, but they were just a pain if they came loose, the glue dried up before the bottle was even opened, a pair ripped, whatever the reason was, they were a pain.
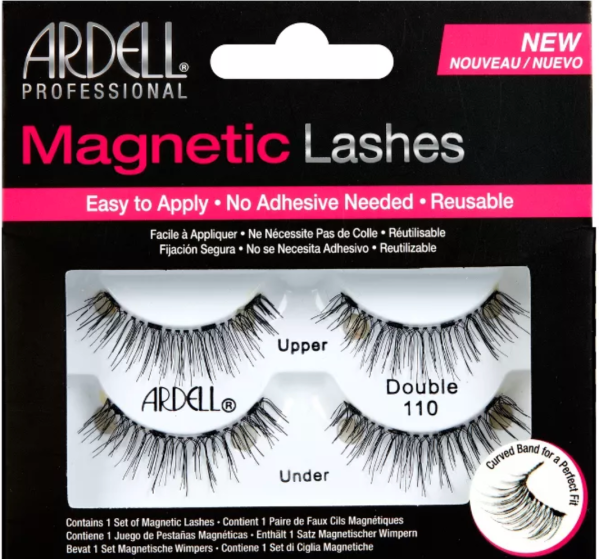
I found magnetic Ardell lashes and thought, “Hmmm… maybe?”. That was a big ole nope. They stuck to each other in the middle of my real lashes. Not attractive. Not to mention since they’re two pairs of lashes that stick to one another just picture what three layers of lashes look like. Like a caterpillar is attacking both of your eyelashes. Not a good look, just take it from me.
Now, I’ve heard a lot of people talk about Silly George magnetic lashes. A magnetic eyeliner is applied and the lashes are attracted to the eyeliner. The lashes never seem to look too fluffy, full, or fake, so I thought I’d check this option out. Uhhhh… $40 for fake lashes I might hardly or never wear? Next!
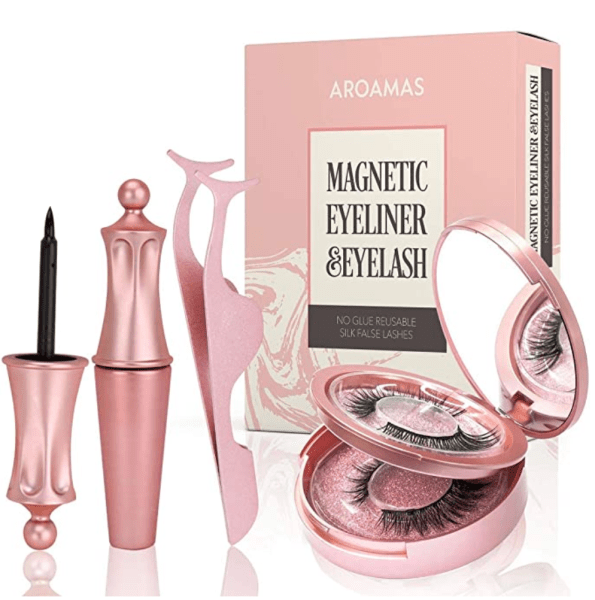
The only logical solution to my search was… AMAZON. Amazon solves all of life’s problems, right? Behold… the solution to all of your false lash needs. I basically found Silly George lashes on a budget, you guys! You should read the reviews. It made it sound like my 2 year old could apply them and wear them for a night out. Where would a 2 year old wear false lashes? Why would he wear falsies period? I don’t know… back to the lashes…
The eyeliner is easy to apply and the directions say to apply 2 coats. I HATE liquid liner and this liner was the easiest liquid liner I’ve ever applied. Once fully dry the lashes simply follow the liner and stay put. THAT IS IT. Seriously, it’s that easy. The awesome part about this kit is there are two sets of lashes for a full, fluffy look and a set that I would consider a “daily wear” set. They are SO good. You can’t beat the price (it seems to fluctuate, but it’s typically around $15-20) and they’re so easy to apply. Try them-I guarantee you’ll love them!
If you know what this is referring to you’re my sister from another mister… or brother from another mother. I won’t pass judgement just because you know great song lyrics! But seriously, guys… I have a favorite lipgloss. I tried matte lipsticks, I really did. I even made an entire post about lip exfoliators because I tried to love them. I mean, I did end up finding an awesome lip exfoliator, so I guess there’s that. Lipgloss is where it’s at for me.
Anyways… back to the original point of this-my favorite lipgloss was discontinued quite a while ago. I have randomly tried others, but nothing can replace my tried and true Bare Minerals lipgloss. However, I have found a close second. Milani came through FTW!
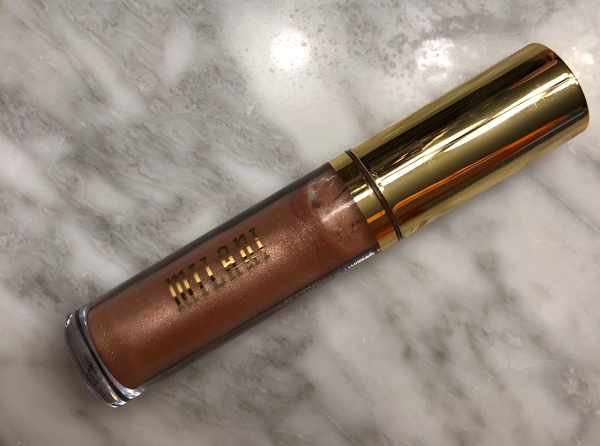
Milani Ludicrous lipgloss meets all of my requirements fairly well: they offer a great shade range, it’s not sticky, it’s not runny, and the color lasts a fairly long time for a lipgloss. The shade range they offer also includes some very fine shimmer or a completely matte gloss (yeah… I know that’s an oxymoron… just roll with it, k?).
The shades that were available at my Target weren’t a perfect match to my beloved Bare Minerals, but they had what I was looking for: a somewhat pink/peach shade that with no glitter or shimmer. I found exactly that in the top shade (Teen Spirit) and I grabbed a darker shade with a little shimmer (Semi Charmed). I actually ended up loving the darker shade just as much as my Bare Minerals replacement-score!
I’ve tried Milani lipgloss in the past and HATED it, so I was skeptical. I tried Milani Keep It Full Lip Plumper in Nude Shimmer. I love a good lip plumber, but this ain’t it. The applicator is huge and puts way too much product on your lips at once. Once it’s applied it slips and slides all over the place and applies very unevenly. It has no staying power and the plump? Nowhere to be found.
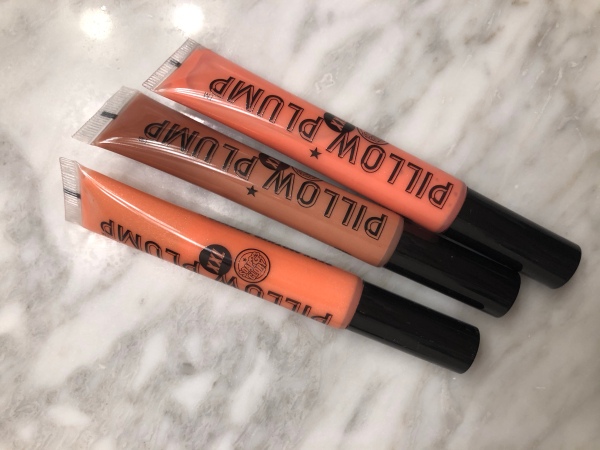
If you want a great lip plumper, try Soap & Glory Sexy Mother Pucker Pillow Plump. This plumper has that tingly, minty plumping effect and really works. The product applies evenly and stays put well for a lip gloss.
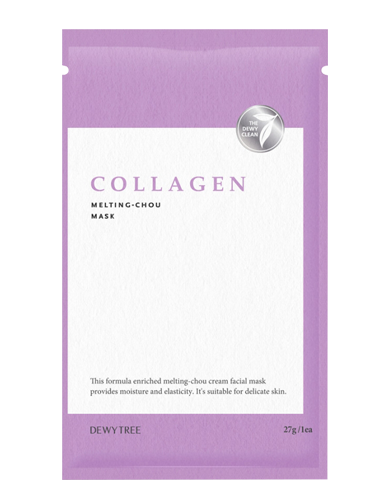
Now, about that mask. I never cared much for sheet masks until I realized how great they are when you have very little time. They’re also amazing if you’d like to lock in moisture to help plump skin after exfoliation like microdermabrasion. I found Deweytree collagen sheet masks at Nordstrom Rack and thought, “why not?”. Best. Decision. Ever. They were amazing and I used them after every microdermabrasion session every week to help boost moisture and elasticity (read about at home microdermabrasion here-you will LOVE it!).
Fast forward a bit after my stash of sheet masks ran out – they are nowhere to be found. Lovely… another product I love discontinued. The replacement search begins. Naturally I searched Amazon. I found some super cheap sheet masks that were ok, but not great. They had a really strong fragrance scent that I just couldn’t get over.
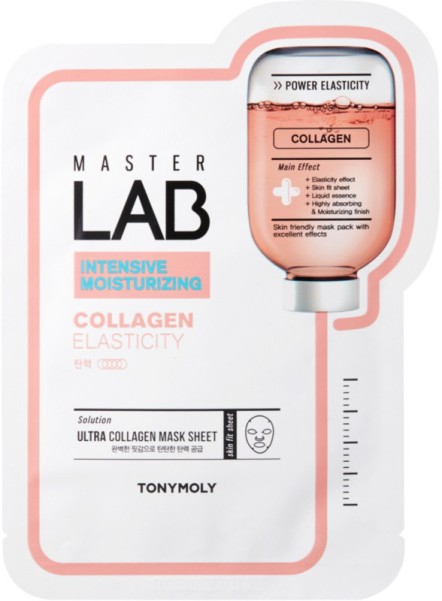
After Google searching for collagen sheet masks I finally came across some TonyMoly sheet masks. I love TonyMoly, so I thought I’d give them a try. SO glad I did! They’re amazing and might even be better than my beloved Deweytree masks (*gasp*). They don’t have an extremely strong fragrance and they seem to absorb better and lock in moisture longer.
The best part is I can actually find them from Ulta and Amazon fairly easily. These might be my new favorite masks. Check them out-you won’t be disappointed!
Facebook ads got me again. I can’t help it… I’m a sucker. I kept seeing ads for the PMD Personal Microderm system. I have always heard such positive things about microdermabrasion treatments from salons-your skin feels smoother, it absorbs product much better, and it allows your skin to regenerate much quicker with frequent microdermabrasion treatments. But… (yes, there’s always a but) have you seen the price?! Yikes. No thanks. Not to mention the time it takes to book an appointment, get the treatment, and then be hassled to purchase products you don’t want to buy. Not signing up for that one.
Of course someone has the answer to ALL of my problems. And of course it just so happens to appear in a Facebook ad. I know it might not seem like I am from all of my posts containing Facebook ad products, but I am actually a very skeptical person who doesn’t like to purchase anything based on an ad. So, I did my research, looked at countless reviews, took a detailed look at how the product actually works, put my science brain to work, and decided that the premise was sound, the price was… ridiculous, and thought I’d love to have one, but I’m not forking over the money for it right now.
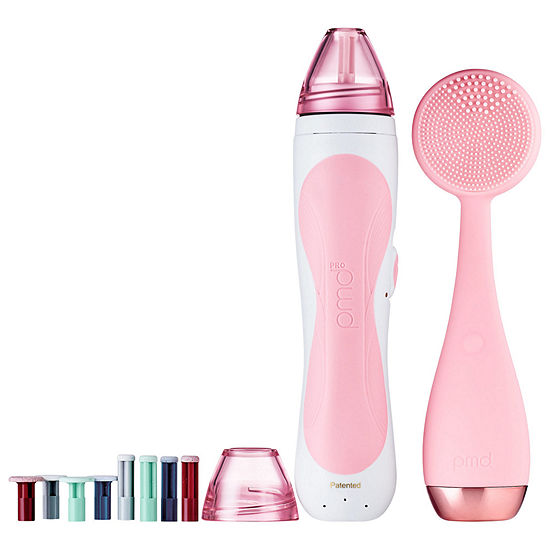
Fast forward a few weeks to Christmas Eve. Here I am, scrolling through eyeshadow palettes on Sephora when BAM! A featured product happens to be the PMD Personal Microderm Pro AND the PMD Clean facial cleanser in a bundle. Now, I did determine that if I were to ever purchase the PMD Personal Microderm I would shell out the extra cash for the Pro version. Why? The Pro version contained two caps for face and body areas (not sure where the heck on my body I would use this thing, but whatevs) and had two speeds. I liked that this particular version contained two speeds so you could actually control how abrasive the treatment would be. I also had my eye on the PMD Clean because of its insanely great reviews. The PMD Clean was also insanely overpriced, but now that it is bundled with the Personal Microderm it didn’t seem like that bad of a deal. Naturally, I took the bait and purchased the bundle. I’ll split this review into two sections: one for the PMD Personal Microderm Pro and one for the PMD Clean.
After unboxing the Personal Microderm Pro, it was quite intimidating. The kit really didn’t come with any instructions, but a quick overview of what each part of the unit was, what it did, and to run the tip along your skin in an outward motion and not to hold the tip on any portion of your skin for a long period of time or it would burn your skin. Yeah… scary to say the least. They have an online tutorial that may be followed, but ain’t nobody got time for that. So, I figured I’d just go at it and if I burned the heck out of my face, oh well… I’ll heal. Maybe.
The unit included a training tip with very low abrasion, so that’s the first one I went with. I also planned on using the lowest speed setting until I got used to the unit. The instructions said that each tip may be used 3-4 times before changing to a new tip.
I washed my face with my usual cleanser and made sure all of my makeup from the day was thoroughly removed and my face was dry. Then, I set to work. It really was very easy and surprisingly quick. I moved in outward motions while keeping my skin tight as I moved down one side of my face, down the other side, and then worked on each side of my forehead.
After I completed my entire face, which was surprisingly fast, I washed my face with my normal cleanser, followed with my usual toner, then followed with my usual moisturizer. My face felt very soft and absorbed the toner and moisturizer much better than usual.
I rinsed the cap and filter with water, made sure the top of the unit was wiped clean with a dry washcloth to prevent any clogging, then allowed the cap and filter to air dry before storing. That was it. Ok, so this might not be as daunting of a task as I was making it out to be.
Fast forward about 5 weeks… I can’t imagine my life without this device. Seriously! To be a little thrifty, I used the lowest abrasion tip 3 times on the high speed setting, then have gradually moved up to a more abrasive tip every 3 uses. This has seemed to work out well, so I’m sticking with this plan. I use the PMD Pro every 6-7 days as recommended so as to not over-exfoliate (is that a word? Probably not…). Each time it gets easier since I’m now used to the entire process and can operate on autopilot for the most part.
This device has so many benefits. My skin is smoother than it has ever been before. My skin tone is evening out and all hyper pigmentation from blemishes or sun spots is reducing every week as I use the PMD Pro. All products I use on my face are absorbed so much better after using this device. I did start to break out a little more than normal around week 3-4 since my skin seemed to be purging itself of all of the nastiness the PMD Pro is helping to get rid of, but other than that my skin seems to be moisturized and clearer than it’s been for years. When I apply makeup in the mornings I don’t need as much moisturizer as I previously needed (which is a miracle, because… winter…) and my foundation goes on smooth and my skin looks much clearer than it used to.
The only down side I can see to using this device is that you can only use a tip 3-4 uses. But I think that’s a small price to pay for all of the benefits I see from using this product. Time will tell in terms of the longevity of the device. I have read reviews of consumers claiming the suction on the device stops around 6 months or so. PMD does offer a year limited warranty and they seem to be pretty responsive to their customers (more on that in a minute… I haven’t been as lucky with my PMD Clean…). I noticed that when customers complained about their device losing suction PMD’s trouble shooting tips seemed to include cleaning the device. There aren’t any instructions on how to clean the device on the package that I can see other than to rinse the cap and filter, so I’d say that’s an oversight on their part.
I never really saw the point of using something to scrub your face other than using your hands. Can it really be THAT much better? Yes, yes it can. A few years ago I purchased a small device similar to the SOLO Mio from Amazon, but at a cheaper price point because I wasn’t ready to shell out $40 for something that scrubs my face. Eh, it was ok. I got kind of tired of having to charge it and it just got shoved to the back of my medicine like the rest of the gadgets I’ve purchased in the past.
I just kept ignoring all of the Facebook ads with the PMD Clean because I figured how much better can this be than the SOLO Mio look alike I purchased a few years ago? I looked at the reviews and there wasn’t a bad review on it. Darn. I decided to go to my favorite online shopping site… Amazon, of course. $99?!?! WHAAAAAT?! Oh, heck no. I just chalked it up to never owning one of these because of the insanely ridiculous price point. Well, when it was offered in the Holiday bundle from Sephora, the price was a little less shocking, so I went for it.
I love that the device uses a single AA battery. That saves time and cabinet space since you don’t have to recharge it or store its charger. The PMD Clean has several speeds and pulsing speeds. Personally, I’ve only used the lowest speed and that seems to do a great job. My skin feels cleaner, I tend to wash my face longer, which gives me a better clean. I do think the PMD Clean is helpful and useful, but the packaging leaves little to be desired. There are no instructions on which speed level to use and for what purpose. PMD claims that they have included instructions in the PMD Clean packaging, but customers seem to all be claiming the same thing: no instructions.
A few weeks after using the PMD Clean the device would randomly turn on on its own for about half a second. Huh? I thought maybe the batteries were running low, since sometimes electronics malfunction when the batteries should be changed. When I opened the device, milky looking liquid was pulled around the end cap. Sooooo… these are waterproof, huh? Apparently mine didn’t get the memo. After trying to air dry the device for a few days, replacing batteries, checking the battery connections, and doing all kinds of troubleshooting, the device continued to turn on randomly on its own and wouldn’t even turn on most of the time unless I opened, then closed the battery compartment, and only stayed on for half a second once it would finally come on.
I reached out to customer service on Facebook (just to let you know, they were more responsive to my comment on Facebook than they were to a direct company email) and I also contacted Sephora customer service. Sephora customer service’s only solution for me was to return BOTH PMD products to the store for a refund, then to repurchase the kit. Uhhhh, no thanks. PMD Beauty customer service sent me a Facebook DM as well as an email. The customer service rep told me they were shipping out a new PMD Clean that day with a return label for the defective device. That was about… ten days ago. I’m hoping they just have a long shipping time from the distribution center, because I assumed it would probably arrive in a week or so. I’ll make sure to keep you posted on whether or not they actually send a replacement. I’m not holding my breath…
Get to the Point…
Alright… after all of that rambling… would I recommend the PMD Pro and PMD Clean? Yes. Are they expensive? Yes. The PMD Pro has made a difference in the texture of my skin, helped fade hyperpigmentation, and allows my skin to absorb all of my facial products much better than normal. It does what it says it will do, it’s easy to use, and is a great addition to anyone’s beauty routine to help skin regenerate every week.


 I’ve written about this eye cream before and it seems to have a cult following. It has great ingredients, is never greasy, is affordable, and is convenient since it’s on Amazon. The awesome people at
 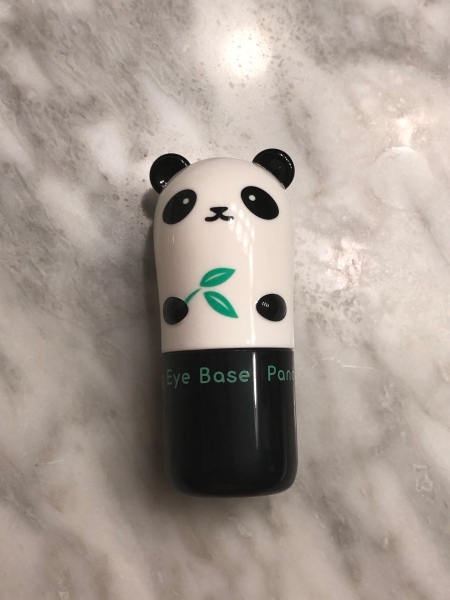 I’m a firm believer in concealer because… kids. I’ve always loved
 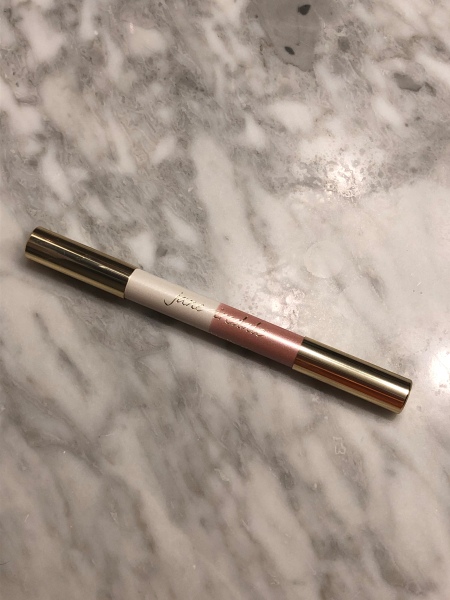 I keep seeing Facebook ads for Thrive Cosmetics highlighters. I can’t tell you how many freaking times I’ve clicked on those things! I just don’t want to become addicted to a product that I have to order from a company directly. Amazon, Target, and Ulta are my go-tos, so I figured they had to have something similar. Of course Amazon came though for me. The
 I’m talking about
  My other go to concealer doesn’t really compare to Shape Tape or Can’t Stop Won’t Stop, but I use it almost daily. I typically wear a BB cream, so since it’s not full coverage, full coverage concealer looks a little crazy. I use