I have wanted to make (ok… have one made… me sew something that complicated? Nope!) a t-shirt quilt practically since the day I graduated high school and realized I had a billion t-shirts I would never wear again, but couldn’t possibly part with. After college I decided I REALLY needed to have a few quilts made. Sorority shirts. Will. Be. The. Death. Of. Me. If we had an event, we had a shirt. Bid Day? Shirt. Formal? Shirt. Recruitment? A shirt for every round of recruitment. You get the idea. Shirts for days. And months. And years. I always see people post their awesome quilts on social media and often inquire as to where they had their quilt made. Many were family members and those that weren’t didn’t really make quilts for just anyone-just for special occasions. If they did do them as a side business they were INSANELY expensive and rightfully so. It takes so much work to create a quilt and t-shirt material is not forgiving. With the number of t-shirts I’ve amassed I might as well have a large tent built out of my shirts.
So, my search continued as a sorted and separated shirts I would want on my quilts. After checking my Amazon lists for price drops on items I may purchase, I remembered that there are hand-made items listed on Amazon. It hit me-maybe, just MAYBE there might be someone out there who makes t-shirt quilts on Amazon. Well, my wish came true. Enter Project Repat.
Any size quilt may be purchased from Project Repat. You choose the size, the size of squares on each quilt (12×12 or 14×14), and backing color. All quilts are backed with PolarTec fleece. Easy peasy, right? Well, sort of. Pricing is much, much lower than traditional quilts, but there is some work involved and any mistakes or additions you make can add up fairly quickly. Prices are very competitive because Project Repat has streamlined the t-shirt quilting process. These quilts have no batting like a traditional quilt, but t-shirts are pieced together and backed by fleece, making a much more cost effective product. The reviews on Amazon are very high (5 stars across the board) and all customer images of their quilts look great. Now that I’ve been through the process, I have cost-saving, as well as time-saving, steps for creating your best Project Repat T-Shirt quilt.
Before You Order Your Quilt
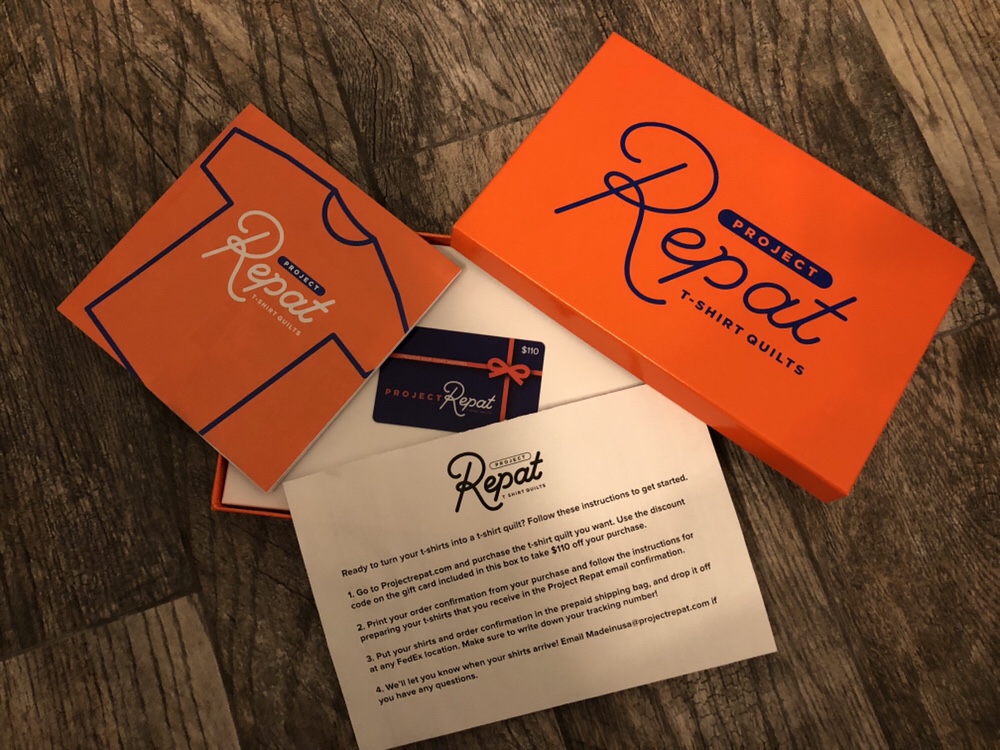
Once you’ve decided you have enough shirts to create a quilt (the least number of “squares” a quilt can have is 16), head on over to Amazon. I have found this is the cheapest way initially to create your quilt. The price on Amazon is typically $99, but I have seen them go on sale frequently for at low as $59.99 (heck, yeah!). When you purchase a Project Repat quilt on Amazon, you’ll receive a $110 gift card ($110 discount code on Project Repat, which doesn’t include the cost of shipping your quilt to you), a shipping bag, and a FedEx label to ship your shirts to Project Repat. This is a great deal, considering you would normally have to get your own packaging to ship your shirts in addition to paying to ship the shirts to Project Repat.
Once you’ve ordered your gift card, start gathering shirts you would like to include in your quilt. You are able to use the front and back of t-shirts, which is great for shirts that have slogans that begin on the front and finish on the back or for shirts that have a name on the front or back and a larger logo on the opposite side. However, just know that if you plan to include both the front and back of a shirt, it is not guaranteed that these squares will be placed next to each other. If you’re like me and you really want certain squares next to each other, Project Repat will accept shirts shipped with a large, color photo of the desired placement of shirts for an extra fee (I’ll explain the fee later in my price breakdown).
Ordering From Project Repat
Once you’ve gathered your shirts, here are sizes that are available at Project Repat:
- Lap (16 panels)
- Twin (24 panels)
- Full (30 panels)
- Queen (49 panels)
- King (64 panels)
I went with the size that was the closest to the number of “squares” I decided on, then shifted front and back panels around to make the number of squares I needed. You also have the option of 12″x12″ panels or 14″x14″ panels. They require 0.5 inch extra for each size square chosen, otherwise a $5 fee will be added for each panel that is not large enough. For example, if you choose 14″x14″ panels there must be 14.5″x14.5″ available. I chose 14″x14″ due to several shirts that had very large sayings on the back. Head over to Project Repat’s website and select the size of squares, size of quilt (number of squares), backing color, and add the quilt to your cart. Once your quilt is added to your cart, enter your gift card number to receive the $110 promotion. The promotion will not cover shipping your quilt to you (the lowest shipping option is $9.99 for a 4-5 week turnaround). Pay the remaining balance for your quilt and Project Repat will send you a confirmation email where you can view instructions on t-shirt preparation and a packing slip. Print your packing slip and make sure that the details on the slip are exactly the specifications you ordered.
Preparing Your Shirts
Next, Project Repat requires that shirts be sent in a very specific condition: cut in half. Simply cut down each side of the shirt to make two haves of a shirt. I will say this is the most labor intensive part of preparing shirts to send to Project Repat. When I ordered my quilt I thought “Awesome… I order the quilt, box up my shirts, and someone else will do the hard part!”. Wrong. So, so wrong. Yes, I will say the “hard part” is definitely cutting the squares and quilting the shirt, but man… when you’re preparing shirts for THREE quilts, your pour little cutting fingers get pretty darn tired.
After your shirts have been cut, lay them out to get a good idea of what the layout will look like and to make sure you have the exact amount of squares you need for your quilt. If you prefer to choose the layout of your quilt, snap picture and print that bad boy out. Make sure it is a large, clear, color photo so there is no confusion when the quilt is assembled.
Packaging and Shipping Your Shirts
Next, you’ll have to package your shirt halves to be sent to Project Repat. I found the easiest way to package the shirts to make sure they fit in the shipping bag is to fold your t-shirt in half vertically, fold the sleeves over, then roll the shirt as tight as possible. Once all shirts are in the shipping bag, include the packing slip (make sure all check marks have been completed and it is signed and dated) and large color photo of the quilt layout (if you have decided to determine the layout yourself), seal the bag, and add the shipping label. Head over to FedEx to ship your shirts and wait for your awesome quilt to arrive!
Cost Breakdown
If the quilt is ordered from Amazon, the initial cost is $99 for a $110 discount code. This is a great deal if you get the quilt on sale at Amazon. Otherwise, Project Repat offers 40% off discount codes for first time buyers. Compare the two to see which deal is best!
- Shipping cost: minimum of $9.99 for 4-5 week turnaround
- 12″x12″ vs 14″x14″ – extra $15+
- Size difference (based on 12″x12″ squares)
- Lap (16 squares) – $74.99
- Twin (24 squares) – $109.99
- Full (30 squares) – $129.99
- Queen (49 squares) – $189.99
- King (64 squares) – $239.99
- Select layout ($20)
- Miscellaneous changes or “fixes” Project Repat makes during production
I was able to purchase my $110 discount code on Amazon for $59, so it made it worth it for me to purchase it there. I paid a total of $129.97 for a 14″x14″ square Full quilt where I chose the layout.
Project Repat Review
Price
I think for the price you receive a quality project. Compared to the time it would take yourself or a loved one to create a custom quilt for you this is definitely a deal. No, it is not “quilt” quality, but all I wanted was a memory that wasn’t sitting in a storage tub.
Ease of Ordering
I do think ordering from Project Repat is as easy as it possibly could be for such a custom product. Options are clearly defined and as long as you follow instructions clearly you should end up with a product you love.
Preparing Shirts
I will say that I was not prepared for the amount of work involved in cutting, piecing together, and packaging the shirts would take. It was a challenge ensuring that I had the required number of squares (front and back, front, or back of shirts) and had an order that made sense. I think this is part of what makes Project Repat’s pricing competitive. You only ship the sides of the shirts you decide to use and they’re already halved to prepare for production.
Would I Recommend Project Repat?
Absolutely. For the price this is a great way to get those old shirts out of storage bins and create a memory you can actually use. Pulling my old shirts out to prepare my quilts brought back a lot of great memories. Go Beavers! Go WSU! Go Greek!
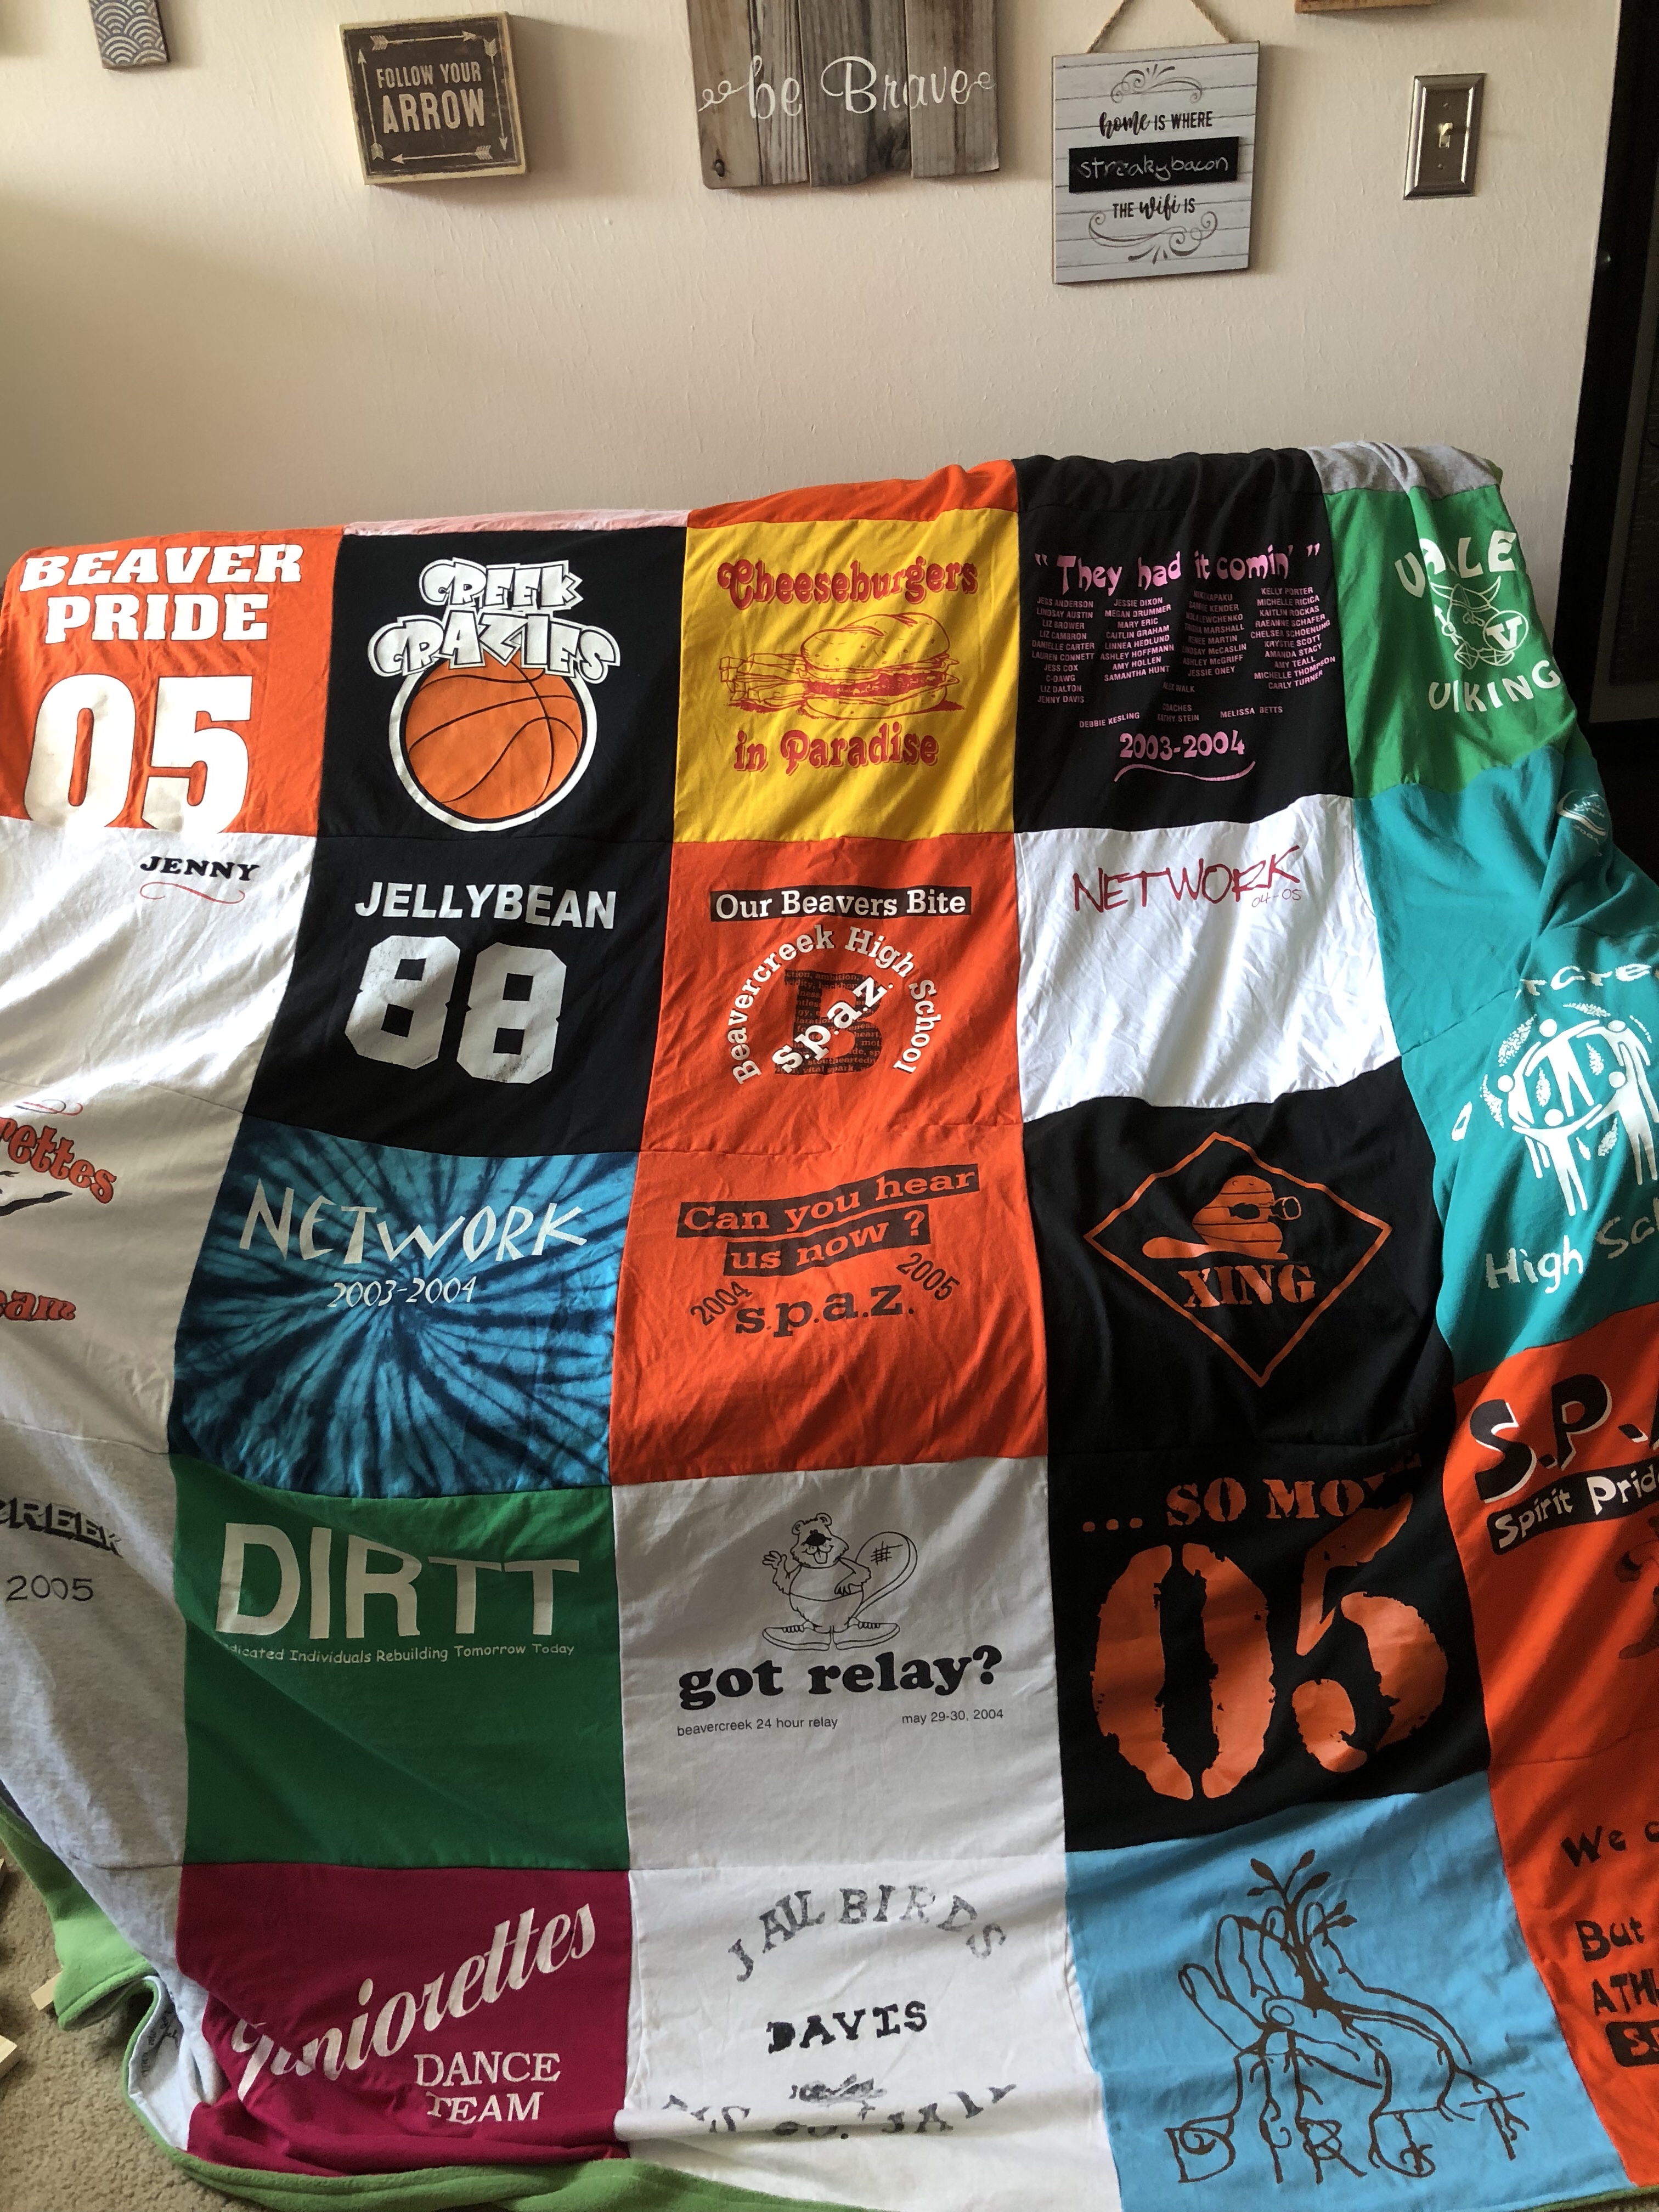
Not to mention, look how awesome they turned out! I think they quality is great for the price, but there is a lot of work involved in preparing your shirts to be assembled.


 We seriously must live on the most fertile plot of land in our entire city… maybe even state. We’ve had problems with weeds since we moved into this house. Yeah, I know… everyone has weeds. But weeds taller than you in a few weeks? I’ve used Preen, mulch, Round Up (uh huh… *gasp*… I used the poison… judge away), rocks in the flowerbed (don’t do it… it’s a bad idea), and anything else I could think of. It turns out the “natural” recipe I found (thanks again, Google…) actually works as well or better than Round Up. And the minstrels rejoiced (yaaaaaaaay).


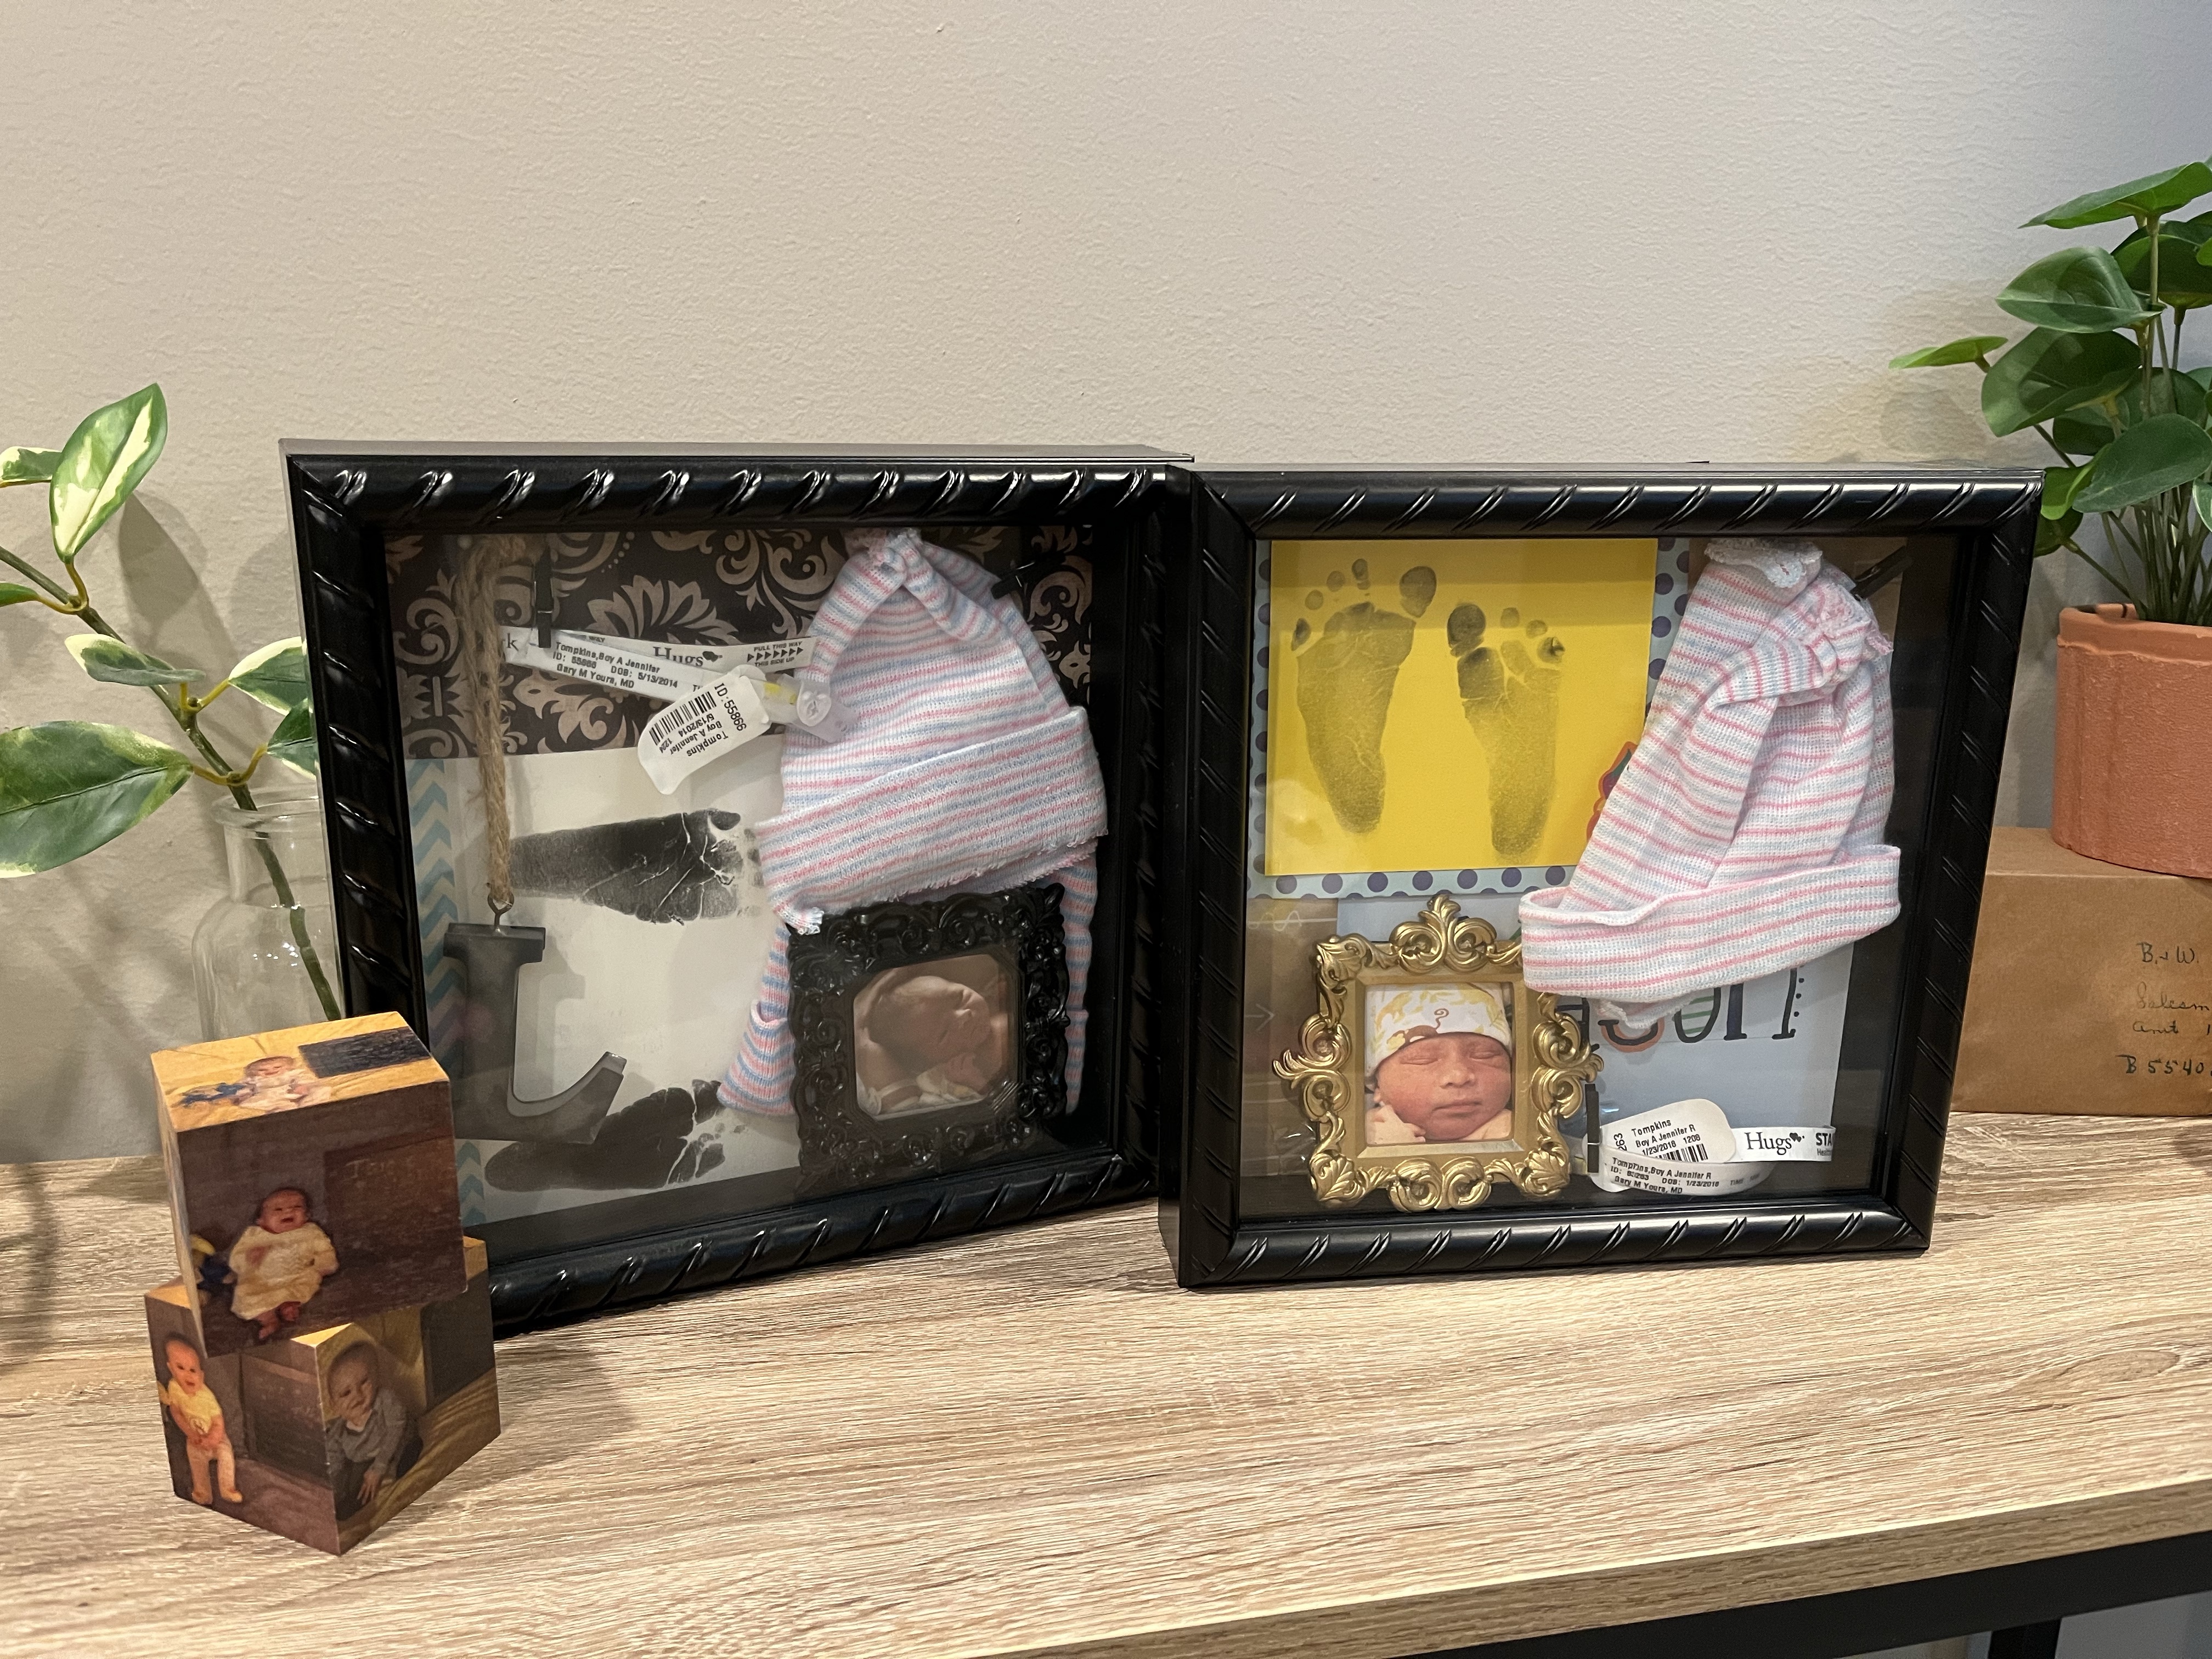 Every newborn has the adorable little hospital hat, their tiny little footprints, tiny little hospital bracelets, and the ever popular hospital newborn photos. I always want to save every memory, but feel horrible shoving them in a box never to be seen. Well, of course Pinterest had a solution for that. I saw several versions of newborn shadowboxes, but most of them looked fairly large, bulky, and contained A LOT of newborn memories. I wanted something to simply hold a tiny newborn hat (my boys both had two for some reason…), their hospital bracelets, and their little footprints. One thing I noticed that I loved was some posts on Pinterest contained little framed newborn photos. So cute! I attempted my own, so here they are!
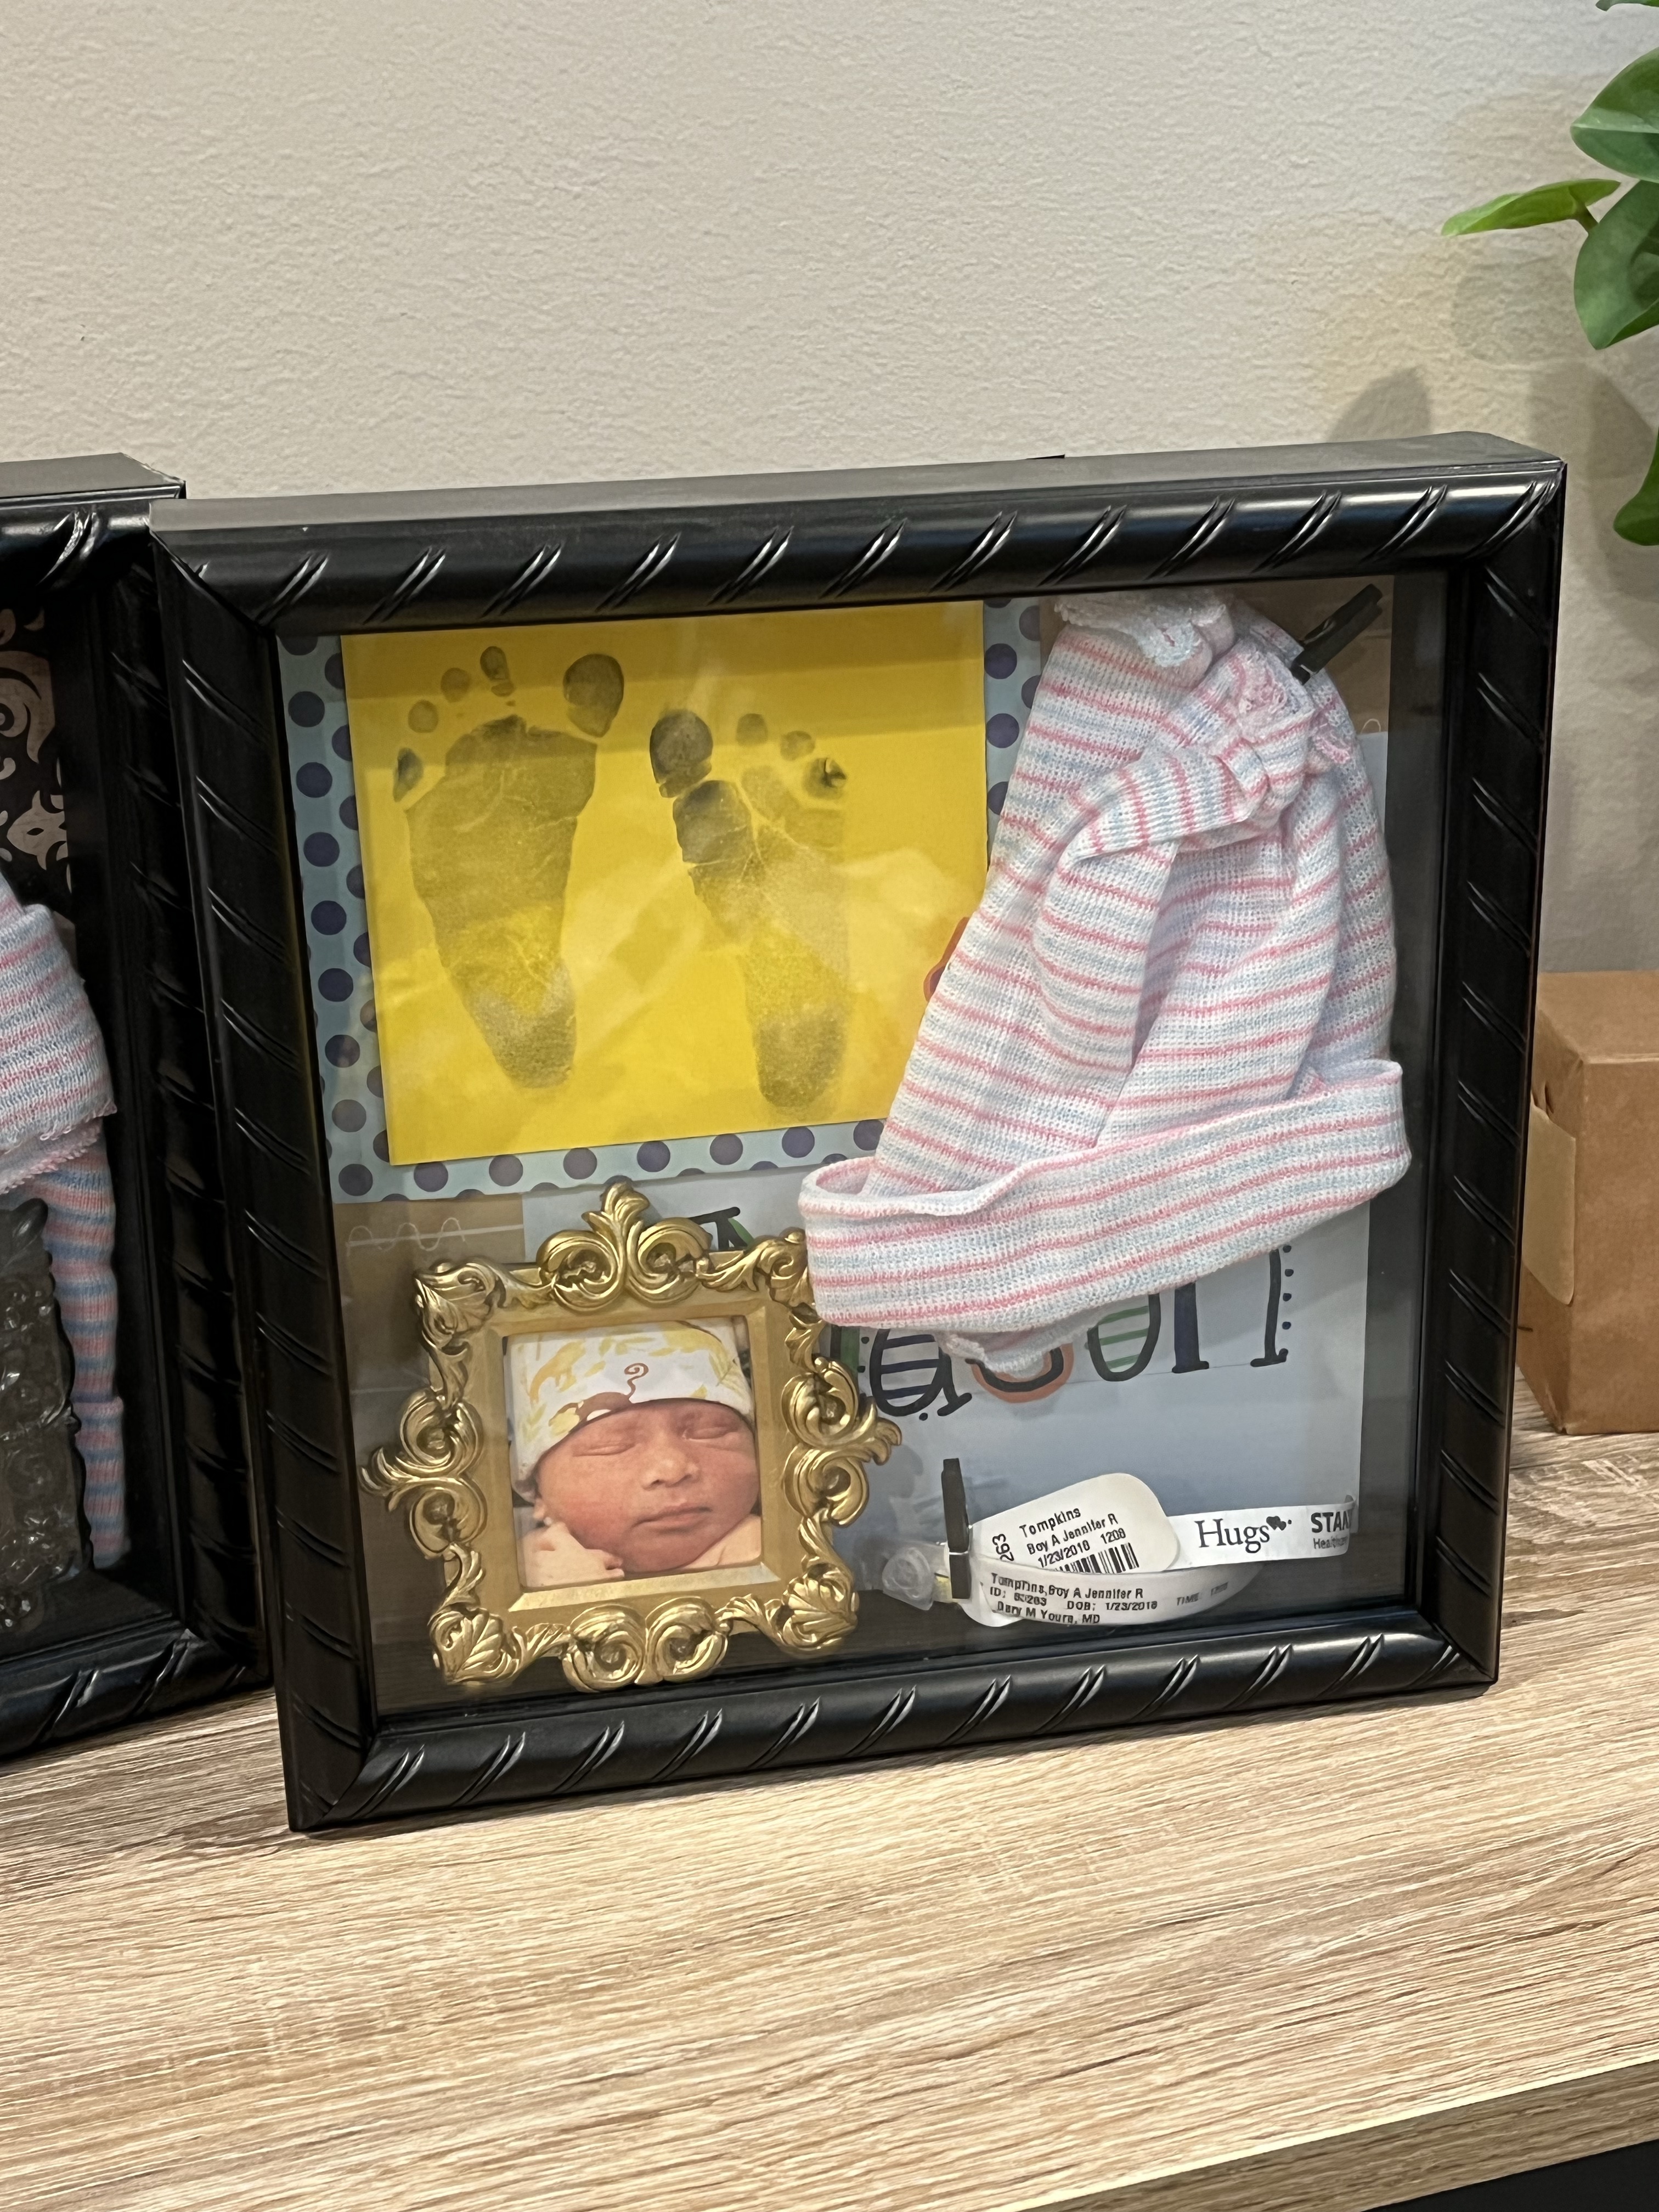 I used 8″x8″ shadowboxes, scrapbook paper for a background, 2″x2″ frames for the tiny newborn photos, and tiny clothespins to hold their hats and hospital bracelets. It took me no longer than 5 minutes to make each of them, but now we get to enjoy their hospital keepsakes.


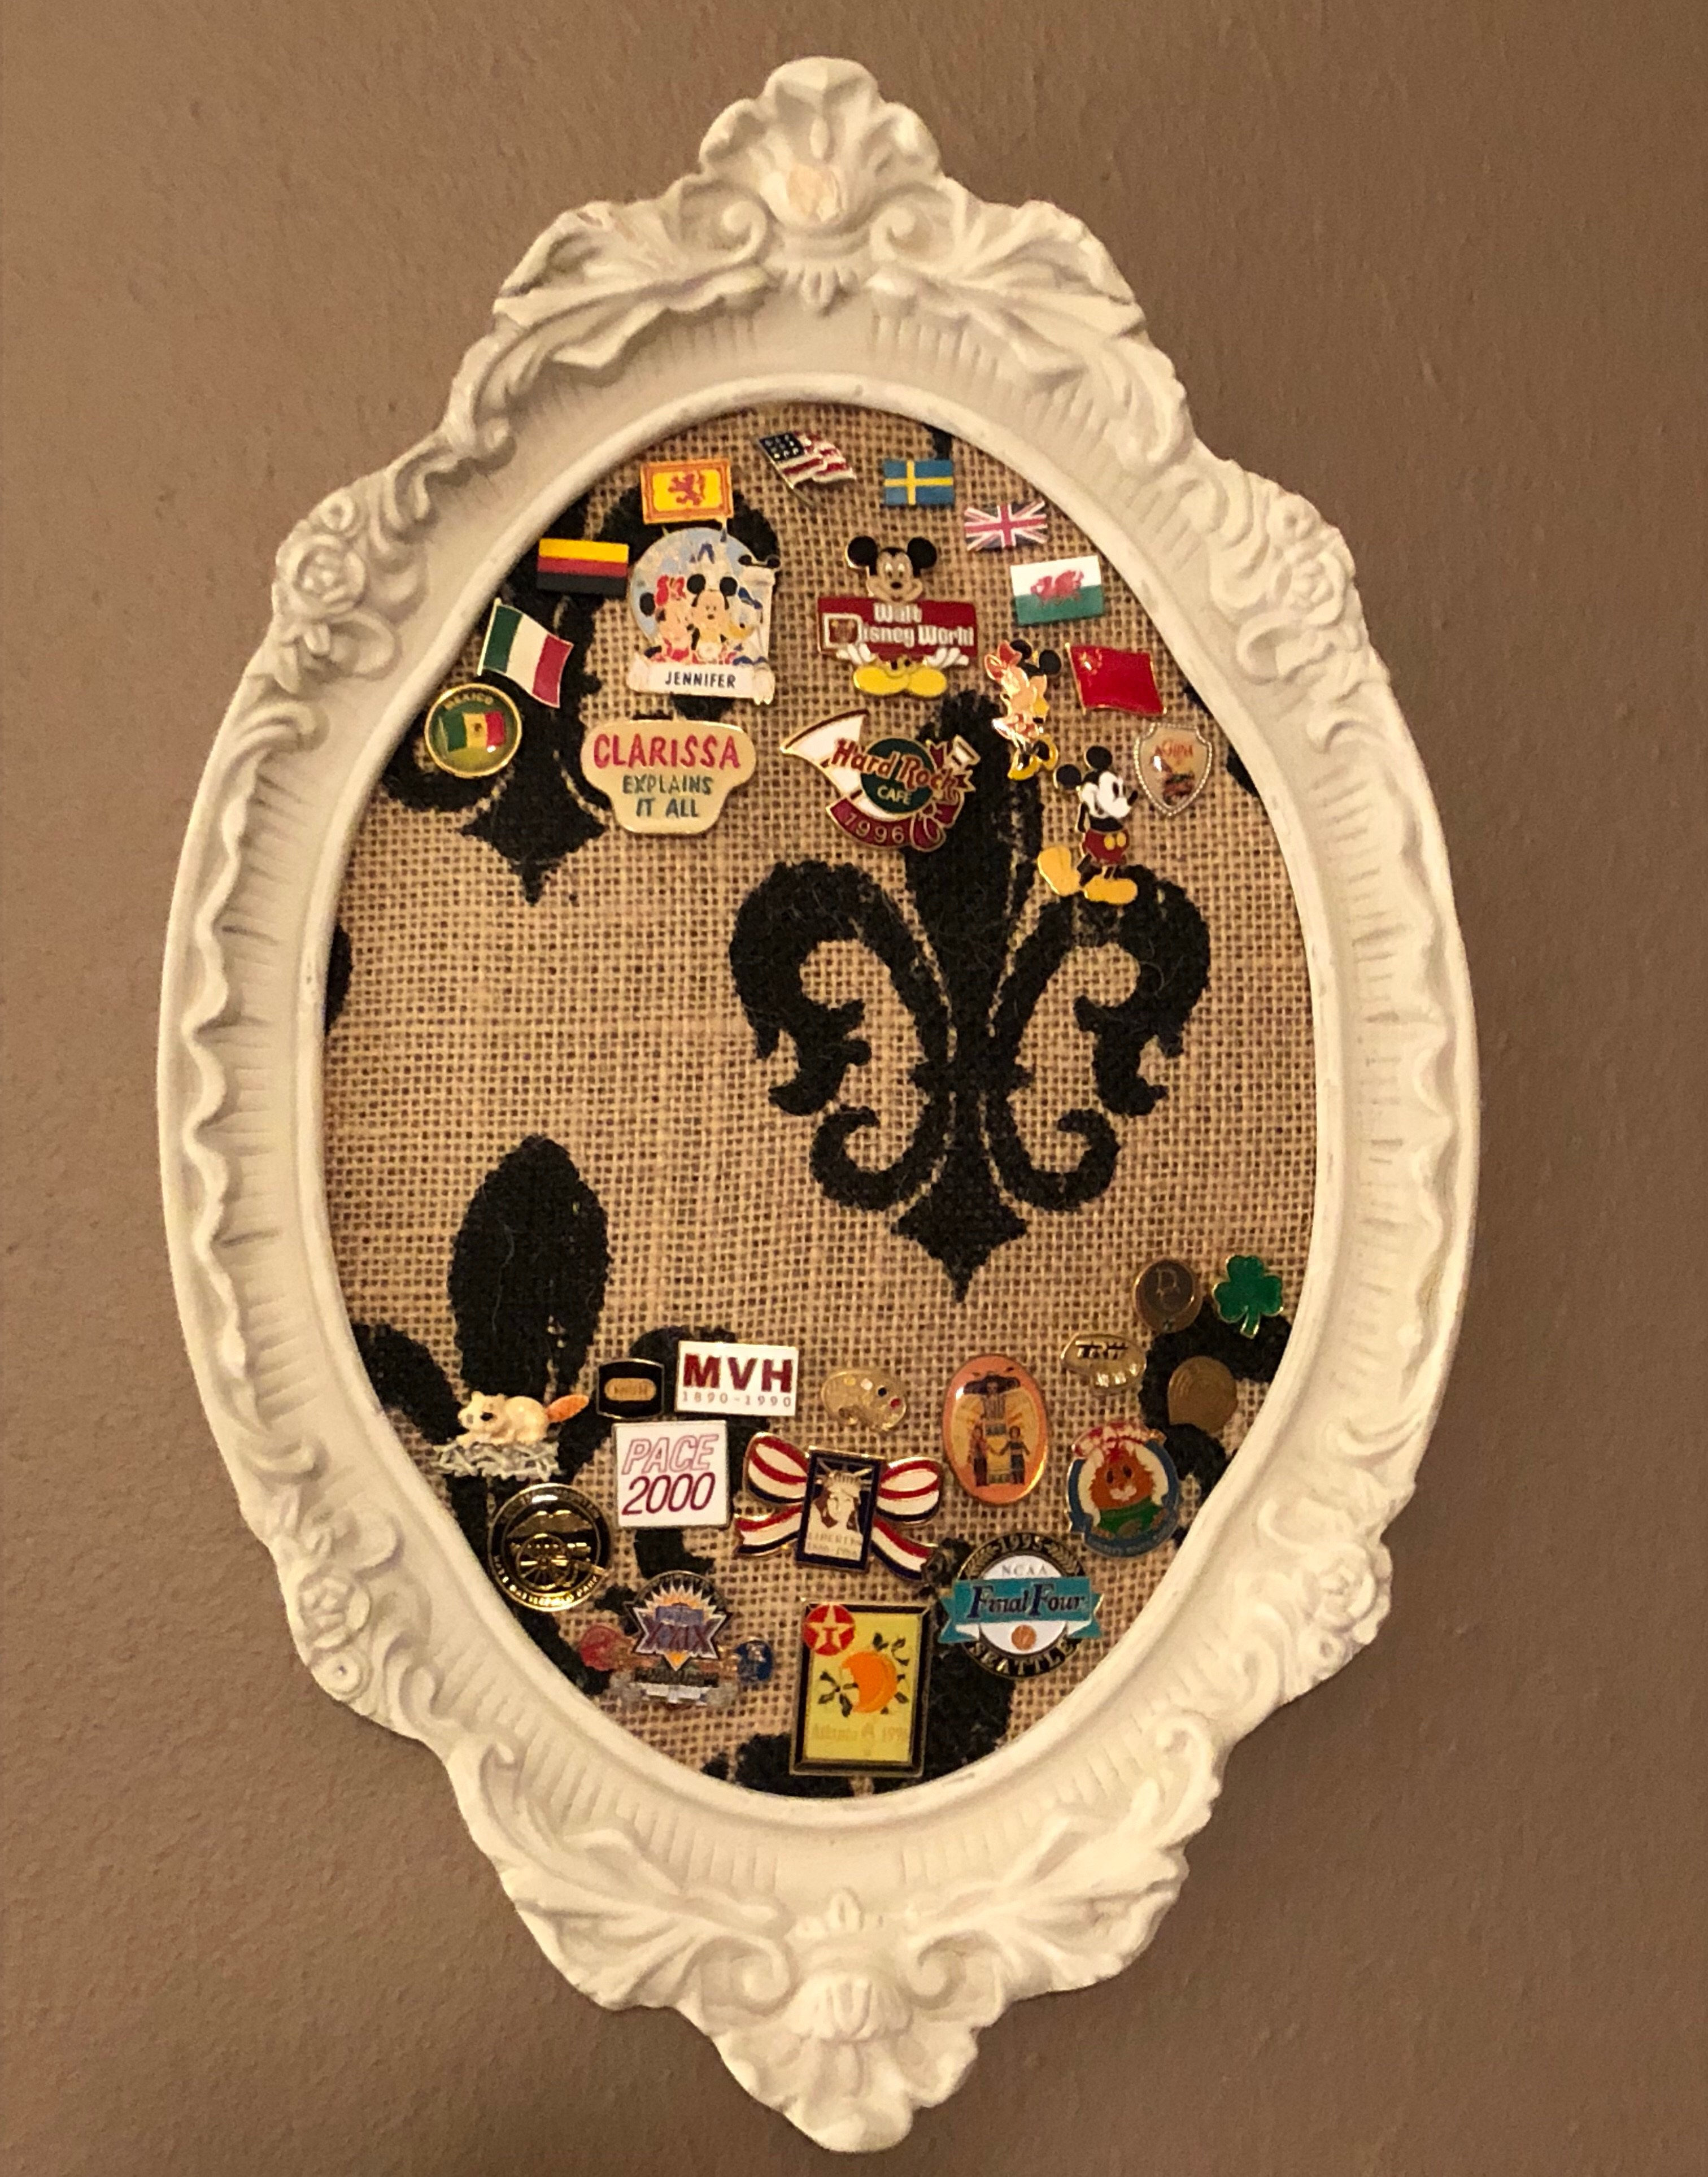
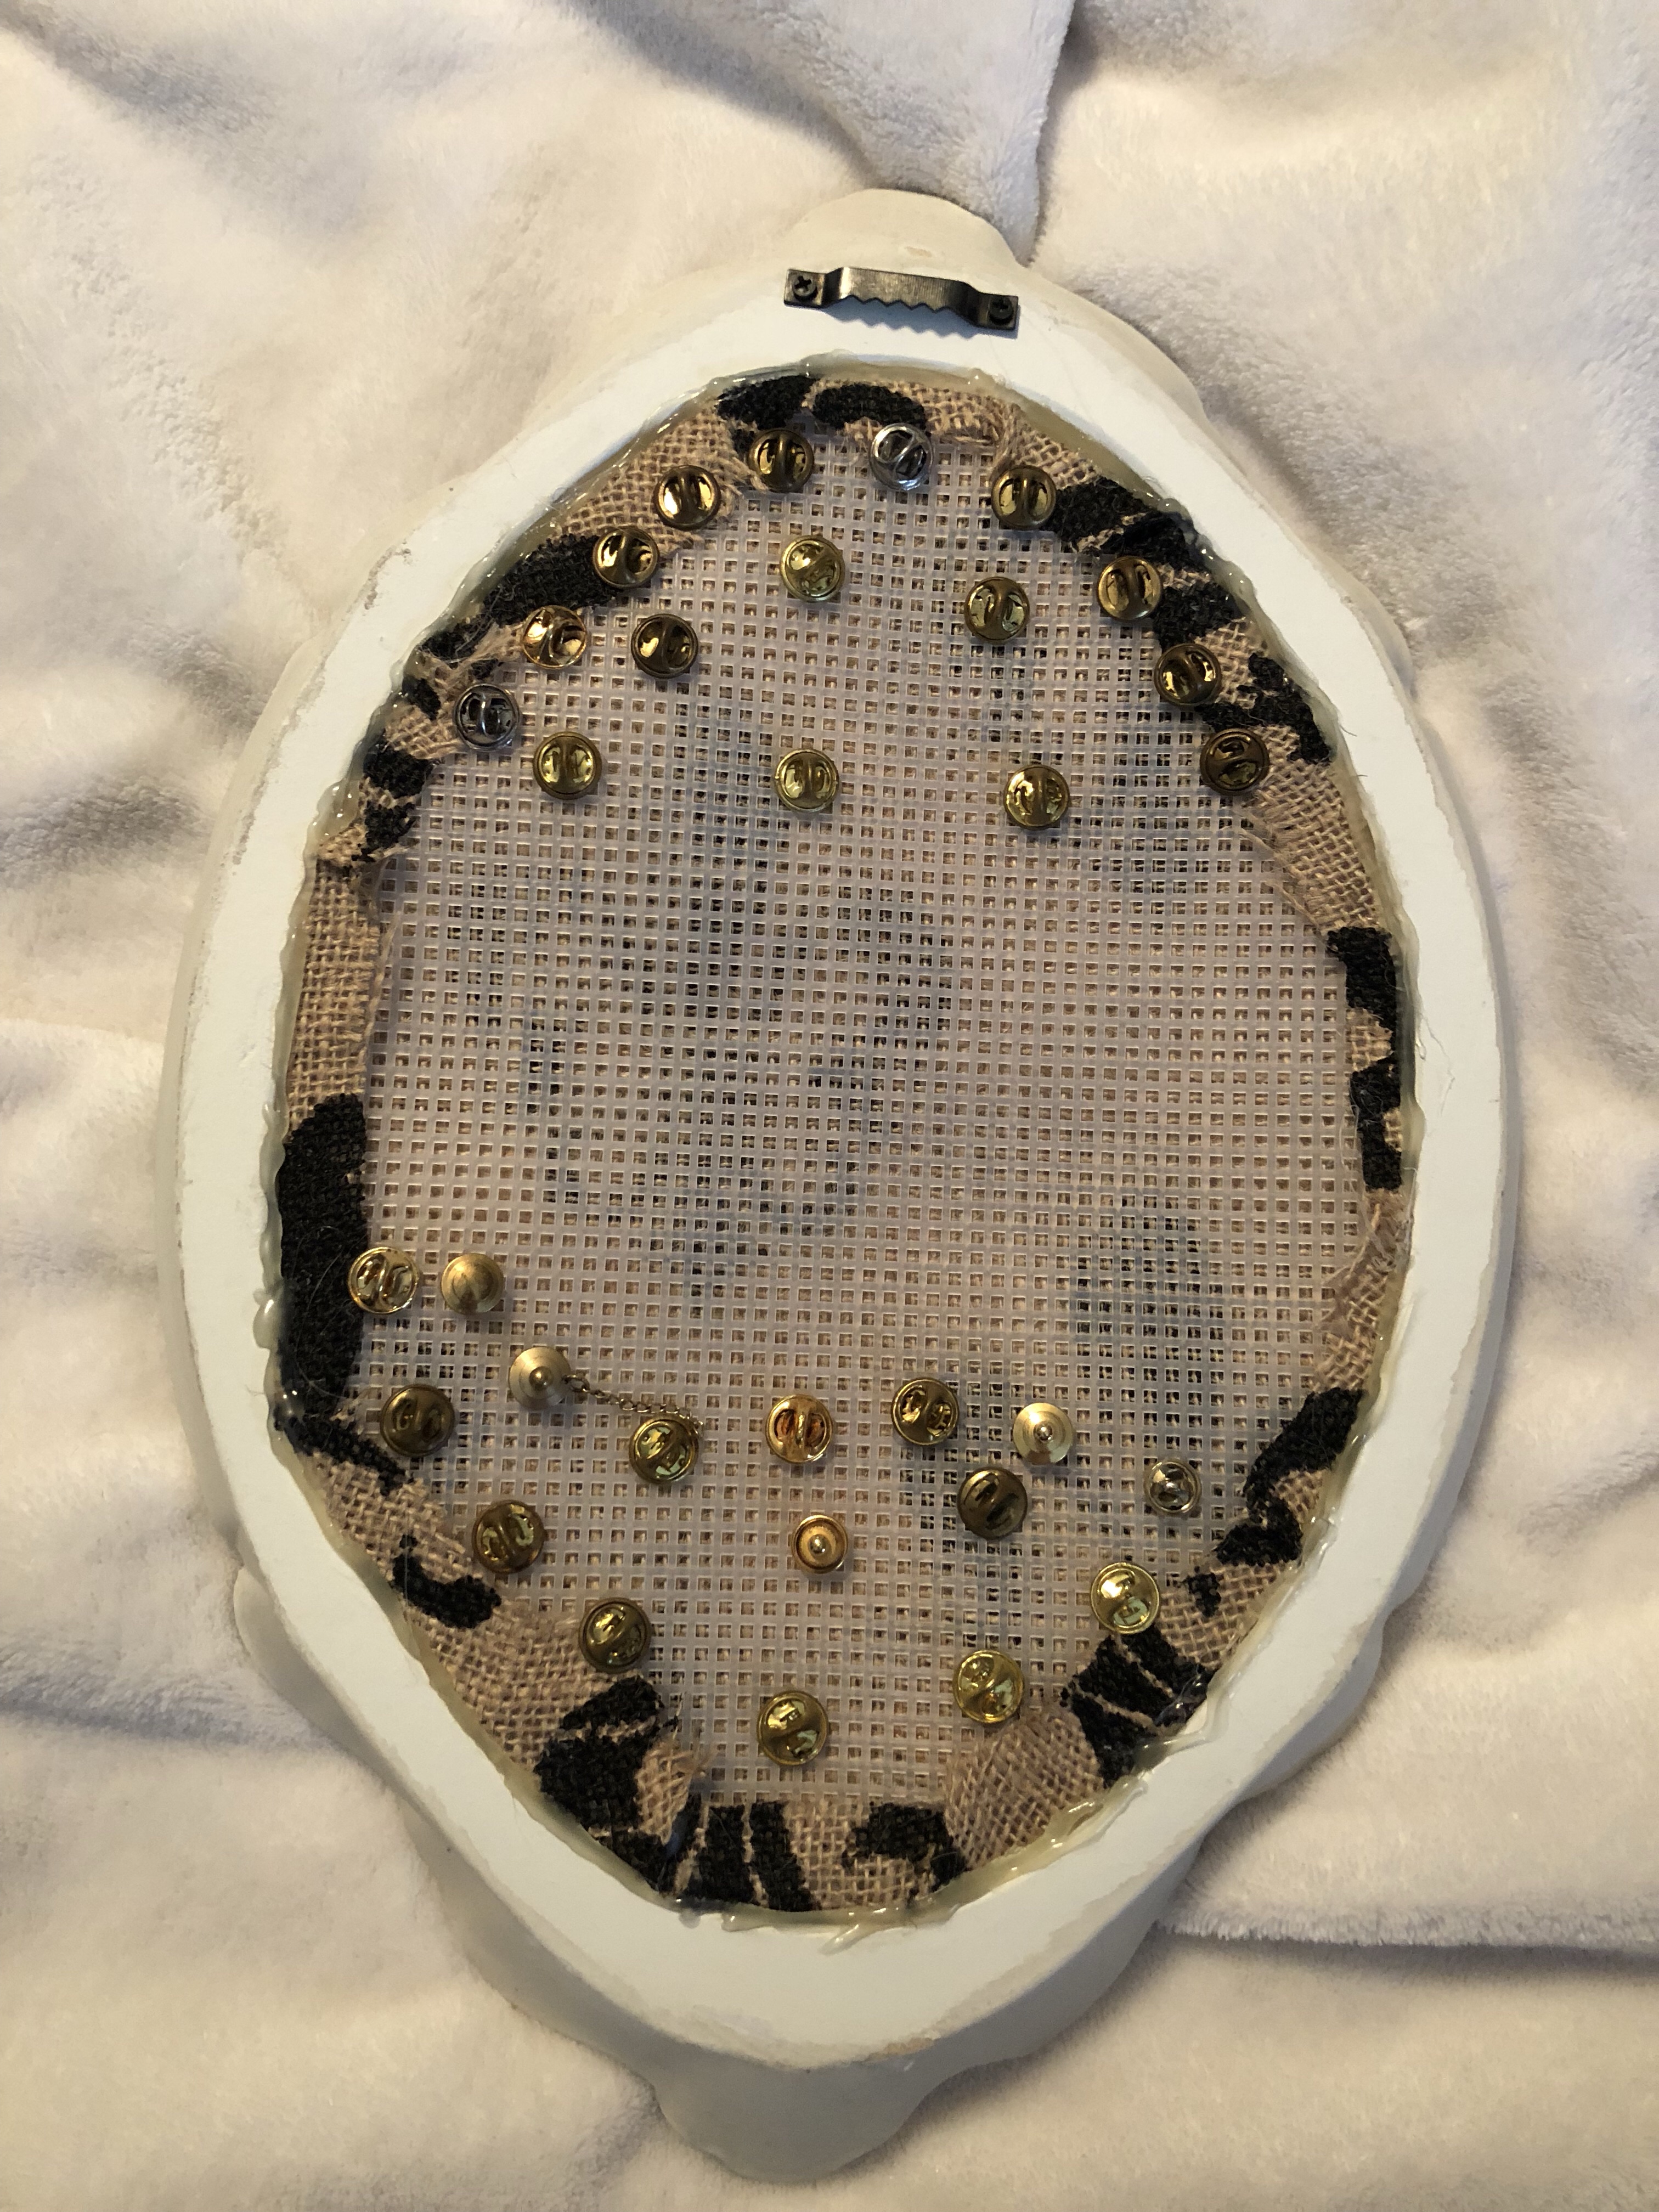 If you’re using a picture frame like I did, mark the plastic canvas based on the inner portion of the frame (the portion where the glass would go) so there is something structurally sound to glue the fabric and plastic canvas to. Think of it this way… if you cut the plastic canvas smaller than the hole, it’s going to fall right through. K? K.