So, you planned an awesome camping party in your backyard complete with hot dogs and s’mores. Of course, Mother Nature can’t help but throw a wrench in your carefully made party plans and decides to rain at the very start of your party. A few things immediately happen: 1. You do a happy dance that all of the tiny humans will fit snuggly on your basement sectional and an air mattress for “indoor camping”. 2. Be thankful you have a Crock-Pot for hot dogs to feed a crowd. 3. Be thankful you have an oven so the much anticipated s’mores are still a possibility.
This recipe is for the latter. All you need is a sheet pan and an oven and you’re in business!
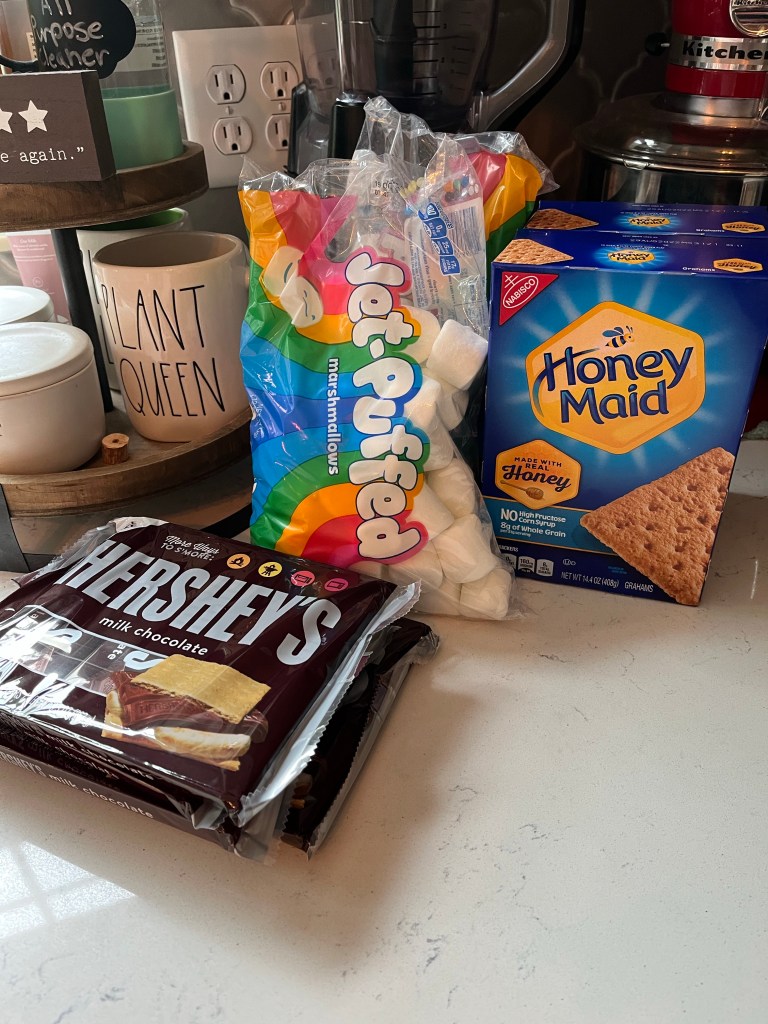
Ingredients and Materials
Hershey chocolate bars
Graham crackers
Marshmallows
Parchment paper (optional, but helps with cleanup!)
Sheet pan
Directions
Set oven to “Broil” and allow to heat while preparing the s’mores for baking.
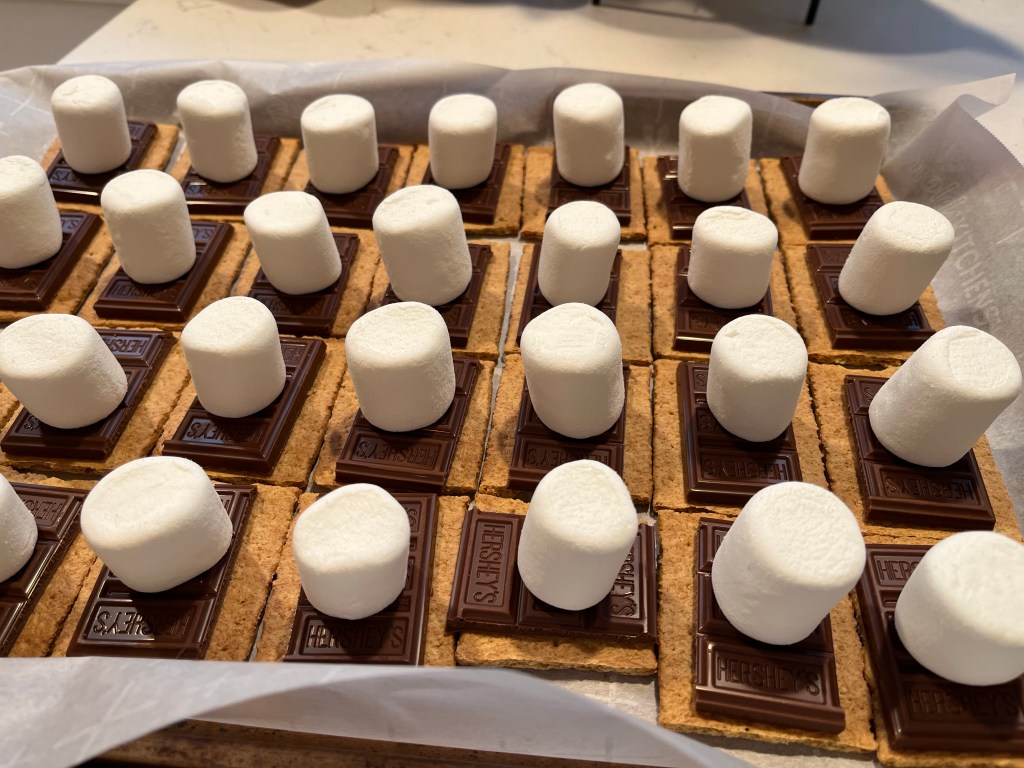
While the oven is heating, prepare all s’more ingredients by breaking the graham crackers in half and breaking the chocolate bars into thirds and set aside.
Place parchment paper on a baking sheet. Add desired amount of Graham cracker halves according to the number of s’mores you plan on serving. Add a marshmallow to each graham cracker half. **Note: Depending on the heat of your broiler, it is advised to wait to add the chocolate AFTER roasting the marshmallows as the heat of the oven could completely liquify the chocolate.**
Place the pan in the oven to toast the marshmallows. This should only take 30 seconds to 2 minutes, depending on the temperature of your broiler. Watch the s’mores carefully as the marshmallows heat very quickly and can burn. Remove from the oven when the marshmallows start to turn a golden color on top.
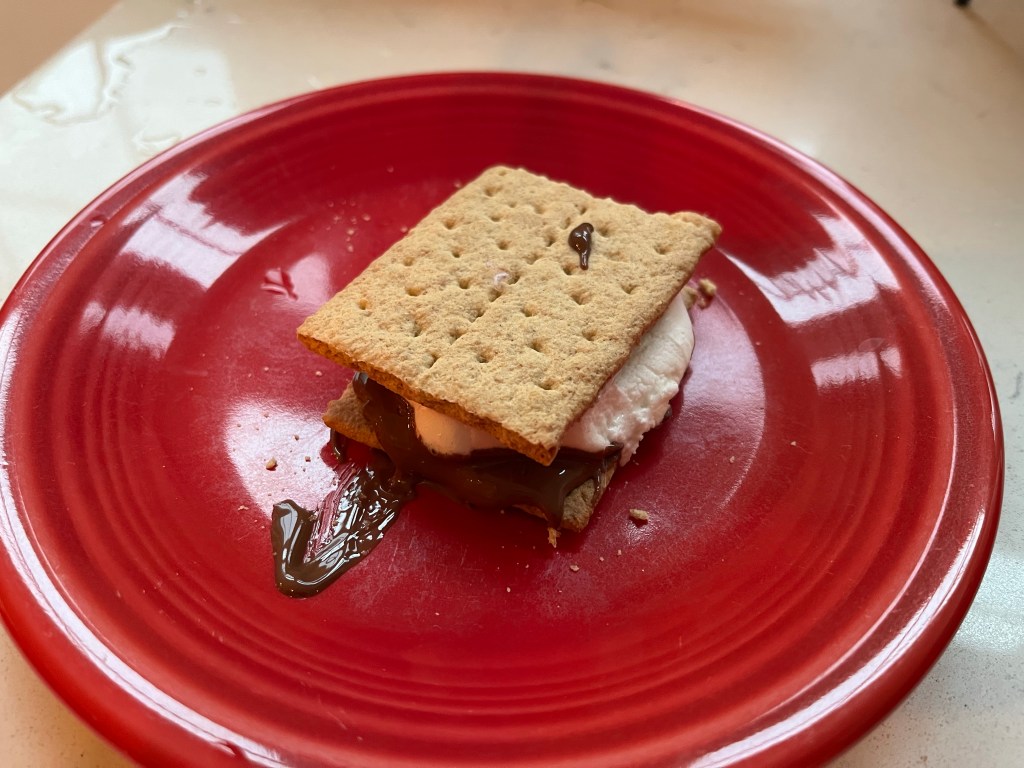
Add chocolate to each marshmallow and top with another graham cracker half. Serve immediately or allow to cool and store in an airtight container.
So, you found webbing all over your plant and leaf edges are browning and dying… now what? There are fuzzy little white things all over your plant and new leaves are suffering… now what? Nearly every plant I’ve brought home from Lowe’s has been infested with mealybugs or spider mites, but don’t panic! I have several options that will eliminate soft bodied pests and keep them away.
Identifying the Pest
Spider Mites
Usually spider mites create tiny webbing on the tips of leaves or where the leaf meets the stem. These pests are very, very tiny and are typically on the back of leaves in these locations.
Spider Mite Webbing after Misting
The pests may even create webbing on the pot or basket in which the plant is contained. The photo above shows webbing that appeared after being misted with water.
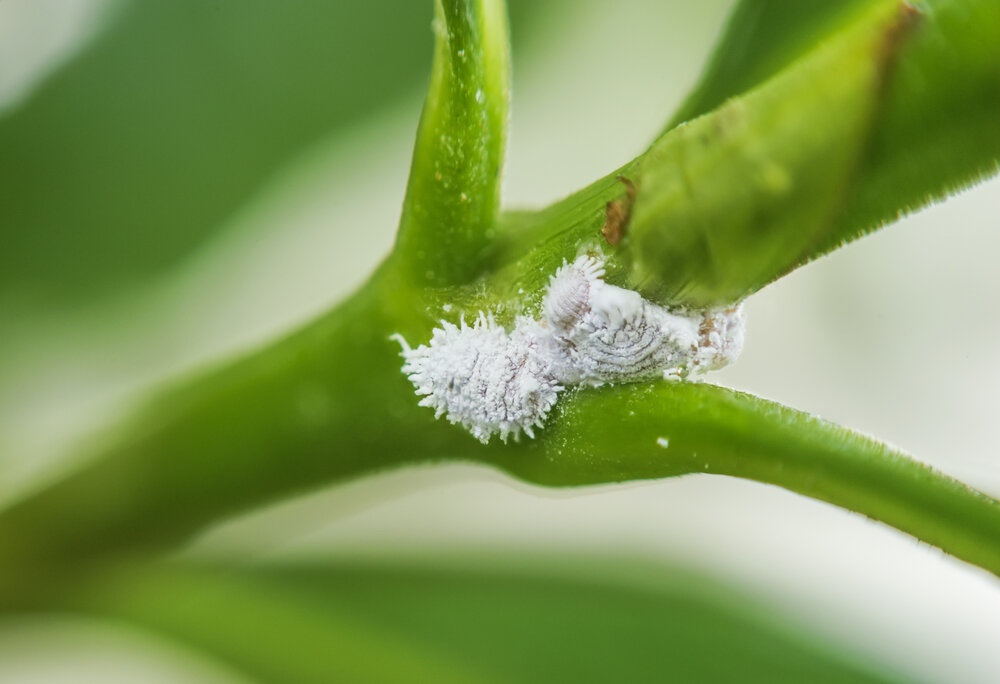
Mealybugs look like fuzzy little dots on plants and can be found on the underside of leaves and the stem. They sometimes clump on the stem at new leaf growth.
Step 1: Physical Removal
Remove all webbing and spider mites using a damp paper towel or lint roller. Remove a sheet of lint roller sticky tape and gently press it on the back of leaves to remove all spider mites.
Remove mealybugs by soaking a cotton ball with 70% isopropyl alcohol and dabbing each bug. This will kill them in contact.
Wash hands thoroughly after removing pests to ensure no other plants are affected.
Be sure to keep the affected plant(s) away from all other houseplants until all spider mites are eliminated.
Step 2: Elimination and Prevention
There are several methods for this part. I’ll provide the 3 options that seem to work best for me: chemical pesticide, natural soap wash, and alcohol and water wash.
Each method has its pros and cons. While chemical insecticide works well, there are drawbacks as well. It is, after all, a chemical that isn’t safe around pets or children and should be used according to the instructions. When I have used this method, I was able to eliminate the spider mites in one use.
The soap wash and alcohol and water wash are also effective and safe to use around pets and children. These methods do sometimes take several applications if there is a large infestation.
Physically remove any pests with the method described earlier, then apply the Garden Safe product. This should be sprayed outdoors all over the front and back of leaves, on stems, and on the top of the soil to kill any pests.
Move the plant to a spot indoors to fully dry away from the sun, as direct light after application of this product could cause burning of leaves (as me how I know… oops!). Wash hands thoroughly after application.
Check the plant weekly for pests after application and physically remove any pests and follow with insect killer application weekly if any pests are found.
Do not leave plant in direct sunlight as the leaves could burn after product application.
Soap Wash
This happens to be one of my favorite methods, although not as effective as the other two. If it’s not as effective, why is it my favorite, you ask? Well, because it’s easy, has no odor, and I can do it quickly weekly without worrying about chemicals or ruining anything else in the house like rubbing alcohol could if there’s a spill.
I also bring my plants inside and allow them to dry on a potting tarp to avoid leaf burn in direct sunlight outside. This is one of my favorite plant care items and you can find it here on Amazon!
Materials Needed:
1 quart warm water (tap water will work fine, but may spot your plant leaves when dry, so use distilled water if you want to avoid hard water spotting on your plants)
1 Tbsp Castile soap (I prefer Dr. Bronner’s, but any pure Castile soap will work fine as long as it has no dyes or fragrances)
Physically remove pests using the previously described method.
Mix ingredients well in a spray bottle.
Move the affected plant outdoors and spray leaves (front and back), stems, and top of soil thoroughly.
Move the plant back inside to dry on a surface that won’t be damaged by drilling soap mix, such as a tarp or repotting mat. Do not leave the plant outside as direct sunlight could burn leaves.
Keep the affected plant away from other plants to endure spider mites do not spread to other houseplants. Wash hands thoroughly after completing this process.
Repeat this process weekly to ensure pests are completely eliminated.
Isopropyl Alcohol as Insecticide
This method works well and kills pests on contact. Namely, mealybugs. If you have fuzzy white bits on your plant, this method may be for you. This will also help eliminate fungus gnats and spider mites.
Remove any spider mites with the previously described physical removal method. Remove mealybugs by soaking a cotton ball in 70% isopropyl alcohol and dabbing any visible mealybugs. This will kill them in contact.
Mix 50/50 water and 70% isopropyl alcohol in a spray bottle. Add 1 tsp Dawn dish soap and mix well.
Spray entire plant, front and back of leaves, stems, and top of soil with alcohol, water, and soap mixture.
Allow plant to dry inside, away from direct light in an area that won’t be damaged by the dripping alcohol mixture such as a tarp or repotting mat.
Wash hands thoroughly to avoid spreading pests and chemicals to other houseplants.
Inspect plant daily for pests. If mealybugs are found, remove by dabbing with alcohol soaked cotton balls.
Repeat this process weekly until all pests are eliminated.
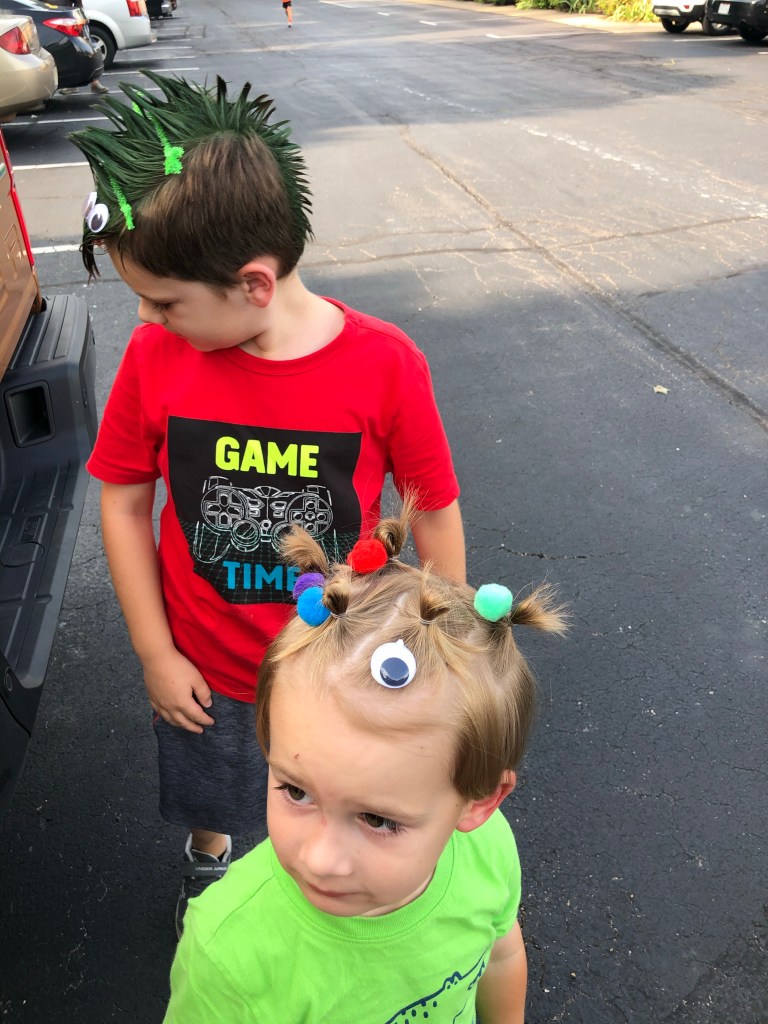
There are always spirit days at school, VBS, and camps. Our kids always get into spirit days and crazy hair day is no exception! I’ve pulled together a few styles that have been fairly easy, use mostly things we already had around the house, and the kids love. So, get ready to get CrAzY!
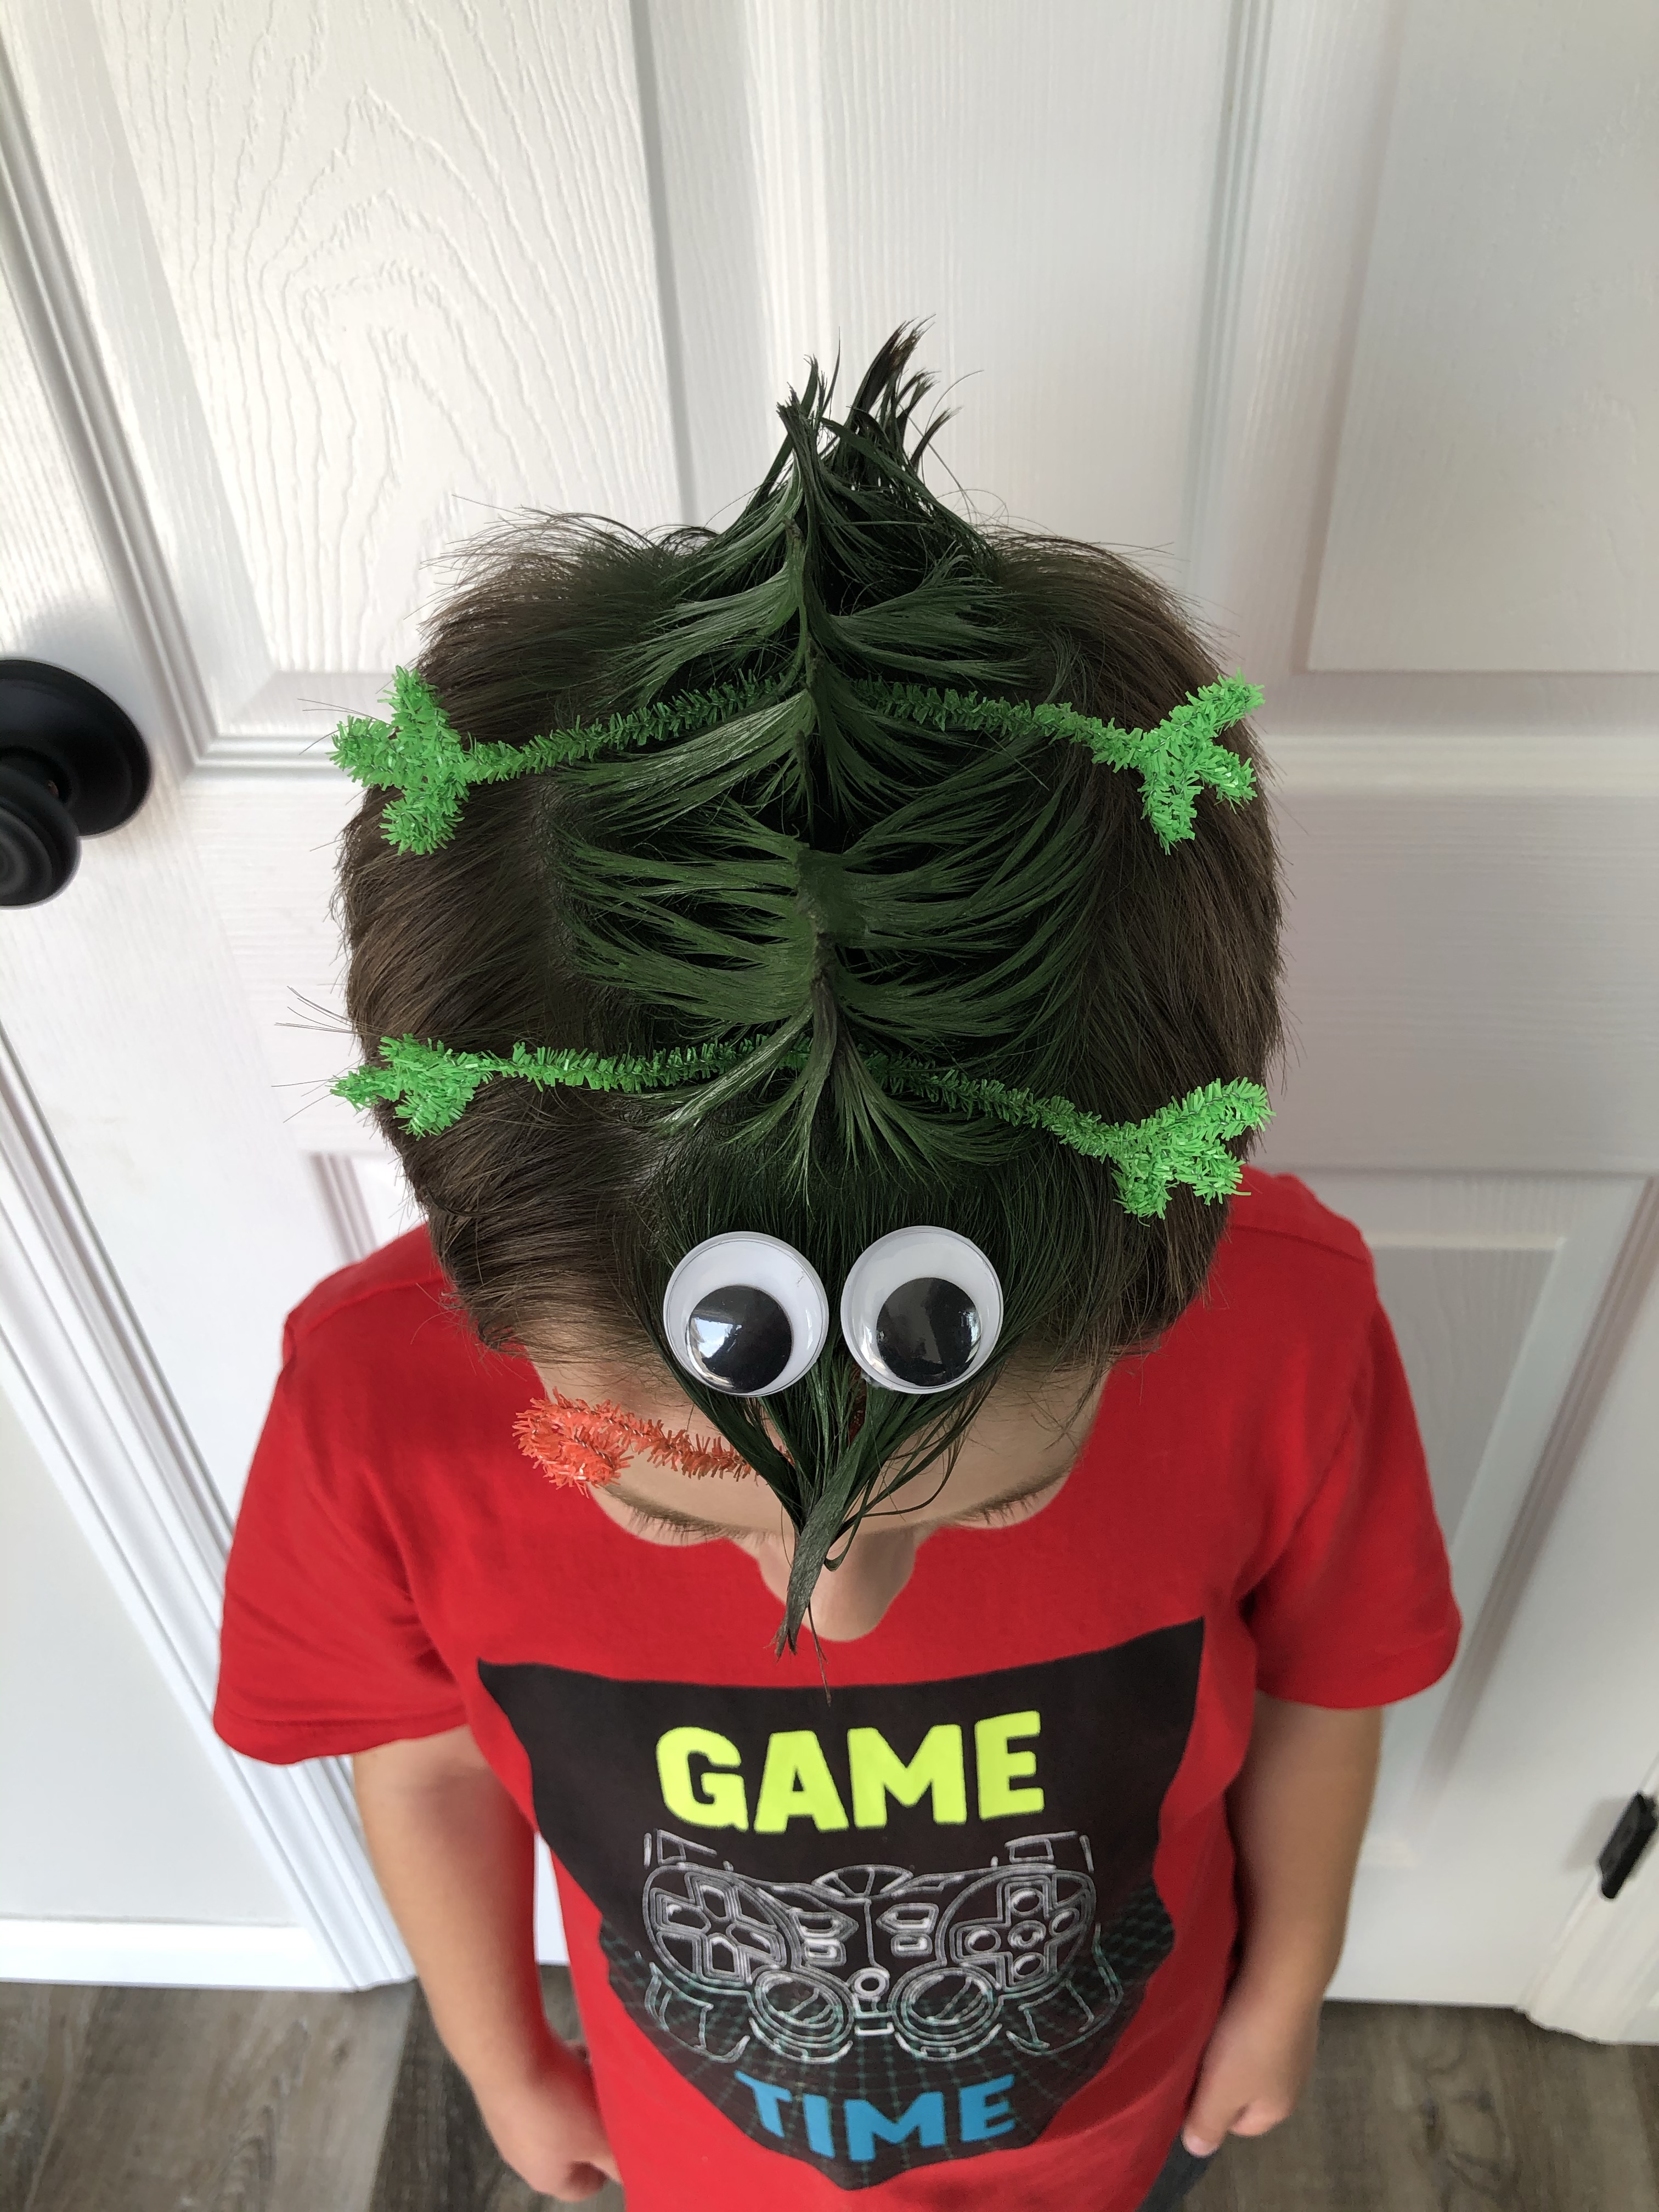
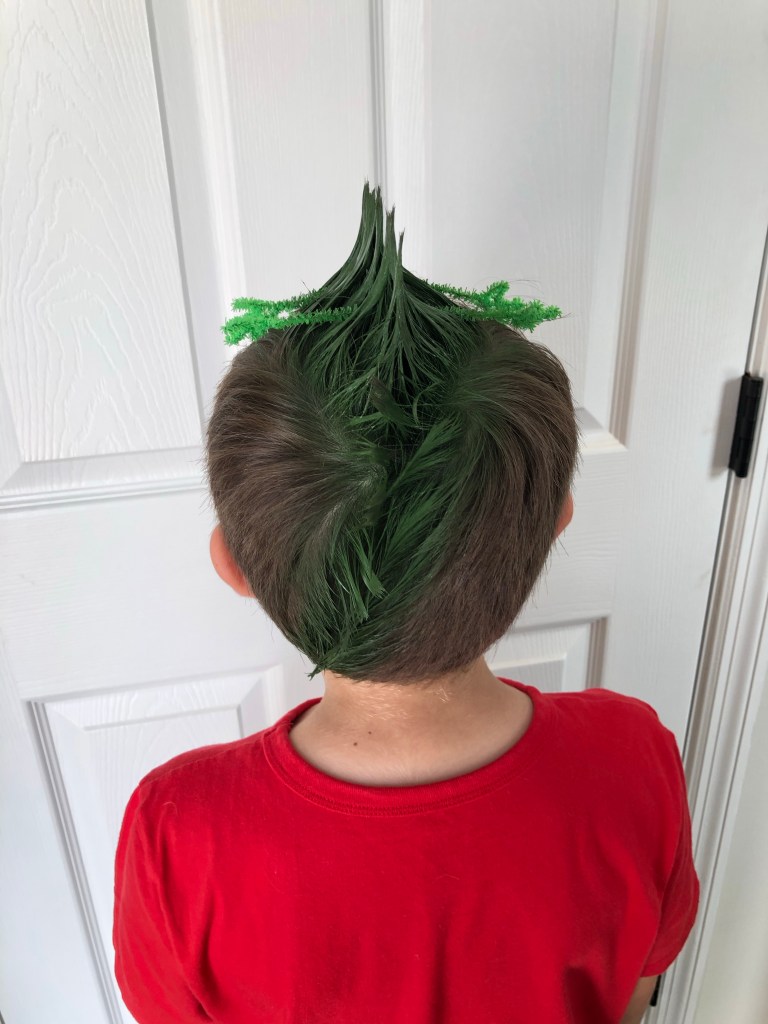
The Lizard
This hairstyle is great for boys whose hair is a little longer on top and shorter on the sides. It’s also much easier for older kids since their hair is a little less fine and soft than younger kids.
Materials
Hair spiking glue (we love got2b Glued and purchase it at Target, but it’s available at most grocery or beauty stores)
Firm hold hairspray
Green spray temporary hair color
Green and pink pipe cleaners
Large googly eyes
Directions
Create a mohawk using the spiking glue. Create a pointed “nose” in front and down the forehead. Create a “tail” in back by allow the spiked mohawk to drift to one side.
Spray the mohawk well with heavy hold hairspray and allow to dry well.
Create legs and feet and lizard tongue while the hair dries. Create two legs/feet by bending both ends of each of two green pipe cleaners into the shape of feet. To create the tongue, cut a pink pipe cleaner in half and curl one end in the shape of a spiraled tongue. Bend the opposite end of the pink pipe cleaner into a hook shape to hook onto the hair when inserted.
Once the hair has dried, insert the legs through the mohawk where lizard legs would be. Insert the tongue into the front “nose” of the lizard and hook on the hair inside so it will stay in place.
Spray the “lizard” part of the hair with the green temporary hair color.
Use the spiking glue to glue googly eyes onto the head of the lizard and allow to dry well.
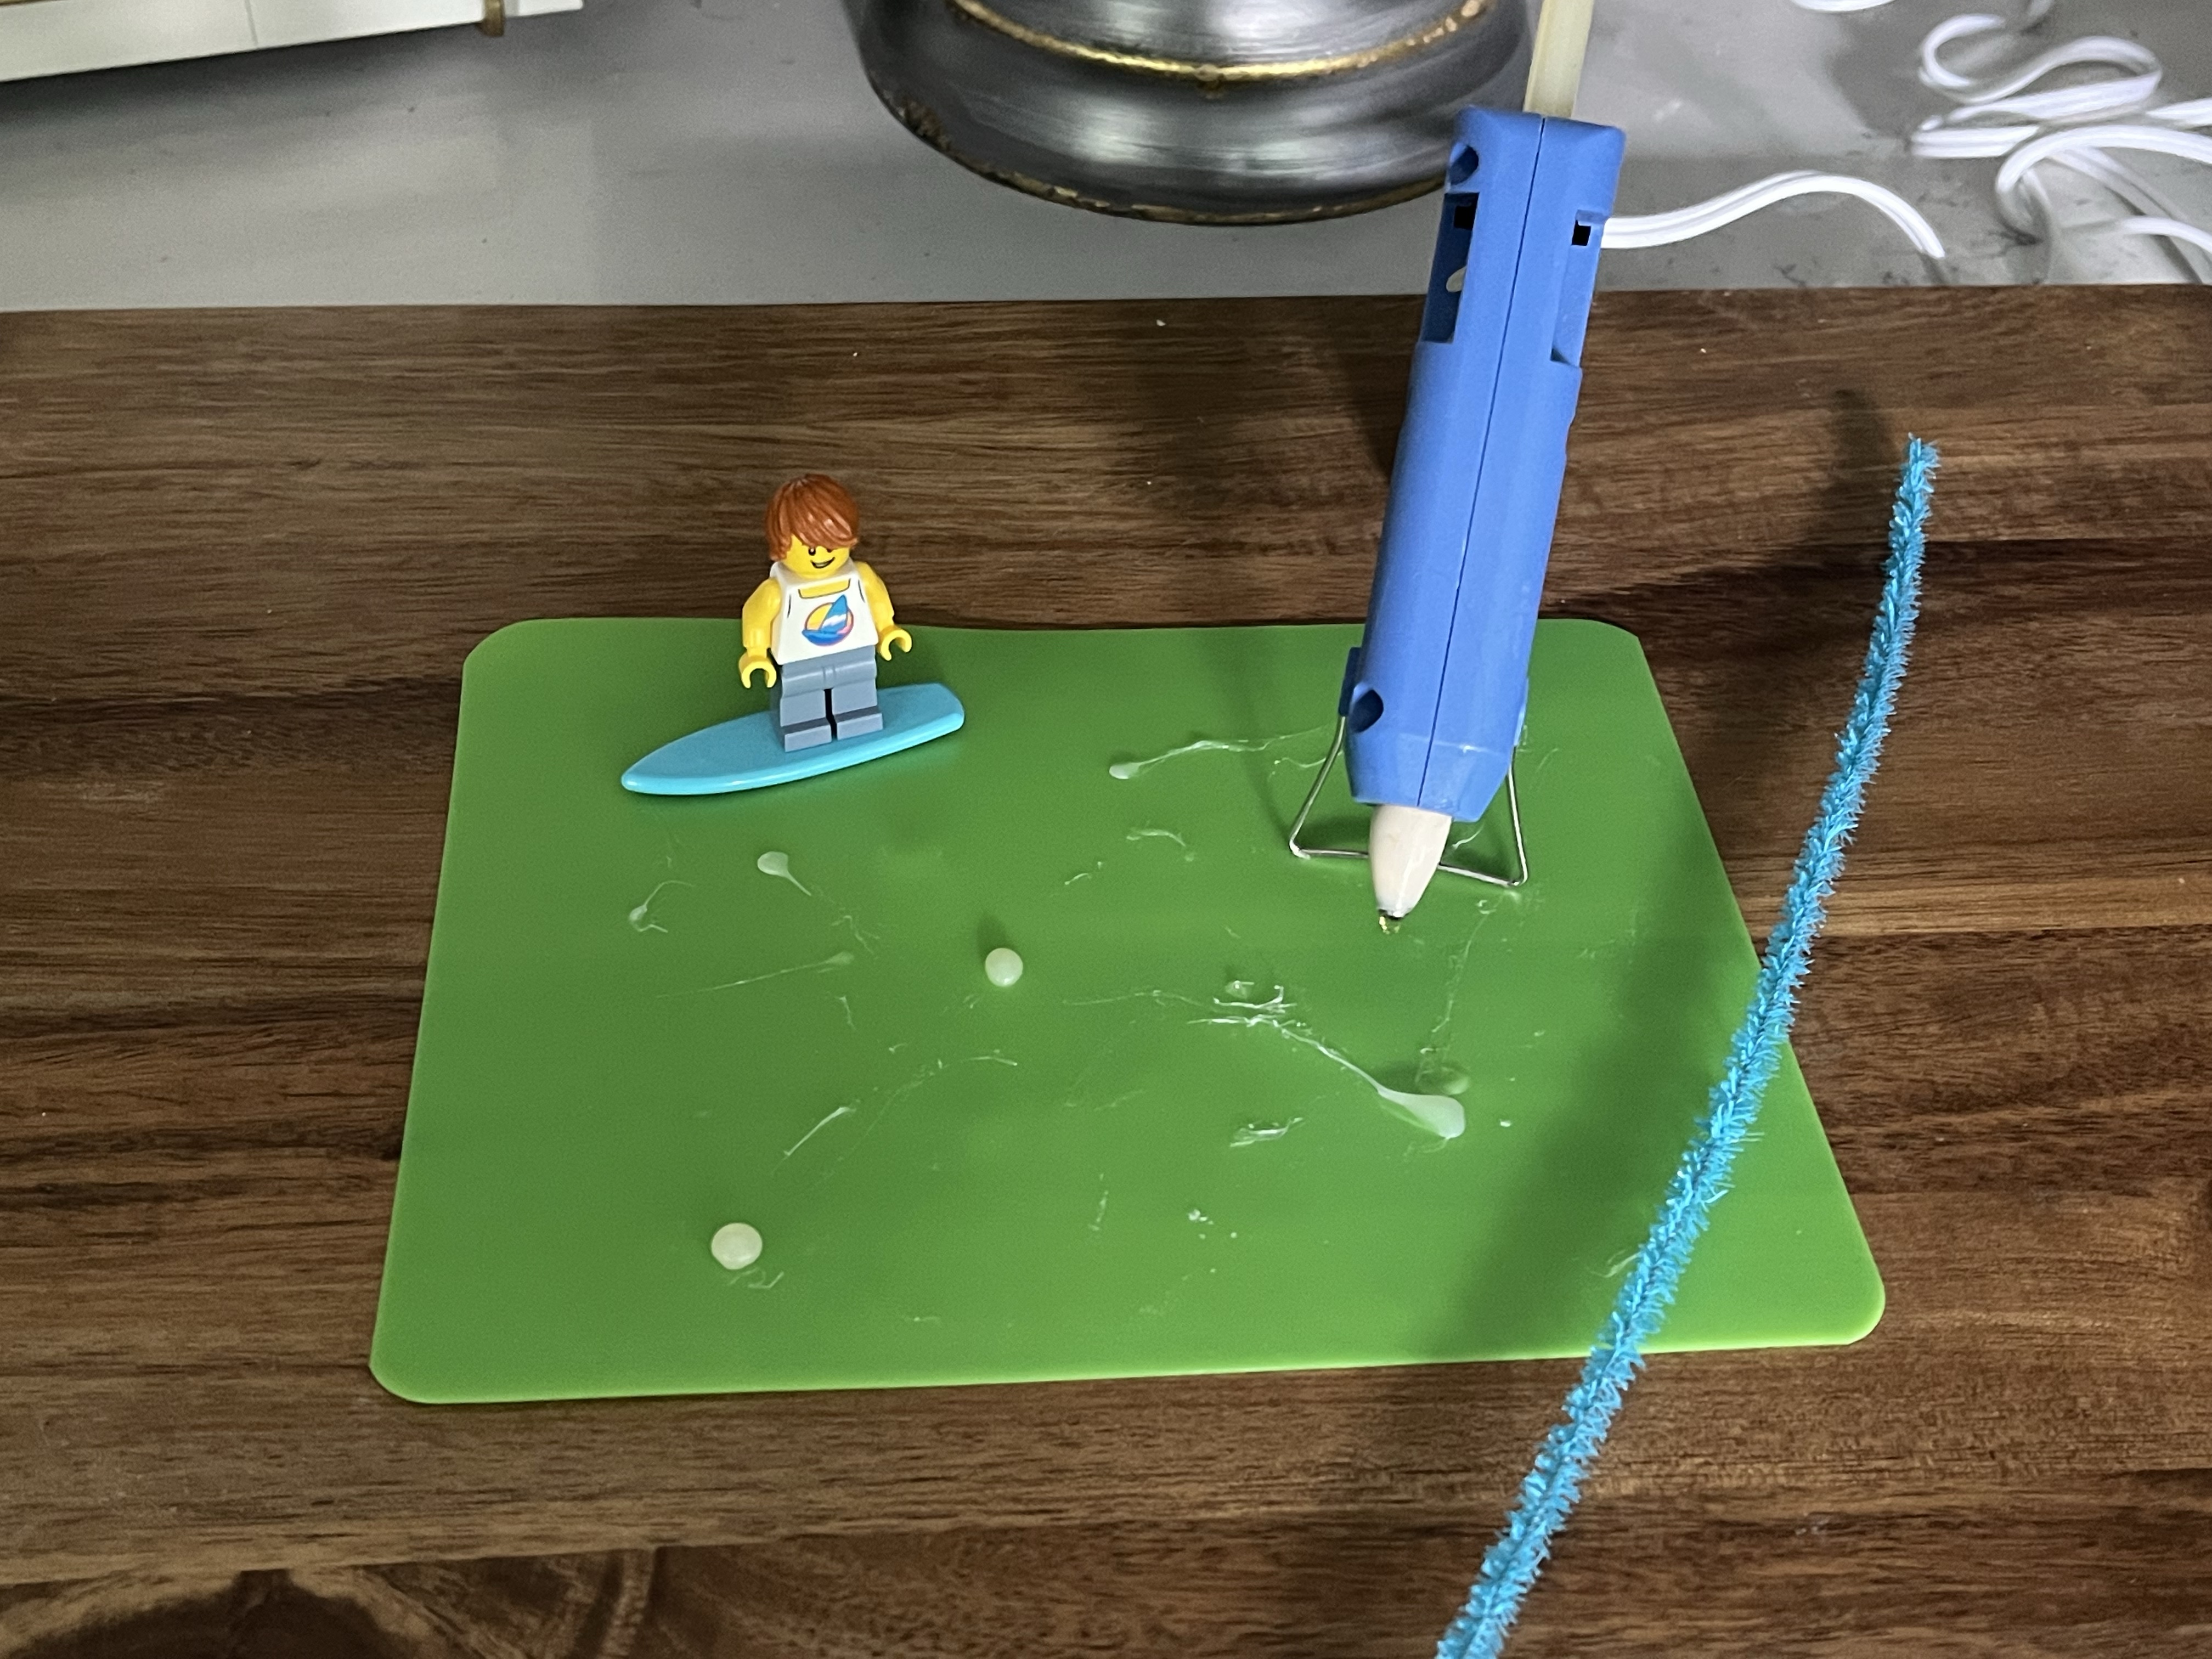
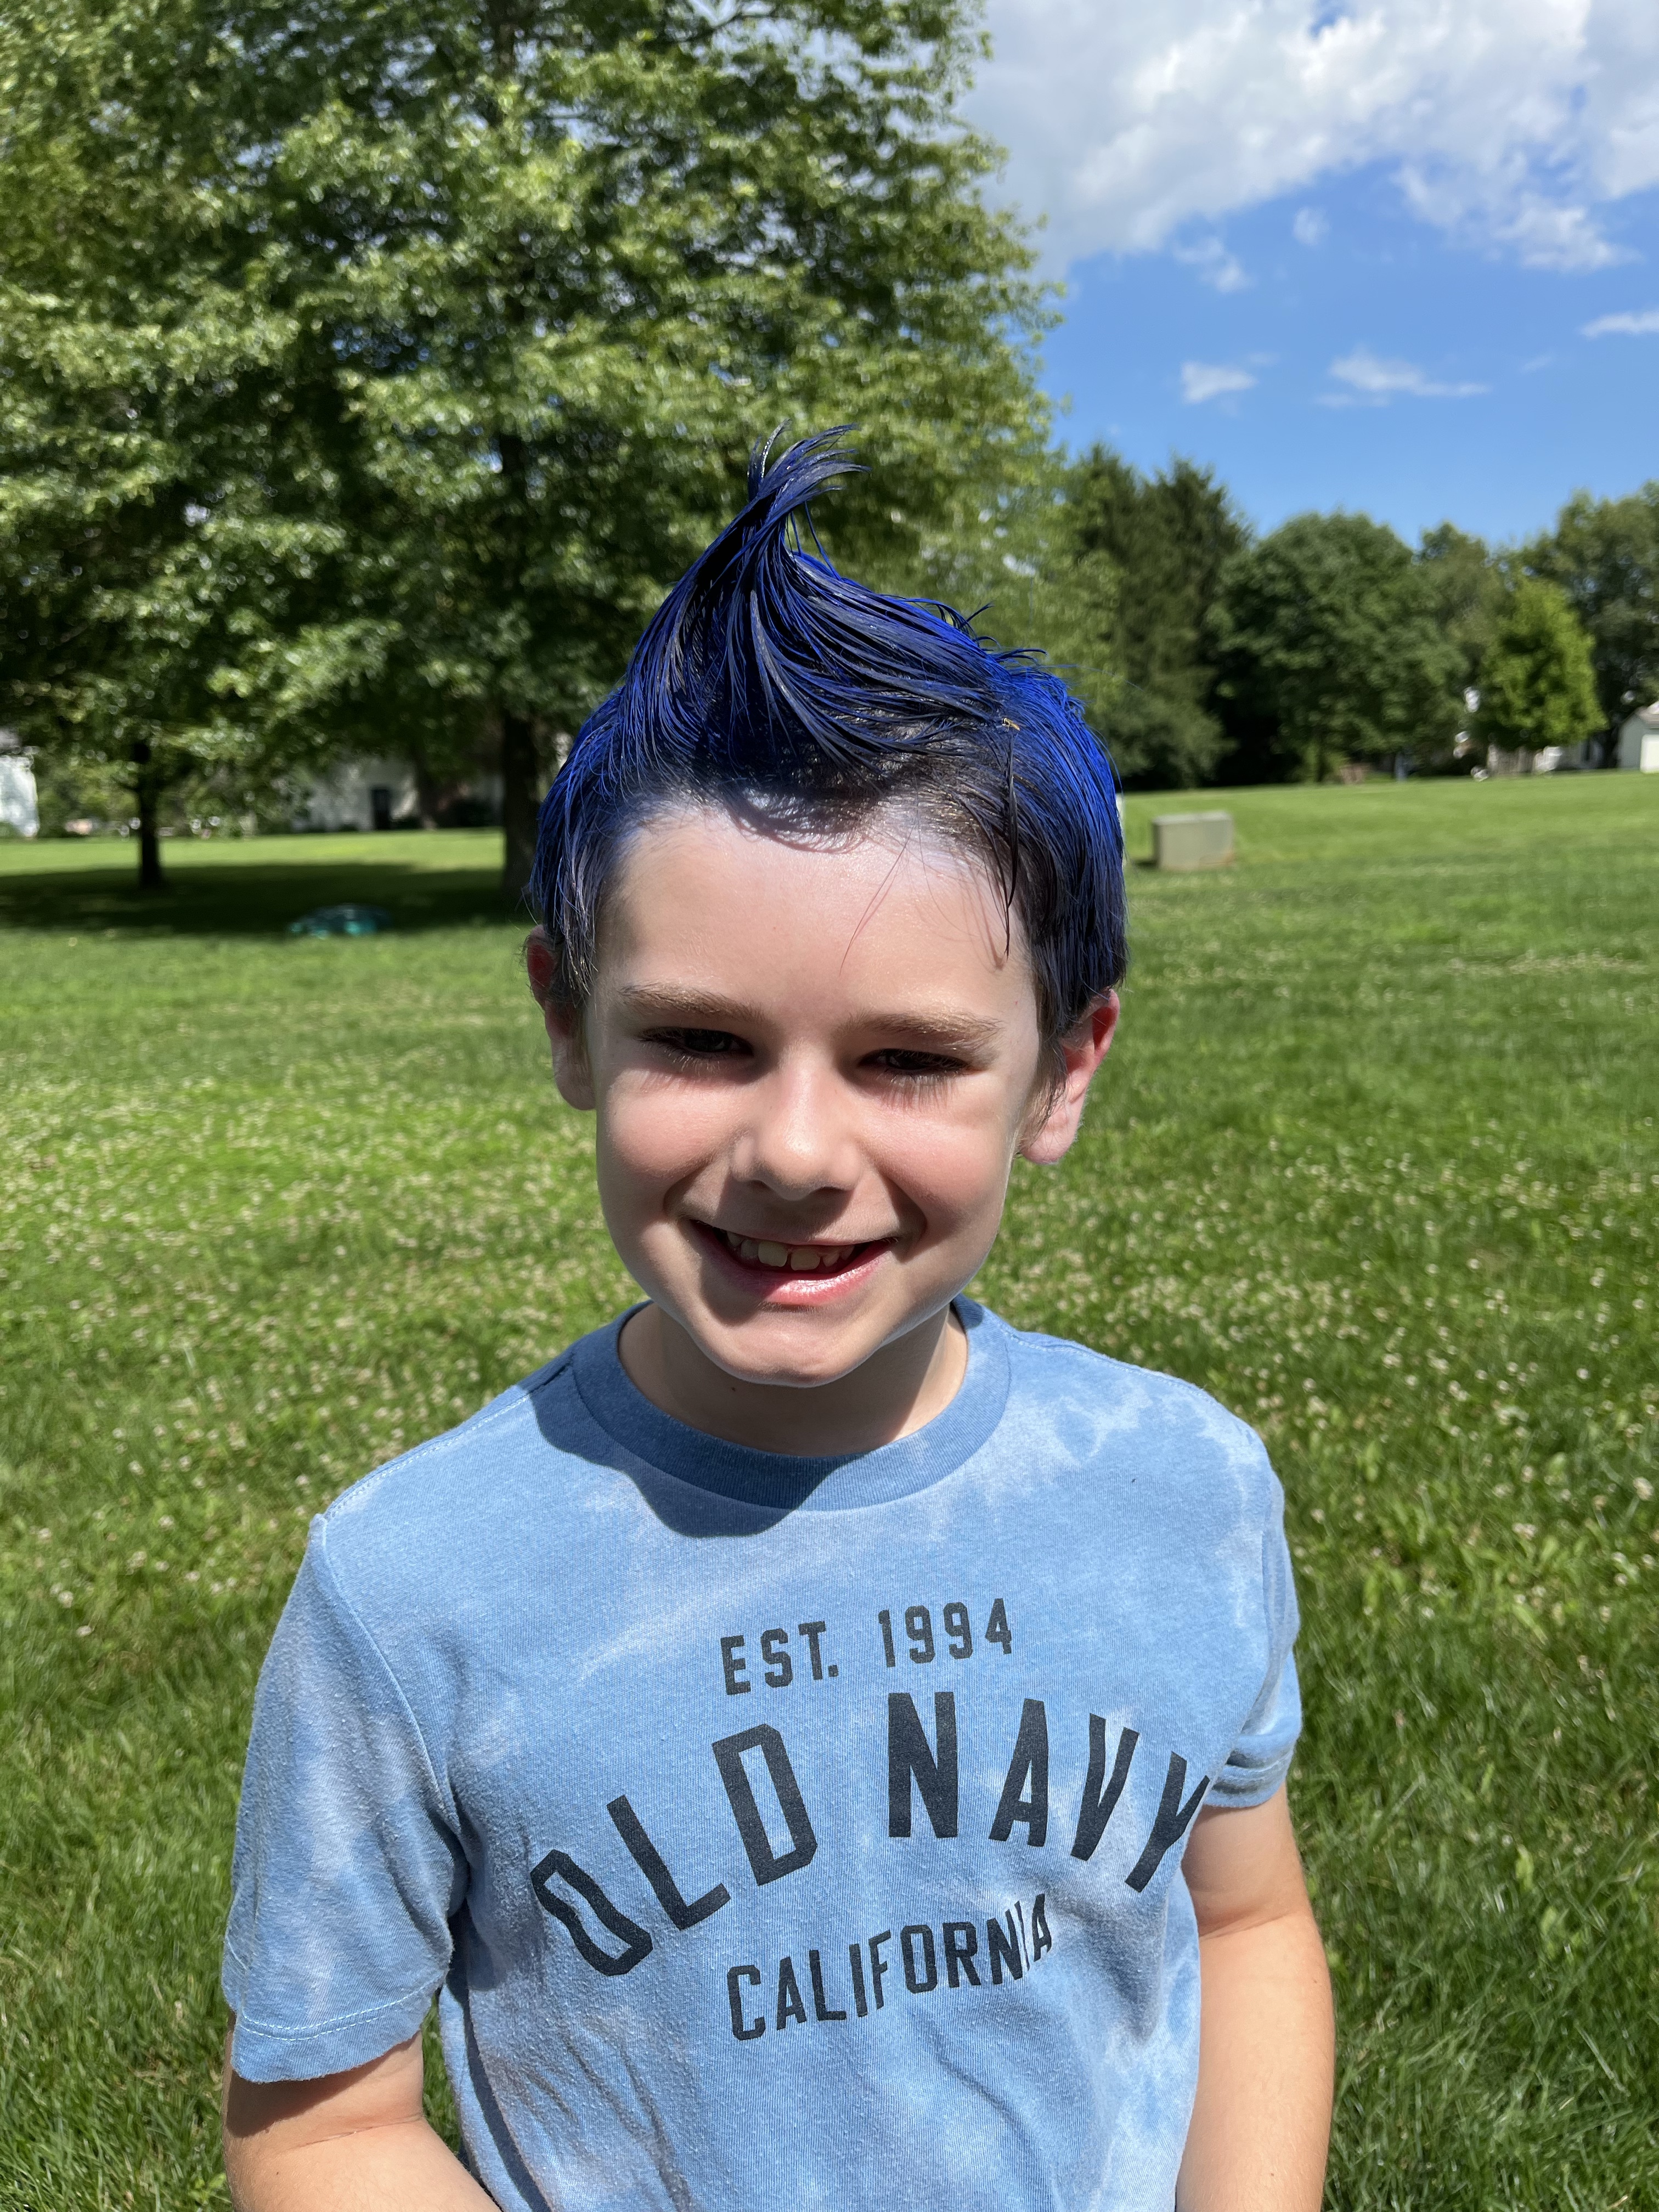
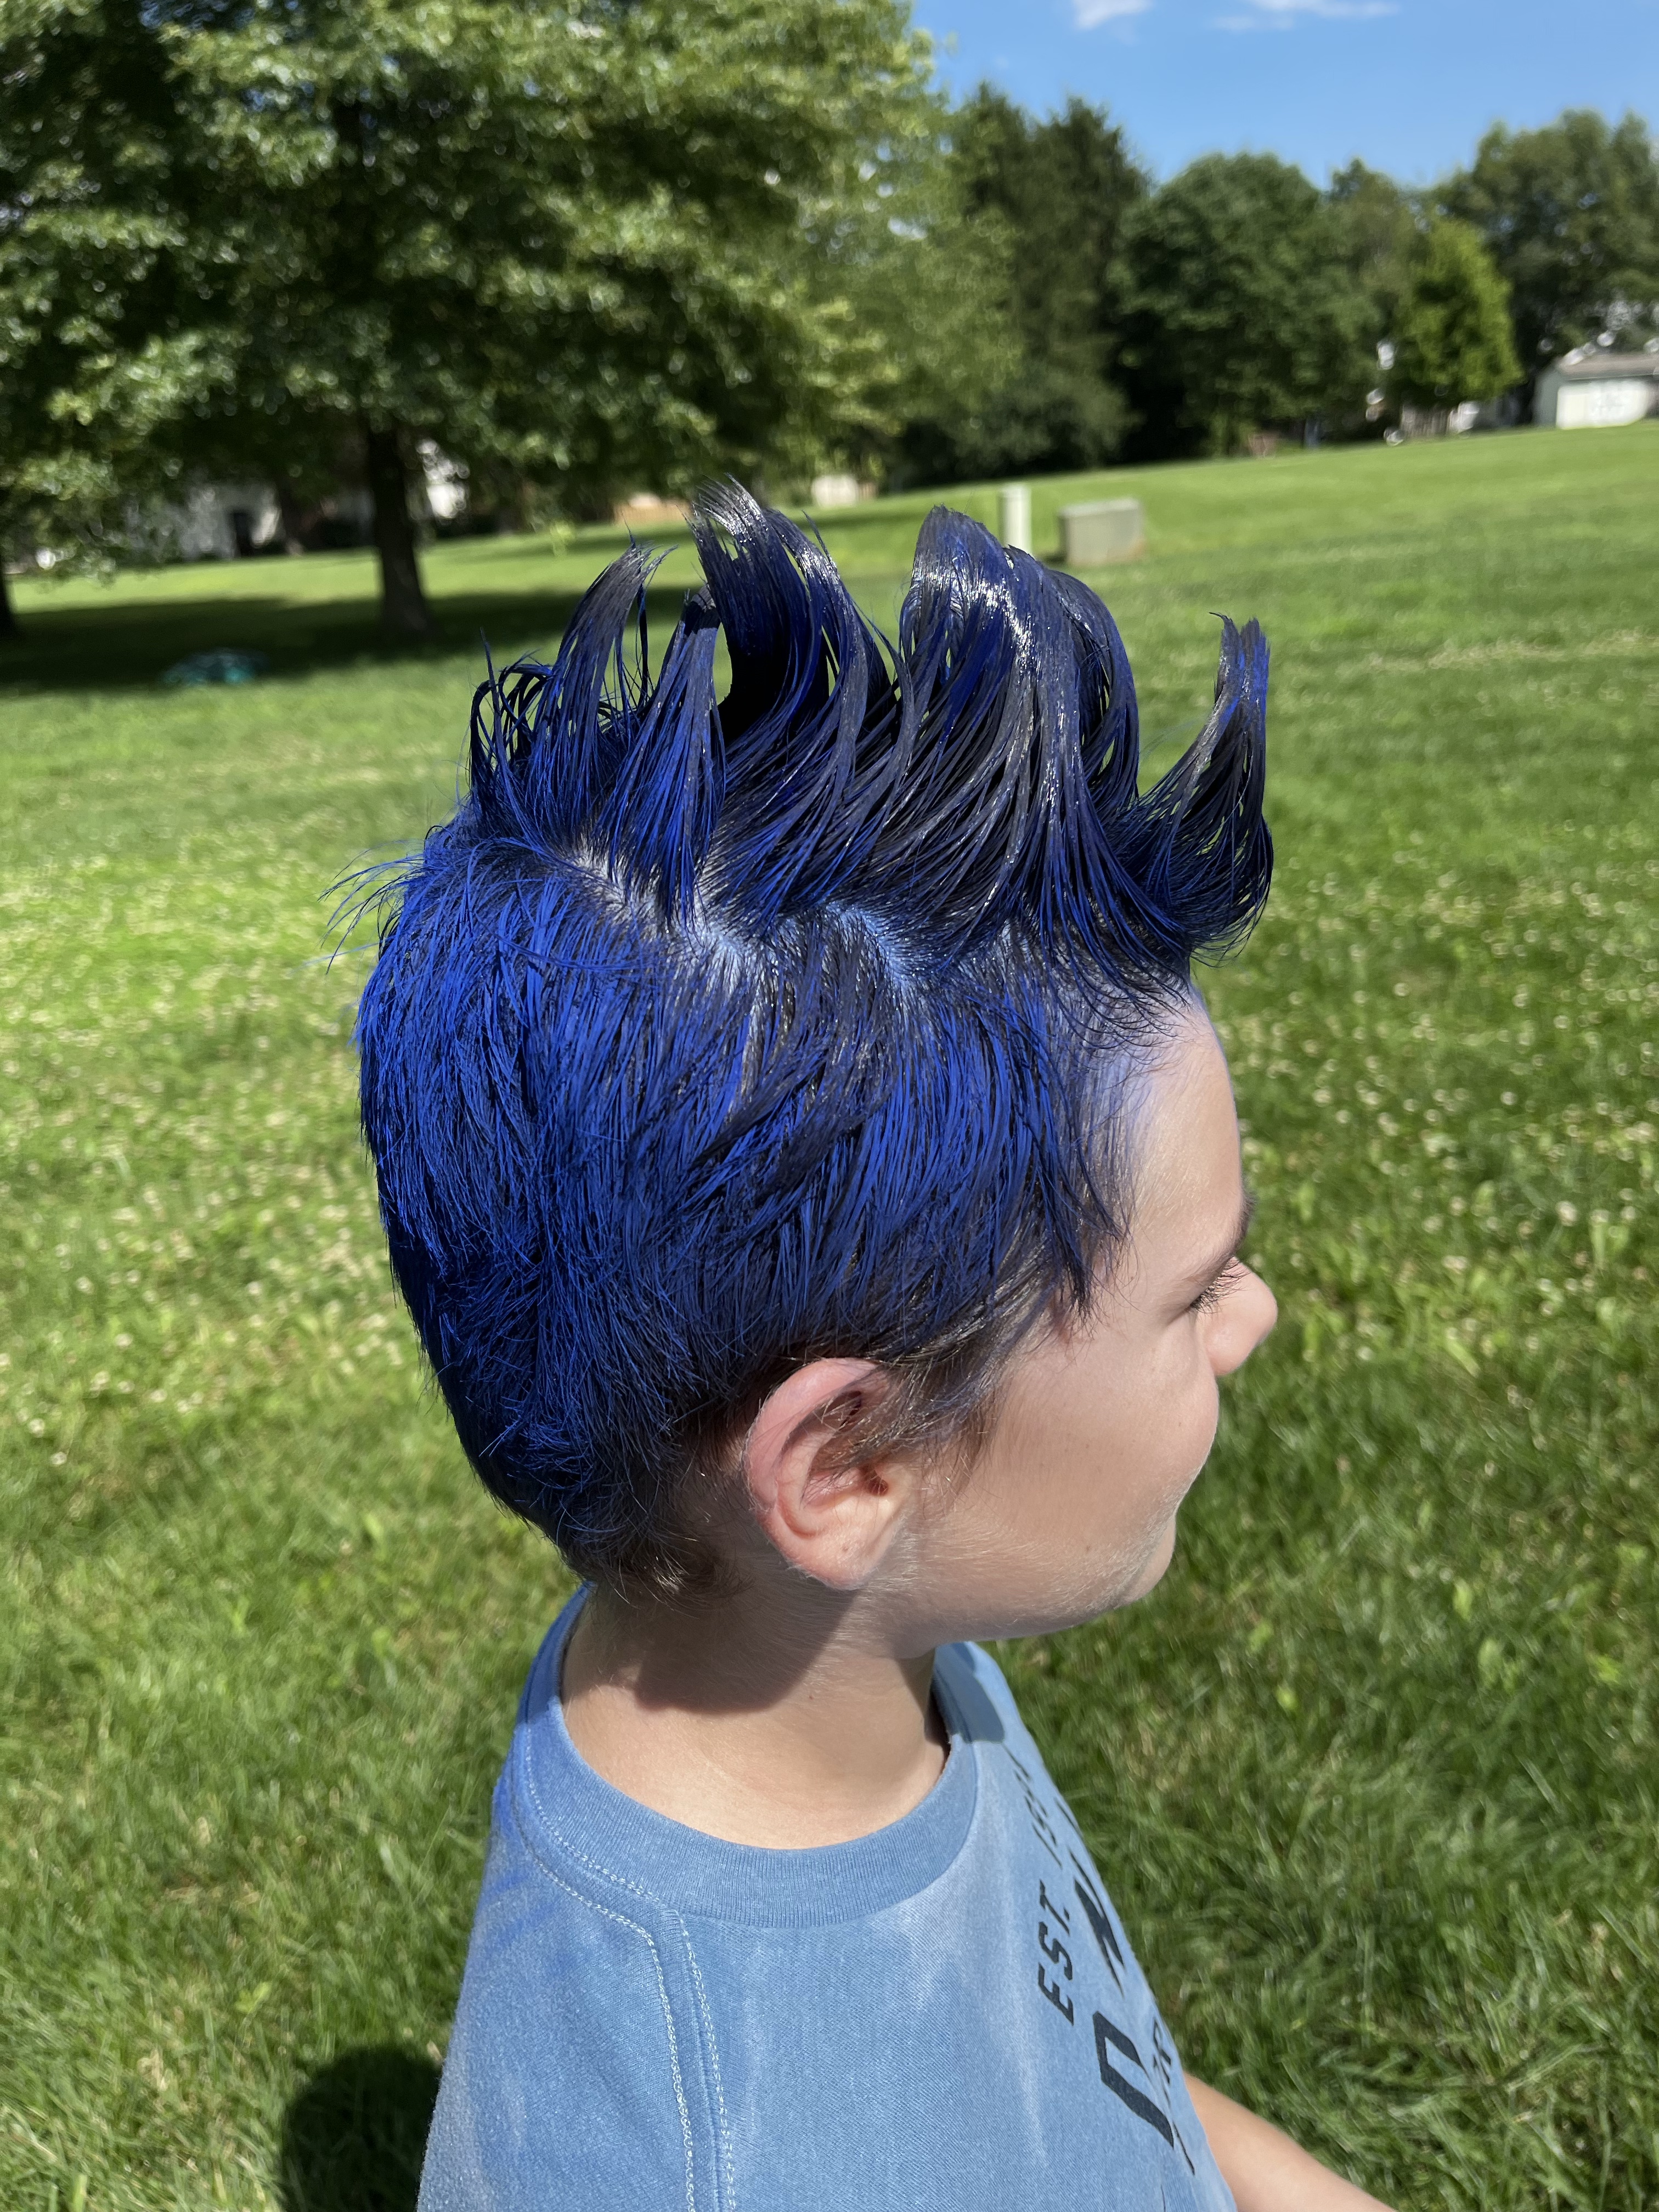
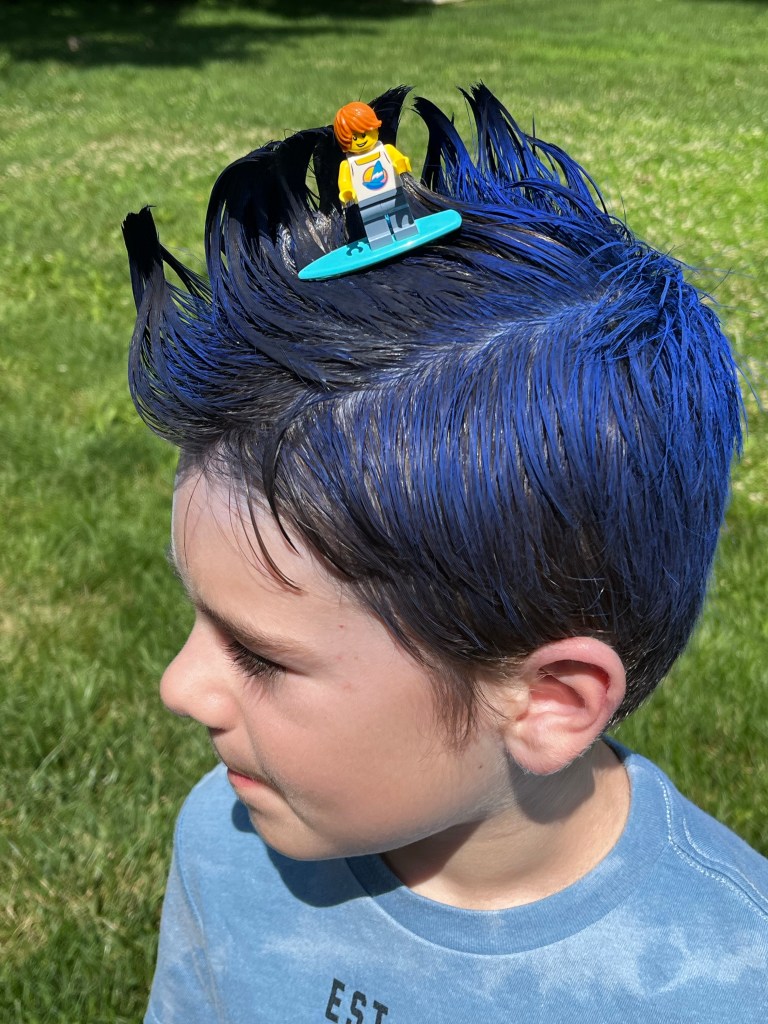
The Surfer and the Wave
This is another great style for a longer boy’s cut. Longer hair on top creates a better “wave” effect. Everybody’s surfin’ now!
Materials
Hair spiking glue (we love got2b Glued and purchase it at Target, but it’s available at most grocery or beauty stores)
Firm hold hairspray
Blue spray temporary hair color
Blue pipe cleaner or other wire
Surfer Lego or other ocean toy (sharks, fish, or other beach toys work great for this wave hairstyle, so work with what you have!)
Hot glue and glue gun
Directions
Create a “wave” hairstyle by a slightly off-centered, curled mohawk type hairstyle. Allow the style to dry well.
While the wave hairstyle dries, prepare the ocean item that will be the wave by hot gluing a pipe cleaner to the toy. Cut the pipe cleaner shorter and create a hook shape at the end to hold onto the hair inside the wave.
After the hairstyle has fully dried, spray all of the hair with blue temporary hair color.
Insert the ocean toy into the wave hairstyle and hook the pipe cleaner around hair inside the wave. Spiking glue can also be used to help secure the item onto the hairstyle.
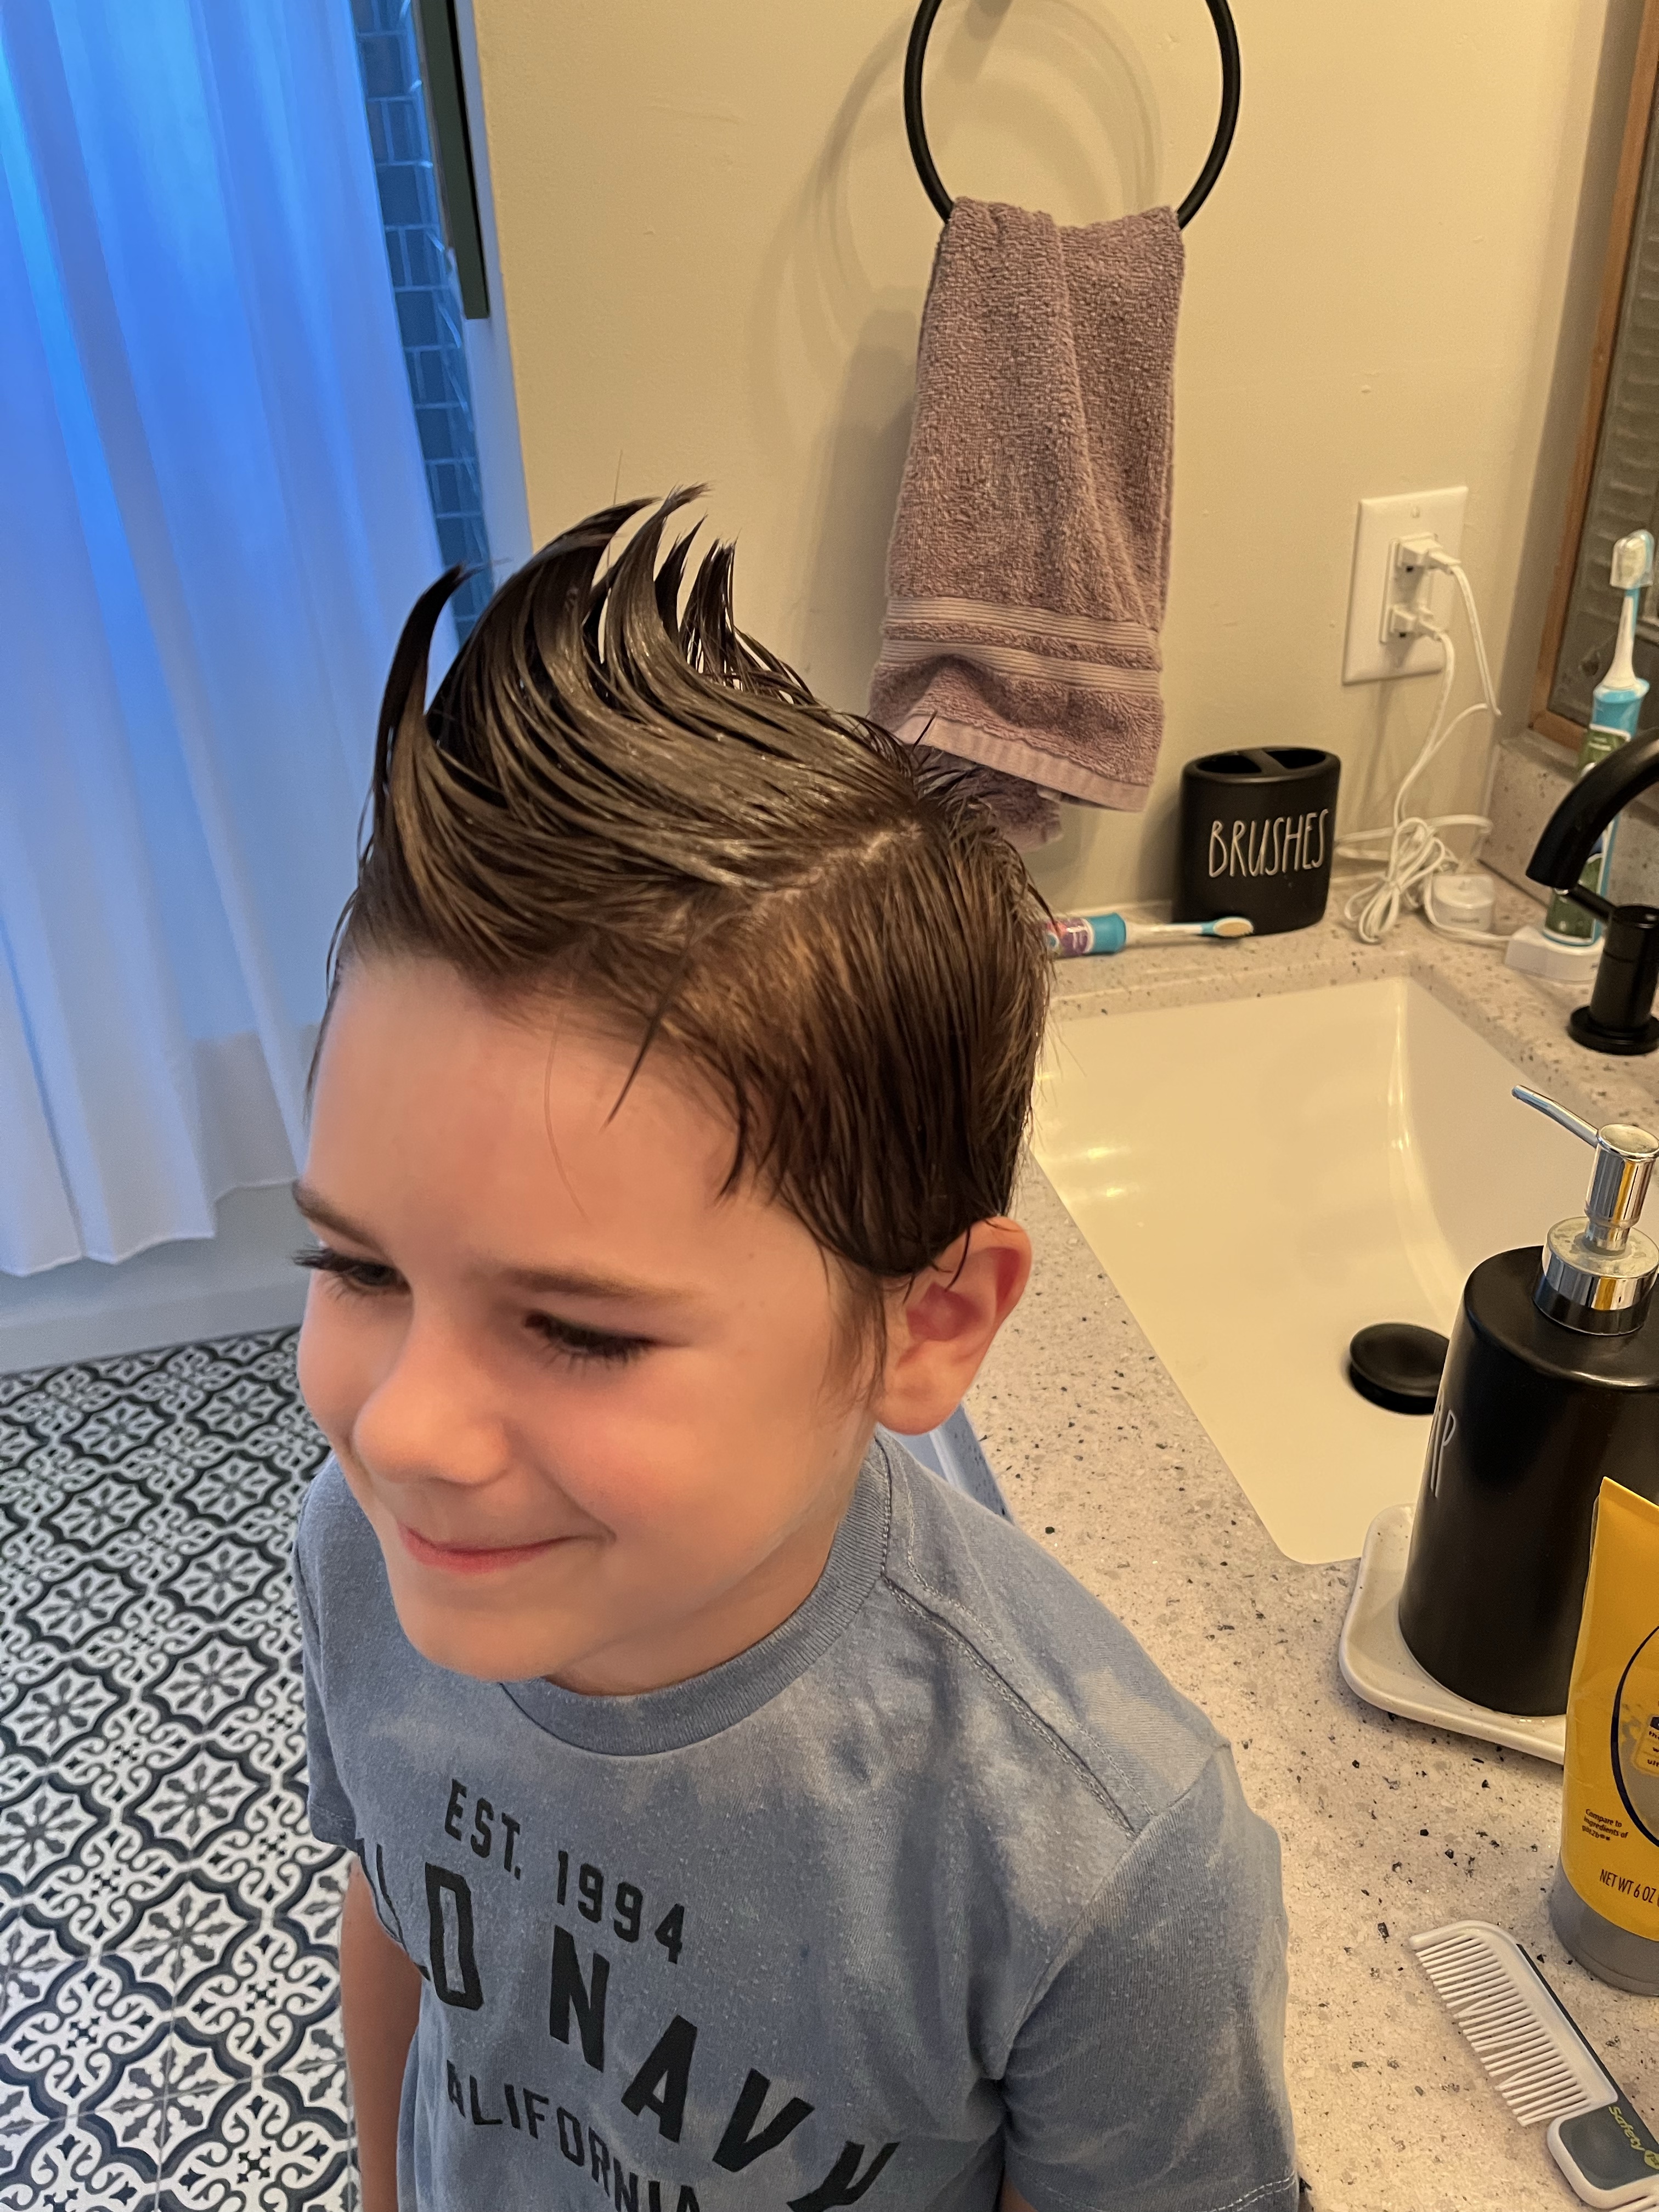
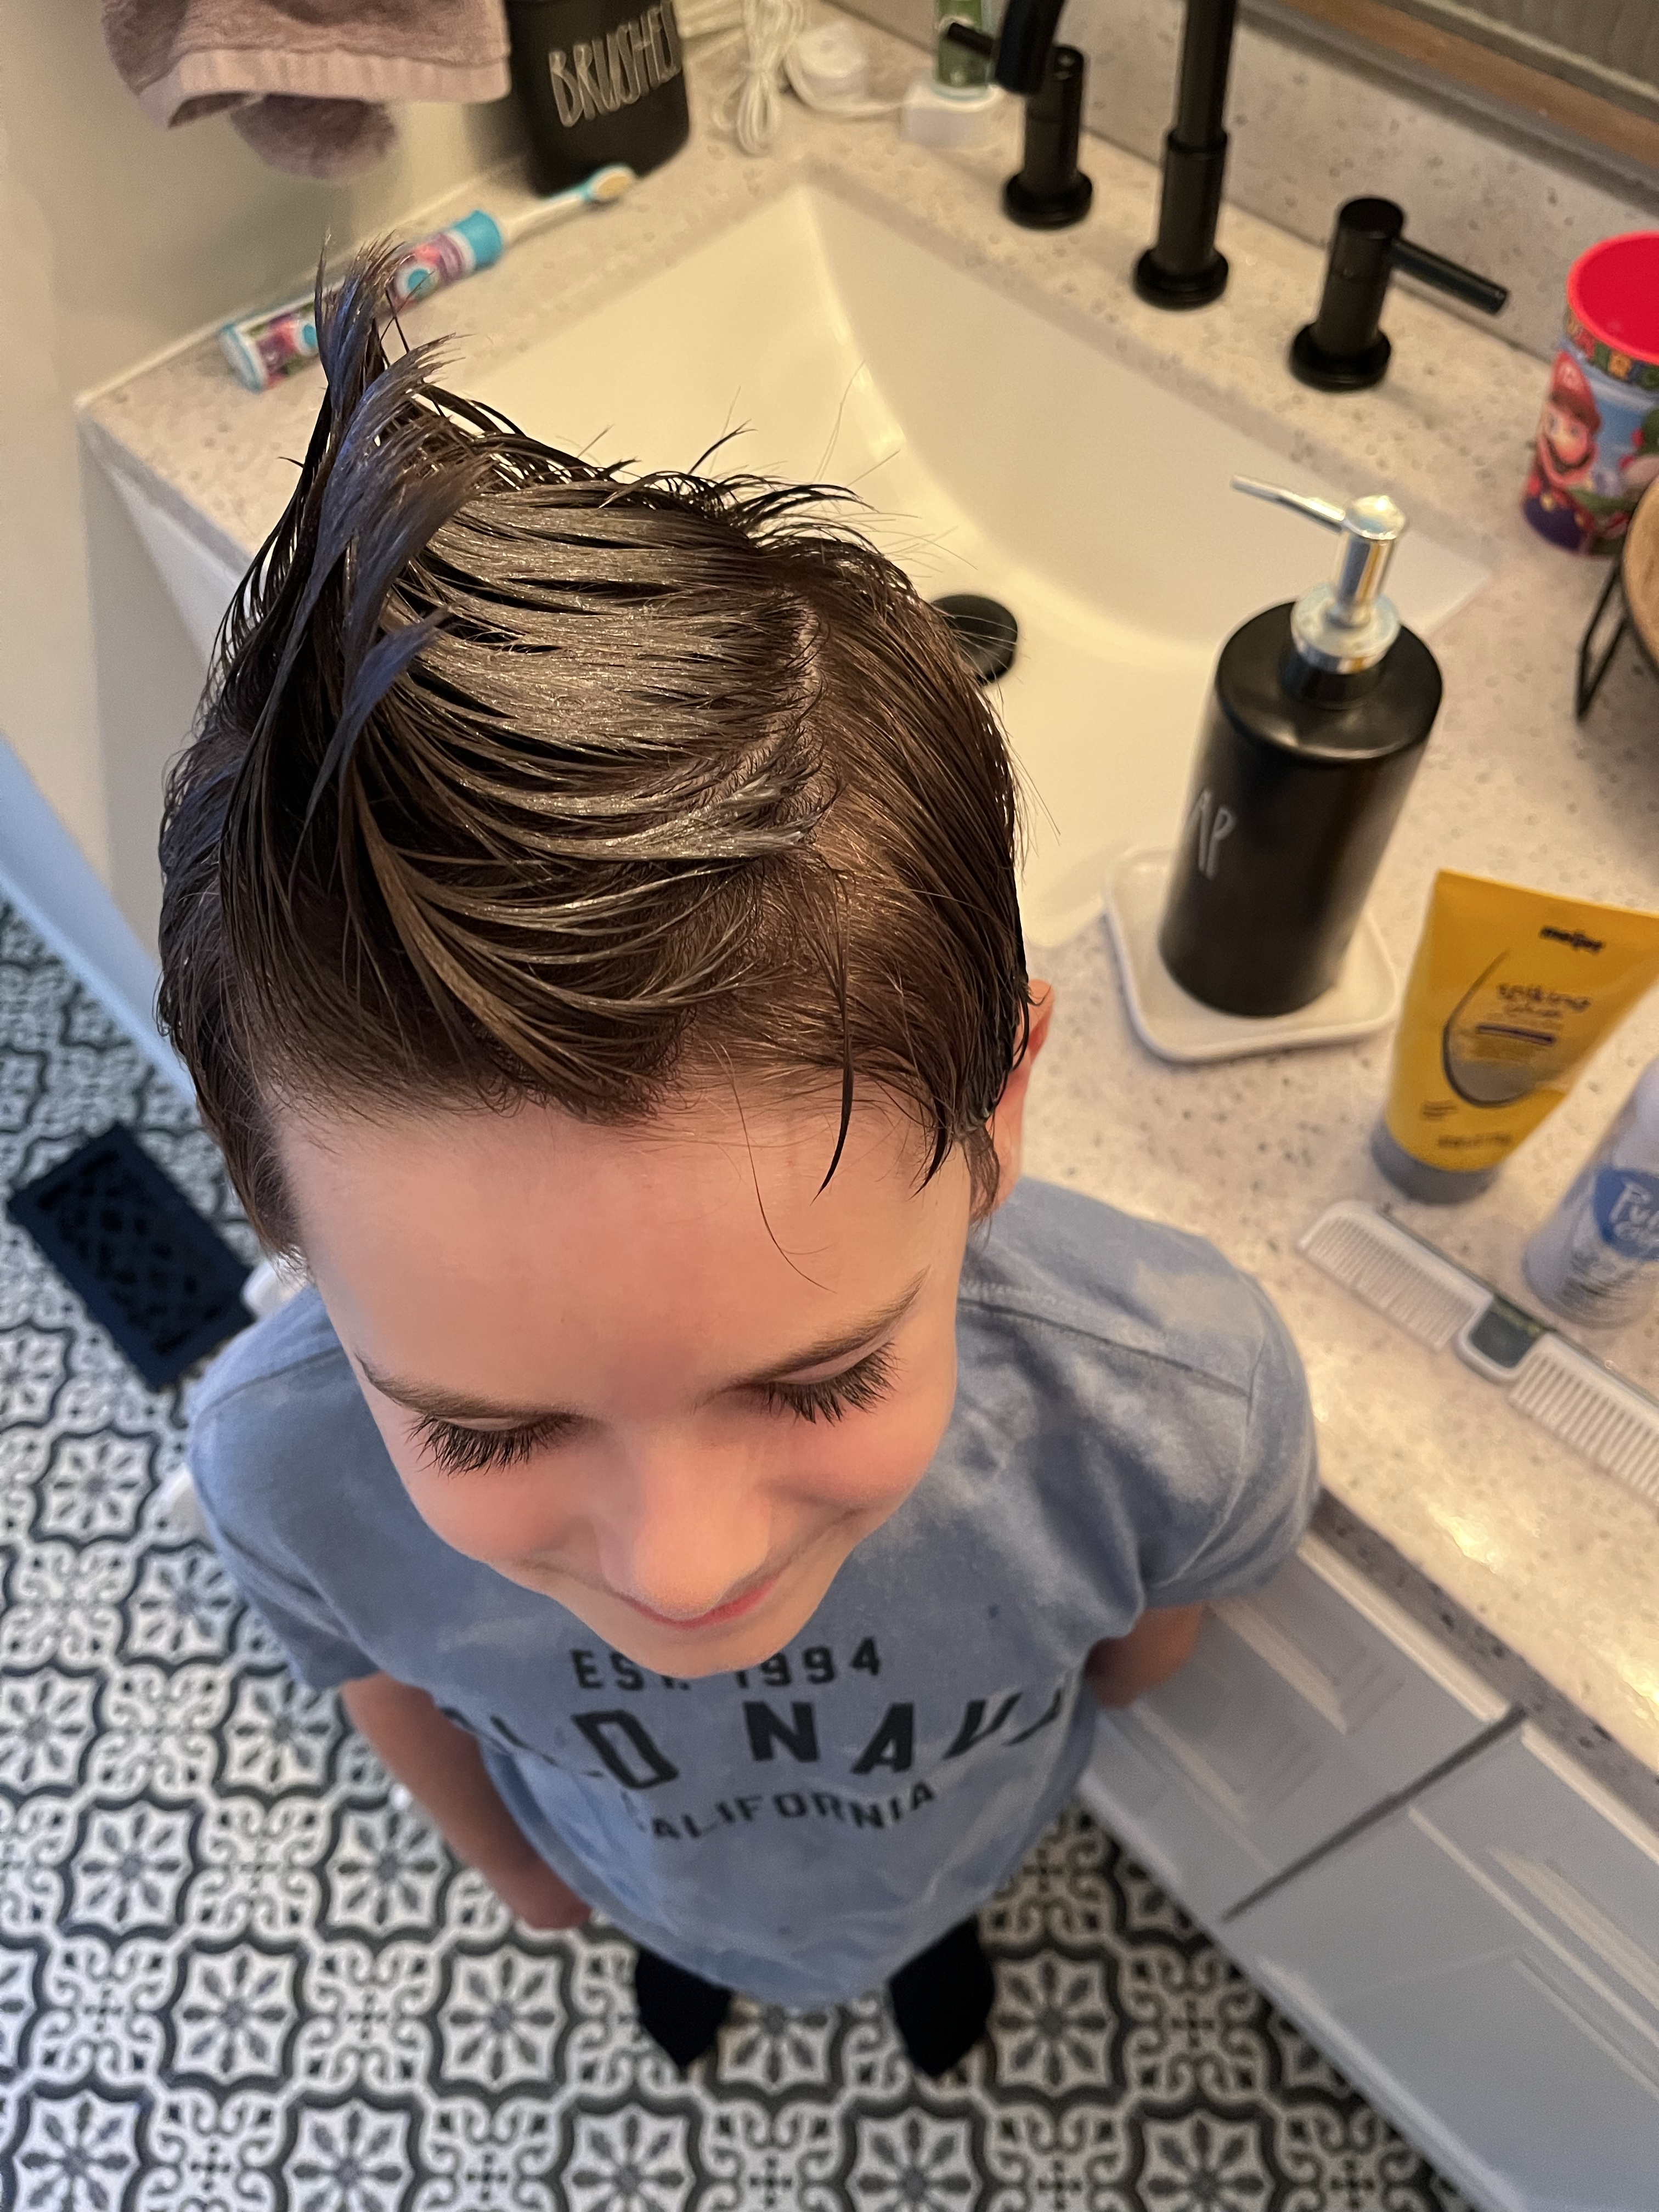
Crazy Colored Spikes
This is another great style for longer hair and is easily customizable with whatever color(s) you can find.
Materials
Hair spiking glue (we love got2b Glued and purchase it at Target, but it’s available at most grocery or beauty stores)
Firm hold hairspray
Colored spray temporary hair color (any color combination you like!)
Directions
Create spikes with an even amount of hair in each section all over the head using spiking glue.
Spray each slime well with firm hold hairspray and allow to dry well.
After the hairspray has dried thoroughly, spray each spike with the desired hair color spray.
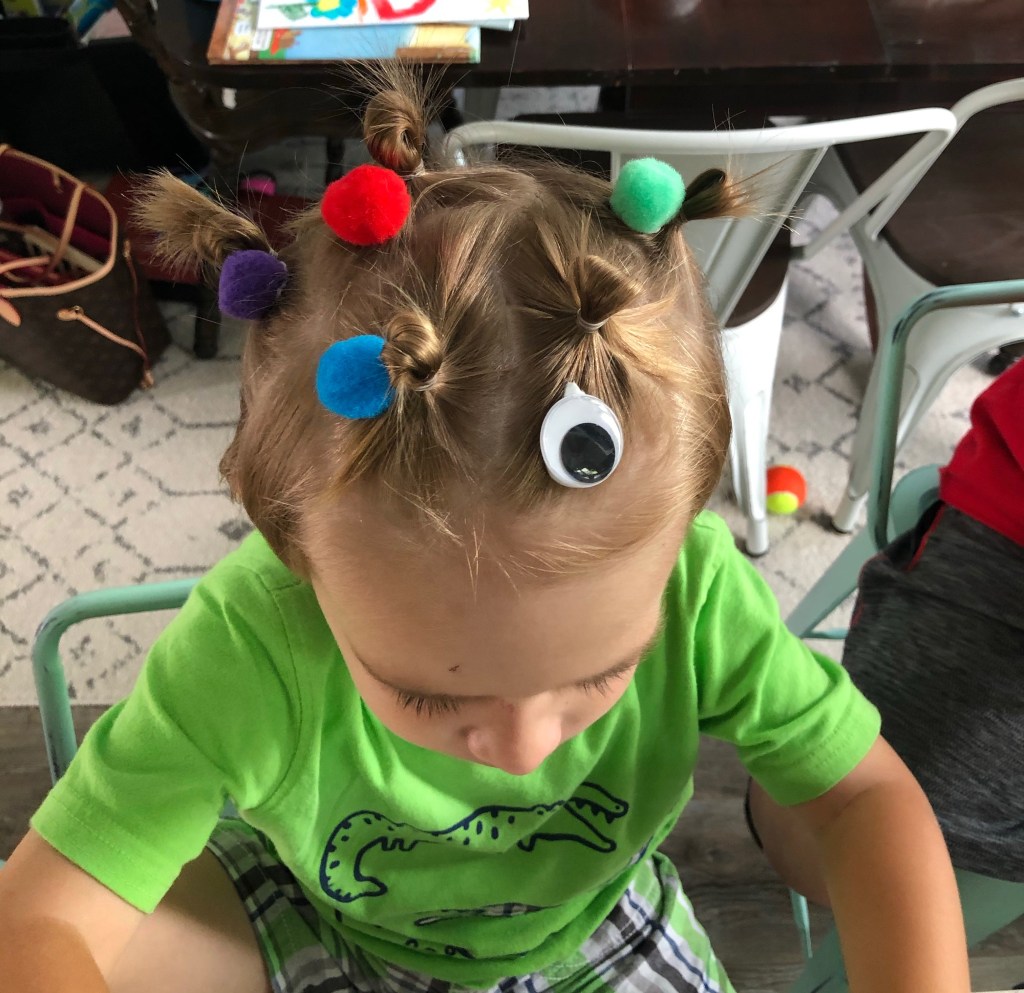
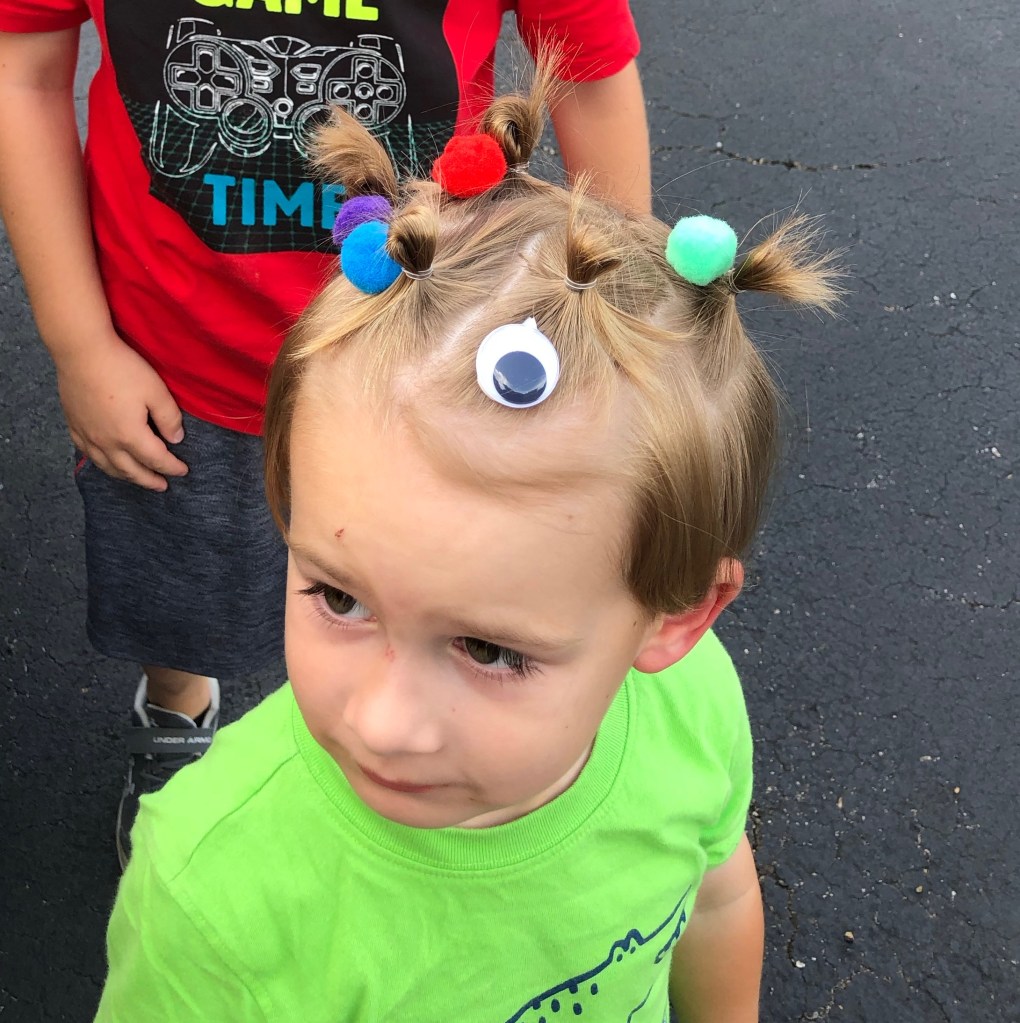
Pigtails and Pom Poms
This hairstyle is great for kids with very fine, soft hair. Our son’s hair had grown longer than normal and this style worked perfectly for his soft, fine hair that wouldn’t have spiked very well with a lot of product in it.
Materials
Small rubber bands
Hair spiking glue (we love got2b Glued and purchase it at Target, but it’s available at most grocery or beauty stores)
Pom poms
Goggly eyes
Any other light craft item such as pipe cleaners or sequins that can be pasted onto the hair
Directions
Create several pigtails by looping or twisting hair in small sections with small rubber bands.
Glue Pom poms, sequins, googly eyes, or any other small craft items onto the hair with spiking glue.
Twist pipe cleaners or other craft wire into the hair for a little extra creative flair!
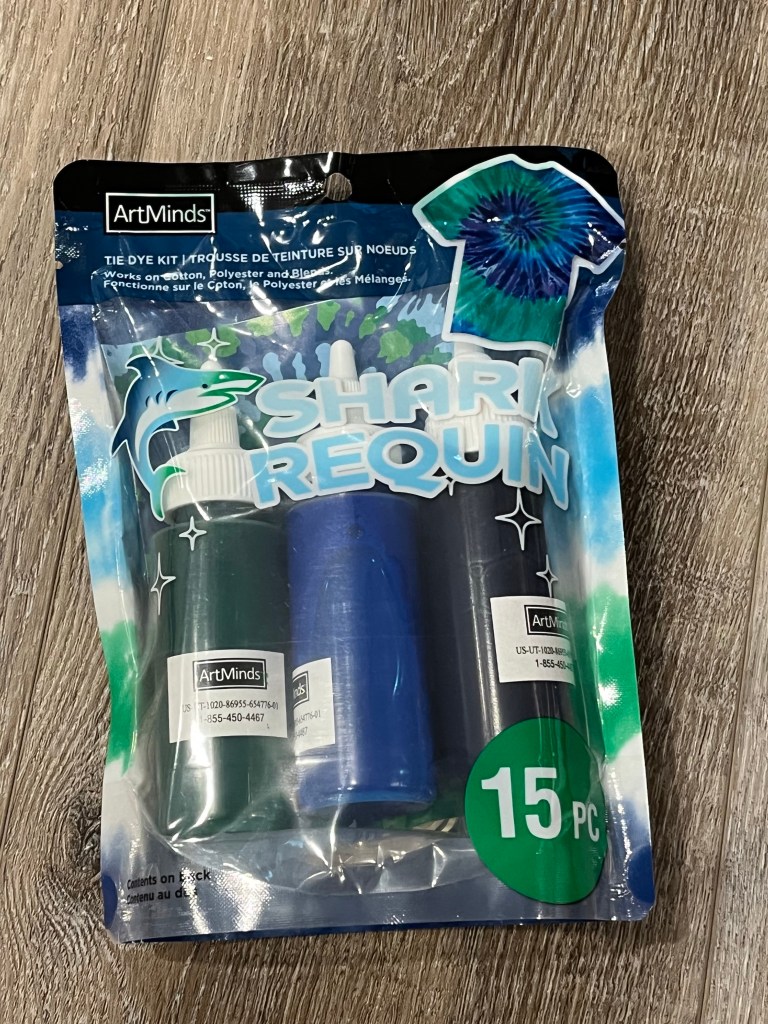
Well, I bought a tie dye kit from Michael’s over two years ago and I’m pretty sure our oldest has asked me to make t-shirts at least once a week since I purchased them. The youngest? Well, he’s a typical second child and says “I don’t want to do that…”. Anyways, for a first time tie dye experience this was pretty painless, so I figured I’d provide some tricks and tips I found helpful during the process. Happy dying, everyone!
Supplies
T-shirt or item you wish to tie-dye
Bottles of dye (I purchased a kit that make it pretty painless from most craft stores-if you would like to use the same one we used, you can find it here on Amazon)
Fork
Rubber bands
Rubber gloves
Large baking sheet
Large cooling rack
Large piece of cardboard
Directions
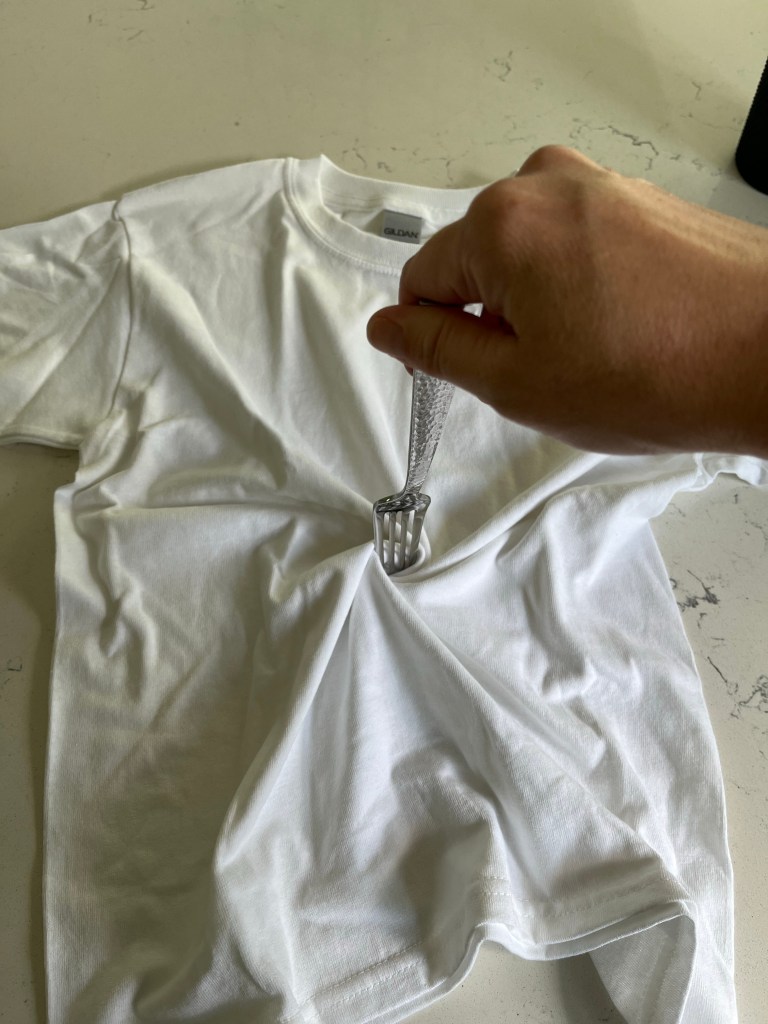
Begin by sticking a fork in the middle of the shirt or item you are dying and twisting until the entire piece is twisted around in a type of cinnamon bun shape. **Note: If you want a very solidly colored tie dye, soak the shirt in water prior to twisting the shirt into a bun shape. If you’d like a shirt that has some white left in the pattern like ours is shown above, do not soak the shirt yet.**
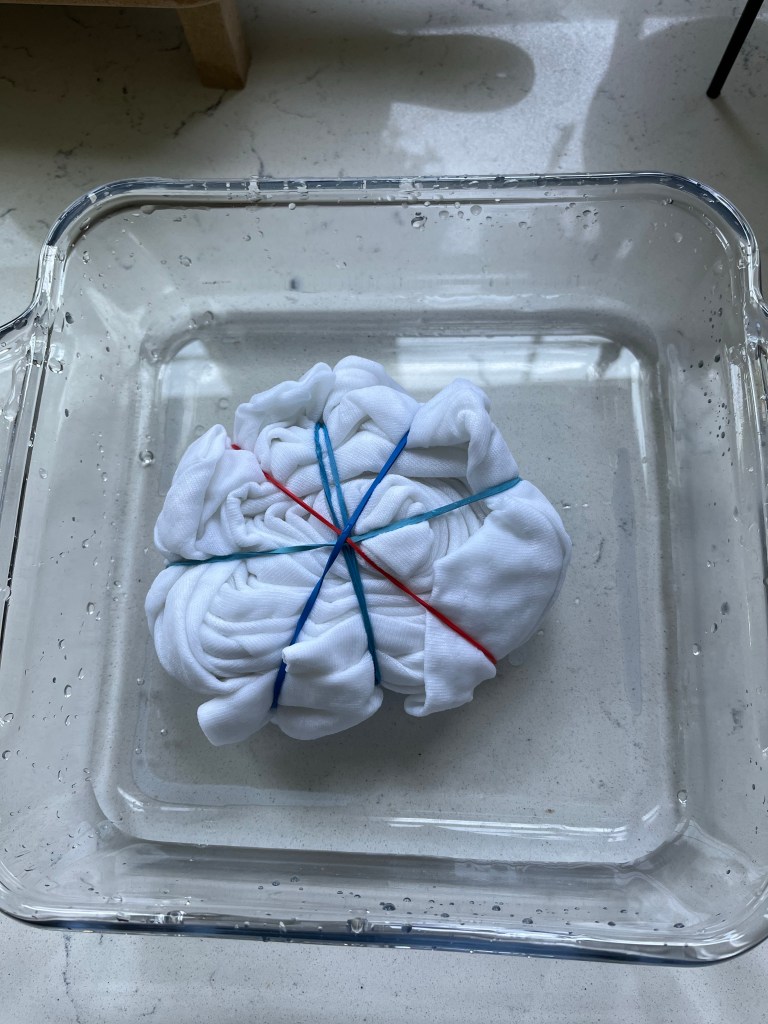
Place rubber bands evenly around the bun shaped fabric.
Soak the bun shaped fabric in water. The more saturated the piece, the more solid the dye will be. The less saturated, the more white there will be. If you want solid color tie dye, soak the shirt prior to twisting and placing rubber bands around it.
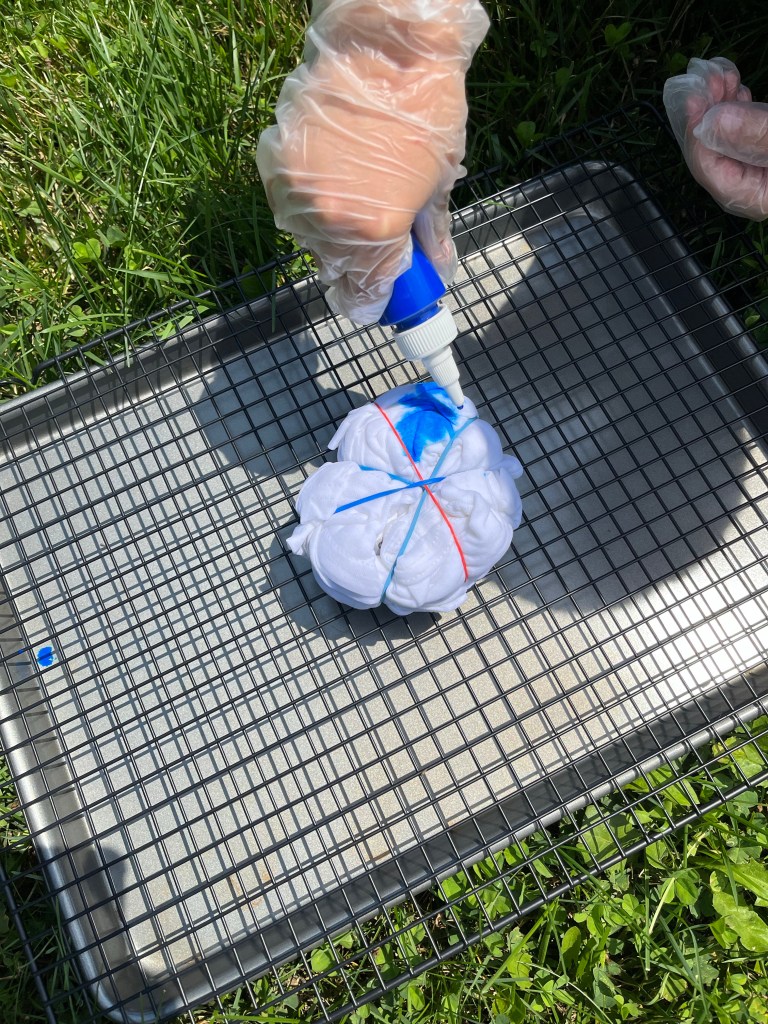
Sit the soaked shirt on a wire cooling rack over a large baking sheet. Apply the dye one section at a time saturating the shirt as much or as little as you’d like. The more saturated, the darker and more solid colored the shirt will be.
Allow the shirt to sit and soak in the dye. You can allow it to soak overnight for a very saturated and blended look or allow it to sit for an hour or so before opening the shirt to dry.
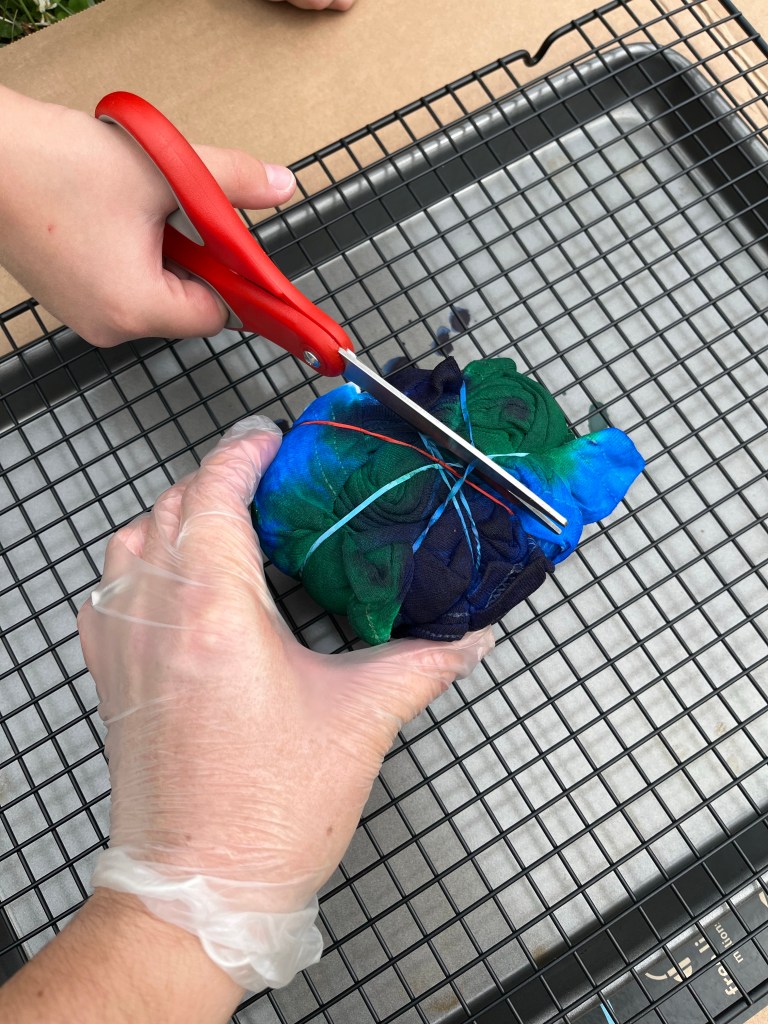
Using gloves, cut the rubber bands off of the shirt.
Open the shirt and place the wire rack and pan on a large piece of cardboard to dry. Allow the shirt to dry for 24 hours. After the shirt has fully dried, place the shirt in a dryer and tumble dry on low for 30 minutes to set in the dye.
Ok, yes… I already have a Dragon Fruit Refresher copycat recipe which is great when you’re in a pinch because it’s only 2 ingredients, but this one uses real dragon fruit (frozen because who needs that hot pink mess chopping a dragonfruit?) and mango lemonade.
Ingredients
Frozen, puréed dragon fruit (I prefer Pitaya brand because they come in single packages that are perfect for this recipe)
Mango lemonade, any variety will do
Chopped mango (I didn’t have fresh on hand, so I used Del Monte chopped mango. You can get creative here!)
Any other chopped fruit (optional-I used kiwi and it worked really well in this drink)
Directions
Place the frozen dragon fruit in a large carafe. Pour the mango lemonade over the frozen dragon fruit.
Allow the frozen dragon fruit to thaw and mix well with the mango lemonade.
Pour mixture over ice and add finely chopped fruit. Enjoy!