I bought this adorable little Bird’s Nest Fern (Asplenium Nidus) at Meijer for $6. I’ve seen them here and there but never really paid much attention to them, but this one caught my eye in its little terra cotta pot. I thought its color was beautiful, its shape was so interesting, and it would brighten a room no matter where I placed it. So, I decided to put it in the kitchen to add a little homeyness.
I really didn’t know anything about these plants, but I noticed when its potting soil became extremely dry it would lose all of its color suddenly. Pretty handy watering reminder! Here are a few things I’ve found about this plant:
Light: Bird’s Nest Ferns do best in medium indirect sunlight, but will also tolerate low indirect light.
Water: These ferns should be watered every 1-2 weeks. Avoid watering in the center of the fern, but instead water around the base of the fern. Let the soil dry out about halfway down before watering.
Humidity: Bird’s Nest Ferns can tolerate a typical home’s humidity, but come from a tropical environment, so they prefer high humidity.
Size: In a home environment, Bird’s Nest Ferns can grow to approximately 2 feet in size.
If you ever come across a Bird’s Nest Fern, pick it up! You’ll be surprised how easy these little guys are to care for and what a statement they are. No one ever believes that mine is real – they’re that distinct!
Chili is definitely one of my top go-to recipes when I don’t know what to make. If its a little chilly outside (pun intended…), I need a complete meal in a pinch, or if I just don’t know what to make, it’s chili to the rescue!
I adapted this recipe from one I found on Food.com. This recipe is so versatile and can be made using lean ground beef or turkey. I usually decide on what to use based on whatever I have the most of at the time. Use whatever you have on hand! Don’t like kidney beans? Use black beans! Don’t like bell pepper? Don’t add any! Customize it how YOU like it.
Ingredients
2 lbs ground turkey or lean ground beef
1 onion, chopped (or use diced frozen onion to save time and cleanup!)
1 bell pepper, chopped (I usually prefer red or orange, but any color will do!)
1 (16 oz) can red kidney beans, undrained
1 (16 oz) can black beans, undrained
1 (16 oz) can stewed tomatoes, diced
1 (6 oz) can tomato paste
2 Tbsp chili powder
1/2 tsp garlic powder
1/2 tsp oregano
1/2 tsp cumin
1/2 tsp paprika
1/2 tsp black pepper
1/2 tsp salt
1 1/2 – 2 cups water
Directions
Over medium heat, spray a large dutch oven with non stick cooking spray.
Saute ground turkey or beef, bell pepper, and onion until lightly browned and onion and pepper are soft.
Add remaining ingredients and water and stir well.
Cook covered over medium heat for 30 minutes.
Serve with shredded cheese, oyster crackers, and sour cream. Enjoy!
I have no idea why, but I always forget about sheet pan meals. They’re delicious, healthy, and you can use whatever vegetables and seasonings you happen to have on hand. Today is the first day of fall, sooooo time for fall foods! This recipe is great because you can customize it however you like with whatever vegetables you happen to have on hand. Some great vegetables to use are squashes, brussel sprouts, or even cauliflower or broccoli. You could even use chicken breast or legs instead of thighs. I prefer the chicken thighs because they seem to come out crispy on the outside, but not too dry on the inside. I adapted this recipe from one I found from Flavour and Savour.
Ingredients
8 skin on, bone in chicken thighs (any number will do!)
2 medium sweet potatoes, cut into approx. 1 inch pieces
1 medium zucchini, cut into approx. 1 inch pieces
small golden potatoes (any amount is fine, whatever you prefer)
2 medium shallots, sliced
1 honeycrisp, gala, or other sweet apple, sliced with peel on
1 Tbsp thyme
1 Tbsp rosemary
sea salt and pepper, to taste
Marinade
1/4 cup olive oil
2 Tbsp lemon juice
2 cloves garlic, minced
1 tsp dried thyme
1 tsp dried red pepper flakes
sea salt and pepper to taste
Directions
Preheat oven to 425 degrees F.
Add chicken thighs to a plastic Ziploc bag. Whisk all marinade ingredients together in a small bowl and pour the marinade into the Ziploc bag with the chicken thighs. Seal the bag and allow the chicken to marinate in the refrigerator while preparing the vegetables.
Cut all of the vegetables and fruit into uniform size pieces.
Spray a sheet pan with cooking spray. Add all vegetables and fruit to the sheet pan.
Place marinated chicken thighs on top of the vegetables and fruit and pour any extra marinade over the chicken.
Bake in the oven 35-45 minutes or until the chicken reaches a temperature of 165 degrees F. If you prefer even crispier chicken, place the pan under the broiler for a few minutes after the chicken thighs have fully cooked.
Taco Tuesday is a weekly occurrence, so there needs to be some variety, right? Sure… variety is the spice of life (yes, pun intended). With grocery costs skyrocketing lately I grabbed the alternative to ground beef for our Taco night staple-turkey! It’s more cost effective, tastes great, and I’m sure our arteries will thank us later. This recipe isn’t short on flavor, but is lighter on fat! Customize these tacos however you’d like! I’ll make a list of what we usually top ours with, but get creative! There are also links to Copycat Chipotle guacamole and corn salsa, homemade white queso, and Copycat Chuy’s Creamy Jalapeno dip. I know you could drink that stuff with a straw… we all could…
Ingredients
2 lbs ground turkey (or 1 lb if this recipe is only for a few people or you don’t like leftovers)
1 packet taco seasoning (or make your own using this recipe!)
1 packet ranch seasoning
taco shells or tortillas
Toppings
taco sauce
shredded cheese of choice
cilantro, finely chopped
black olives, sliced
sour cream
salsa
shredded lettuce
diced tomato
corn salsa (check out my Copycat Chipotle recipe here!)
guacamole (more copycat recipes-check out my Chipotle version here!)
Brown the ground turkey on medium high until thoroughly cooked.
Add one packet of taco seasoning and one packet of ranch seasoning if using 2 lbs of ground turkey. If only using 1 lb of ground turkey use 1/2 packet of each type of seasoning.
I’ve tried some great haircare in the past, but nothing has compared to Verb. I guess I have what would be considered “curly” hair. It’s more or less wavy, but if I twist it while wet, it will curl and I can wash and wear with no styling, so I’ll call it a hair win. I’ll tell you what I love about Verb products, give a review of each of the products I’ve tried, where I purchase them and the purchase options available, and provide you with some super low maintenance hair tips. I mean, what mom has time to style her hair? Mom buns get old after a while, guys, let me tell you…
Verb Ghost Shampoo and Conditioner
My love of Verb products all started with my mom (shoutout to all of the amazing moms who know what their daughters want when their daughters don’t even know themselves… you know who you are!). She bought me a Verb Ghost set for Mother’s Day a few year’s ago. I had never herd of Verb and thought “Ooooh-new hair products, niiiiice!”. Little did I know how much I would love these hair products. If you’re not sure what type of hair you have, Ghost products are for you. I have wavy, soft, thick hair, but these products are great for any hair type. They clean hair well and my roots don’t get oily too quickly, but it also doesn’t dry my hair out with regular use. My hair stays soft and shiny and styles very easily. Ghost is great for color treated hair and helps your color last without being too harsh. If you’re not sure where to begin, Ghost products are for you!
Verb Curl Shampoo and Conditioner
After Verb products became much easier to purchase (Ulta and direct from Verb’s website), I decided to try their curl shampoo and conditioner. I’m definitely a believer after using these. My hair seems to maintain curl or wave much better than any regular shampoo, doesn’t get oily, and the roots don’t just lay flat after shampooing, but maintain some volume (win, win!). If you have curly or wavy hair, you’ll love the curl shampoo and conditioner.
Verb Ghost Oil
Yes, it’s an oil… don’t be afraid of it-it’s weightless! Since I have wavy/curly hair I use it after finger combing my damp, microfiber towel dried hair so it doesn’t become frizzy after air drying or styling. A little goes a long way. It’s not sticky and doesn’t make my hair look greasy. I make sure to concentrate on my hair several inches from my scalp to make sure I get some extra non-hair washing days in (yeah… I said DAYS… I’m a mom… give me a shampoo break pass, ok?). If you want to eliminate fly aways or give your hair a smoother look before styling it with curing or straight irons, you’ll love Ghost Oil.
Verb Ghost Mask
I’ve never understood the point of hair masks. My hair usually stays soft, I don’t tend to get many split ends because I never use heat on my hair (not because I’m afraid, but because it’s a time suck due to my thick, THICK hair), and it’s not colored. Verb had a sale on their website for different sets and the set that had curl shampoo and conditioner with Ghost Oil came with a Ghost Hair Mask, so I figured I might as well try it. It is a GAME CHANGER! I never thought I needed a hair mask, but this mask is super easy, super quick, and super effective. Use it once a week after shampooing your hair for 5 minutes, rinse, and voila! Soft, manageable hair!
Where to Find Verb Products
Verb products were a little difficult to find for a while and could only be purchased in some salons or on Amazon from an authorized salon. Now their products are easy to purchase directly from their website and yes, they have sales… GREAT SALES! I like to purchase their package sales because they tend to create packages with products you’ll actually use. Shocker, I know! If you’d like to try several of their products I suggest waiting for one of their sales and purchasing direction from them. They also have great sales on larger bottles of Verb products. So, you get the advantage of a discount due to a bulk product AND a great sale on top of that (usually around 20% when they have their large product sales).
If you prefer to walk into a store and purchase Verb products, Ulta has a great selection. They don’t typically have sales on any of their Verb products, but you can purchase for pickup online and walk into the store and take your products home that same day. You can also have them shipped if you’re like me and the thought of walking into a store is too much to bare any longer. Bonus? ULTA POINTS, GUYS… ULTA POINTS. Ulta also usually has a $3.50 coupon or some type of promotion going on with samples, so there’s always that.
Effortless Hair Styling Tips
Like I said earlier, I have wavy/curly hair that is soft, but SUPER thick. I have found the most effortless way (besides the mom bun piled on top of my head) is to let my hair air dry, but frizz, guys… frizz. Here is my process for frizz-free waves/curls:
Shampoo and condition hair as normal.
Use a hair mask once a week to help lock in moisture and shine.
Finger comb wet hair to remove any knots, then towel dry briefly with a microfiber hair wrap like this one from Amazon. Don’t have one or want to purchase one? Use an old t-shirt!
After briefly drying with a microfiber towel or t-shirt, twist some strands of hair to encourage curl. Apply a small amount of Ghost Oil on all hair, concentrating mostly on the ends and scrunching to encourage curl/wave.
Let hair air dry.
Let me know what your favorite Verb products are so I can try some new ones!
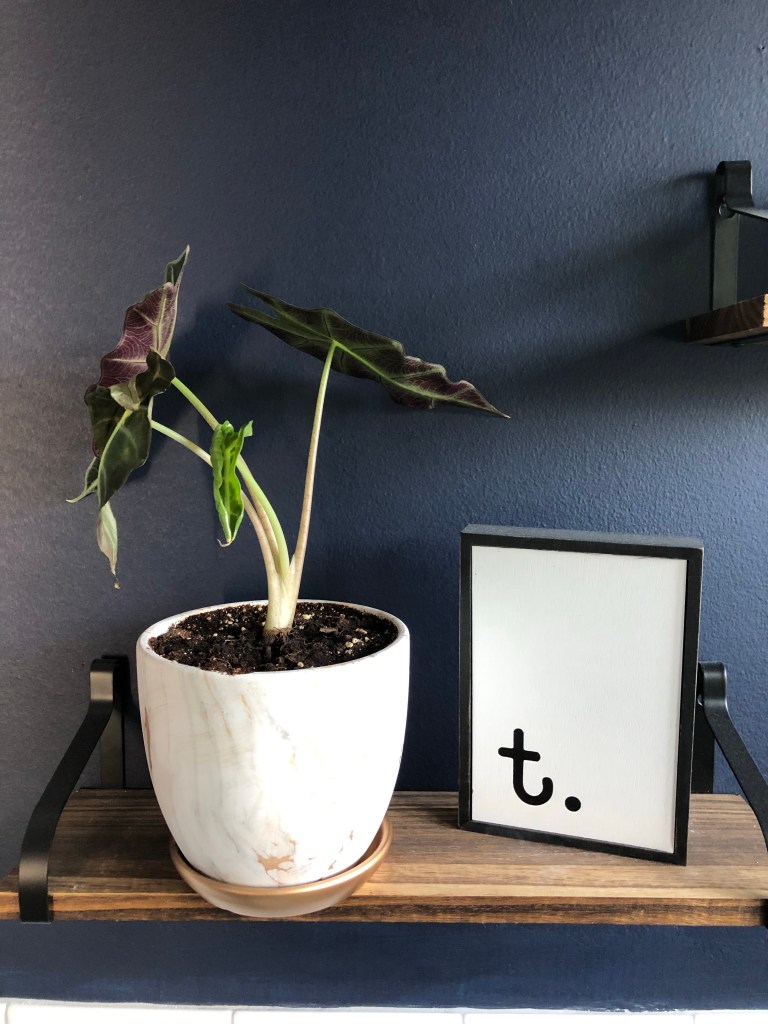
Alright, this post isn’t ENTIRELY about alocasia pollys losing leaves, but more about their general care and things I find fascinating about them. I bought my alocasia polly from Amazon… yes, Amazon! The convenience always gets me and the price was fair for the convenience ($18.99 for a 4″ pot and $31.99 for a 6″ pot). I’ve purchased several plants from the Rooted company on Amazon and the plants have always arrived in excellent condition and have thrived since they arrived carefully packaged on my doorstep. In fact, most of them have had new leaf shoots or leaves ready to unfurl when they’ve arrived.
Ok, anyways… back to alocasia polly care. Since I’ve never had an alocasia polly, I had to do a little research. They can trick you into thinking they’re dying, but I promise they’re not! Here are a few care tips and some things you might find fascinating about your alocasia polly:
Water
These guys are a little strange when it comes to water. They store all of their water in their large stem or base. This means you should only water your alocasia polly when it is completely dry. They store all of their water in their stem and use the water from their stem, so they don’t like to have constantly moist soil. Water them when they’re completely dry only, usually every two weeks.
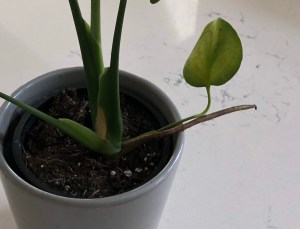
Unfurling Alocasia Polly Leaf
Light
Alocasia polly leaves tend to burn, so they don’t care for bright, direct light. While they love being in a well lit room, they thrive out of direct light. If your alocasia polly’s leaves are starting to become crispy, it might be in too much direct light.
Unfurling Leaves
Alocasia polly’s leaves unfurl similar to a monstera. It’s one of the reasons I LOVE this plant! I love watching them sprout new leaves and unfurl.
Dropping Leaves
Alocasia polly don’t have many leaves at one time. If your alocasia polly begins dropping leaves, don’t panic! It could be growing a new leaf or it could be going into its dormant winter stage.
Dormancy
Alocasia polly go dormant in the winter. Some alocasia pollys lose all of their leaves in the winter months. Water them less than you typically would and don’t feed them with fertilizer as much.
I’ve learned so much about alocasia polly and it’s definitely one of my new favorite plants. Remember-indirect light, water only when its soil is COMPLETELY dry, and it’s not dead, it’s just dormant! If you want to learn a little more about this variety, check out some more info from Plant Care for Beginners!
I’m copying all the things lately and there has been no shortage of Chipotle duplications in this house. Corn salsa is one of those sides that’s a hit with kids and adults in our house. You can keep it sweet or turn up the heat and make it a little spicy. Either way, it pairs great with some copycat Chipotle Guacamole, stovetop queso, or Copycat Chuy’s Creamy Jalapeno dip, so check out those recipes while you’re at it!
Ingredients
1 can sweet corn, drained well
1/4 red onion, finely diced
1 Tbsp cilantro, finely chopped
1/4 jalapeno, finely diced (more or less to taste)
juice of 1/2 lime
salt, to taste
Directions
Combine all ingredients and refrigerate for at least an hour to help flavors combine.
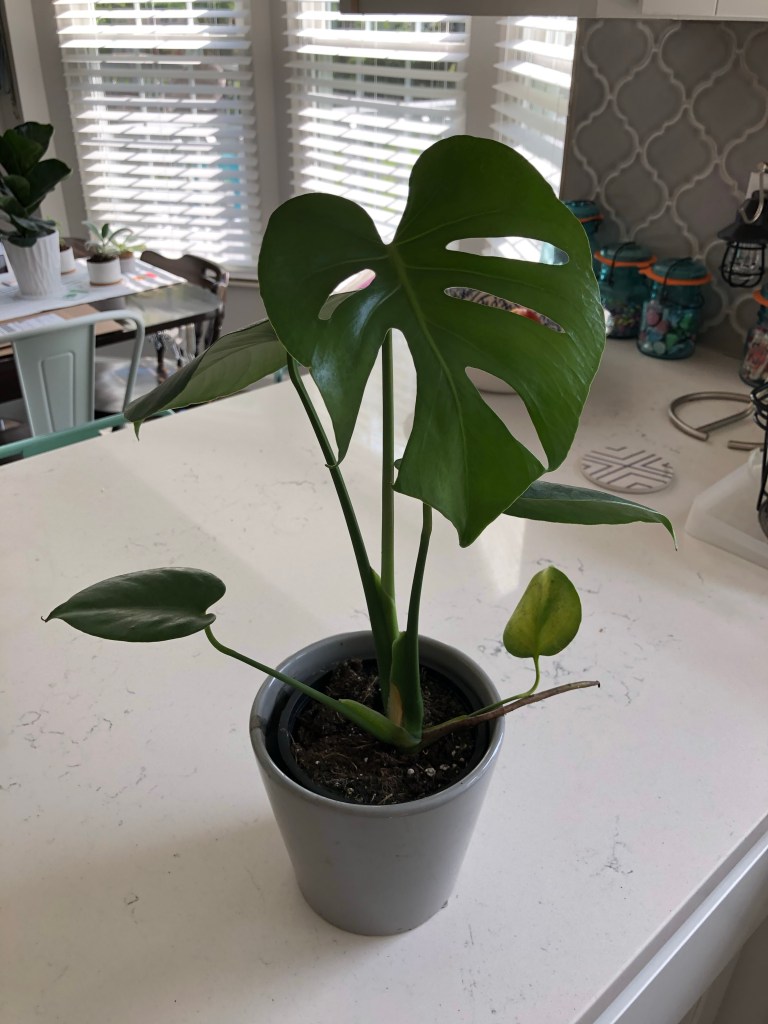
Happy Monstera Monday! I’ve always loved monsteras, but figured they had to be extremely difficult to care for because of their size and beautiful split leaves. Man, was I wrong! When monsteras became the “it” plant everyone had to have, I figured I’d wait to see what the hype was about. Now that they’re EVERYWHERE, I’ve added two to my indoor jungle and they have not disappointed! I’ll give a brief history of my monsteras and if you really couldn’t care less about my plants, but want some care info and fun facts about monsteras, scroll on down to the care section.
When Target rolled out their Hilton Carter live plant collection I couldn’t wait to see what plants they would be carrying, but I knew they would have monsteras. I mean, come on… it’s Target! They have all the trendy things… heck, they MAKE all the things trendy! Well, thanks to work and kids and cooking and cleaning and you know, all the things, it took me forever to even get to our Target to see what they had in stock. Of course, by the time I was able to run into the store they only had one pathetic, broken monstera left. In hindsight, I should’ve scooped that one up while I had the chance.
Before (left) and after (right) of the little Home Depot monstera
Fast forward a week or so and I took a quick trip to Home Depot to pick something up. Since I can’t pass up a good plant, I always browse their little corner plant section-by the way… never pass up their indoor plant section! They have all the trendy plants for a great price! Anyways… sitting there right in the middle was one lonely monstera. He was little, but he was perfect! Since I bought him he’s been repotted and aside from a bit of overwatering while in his tiny pot, he’s thriving and getting new leaves!
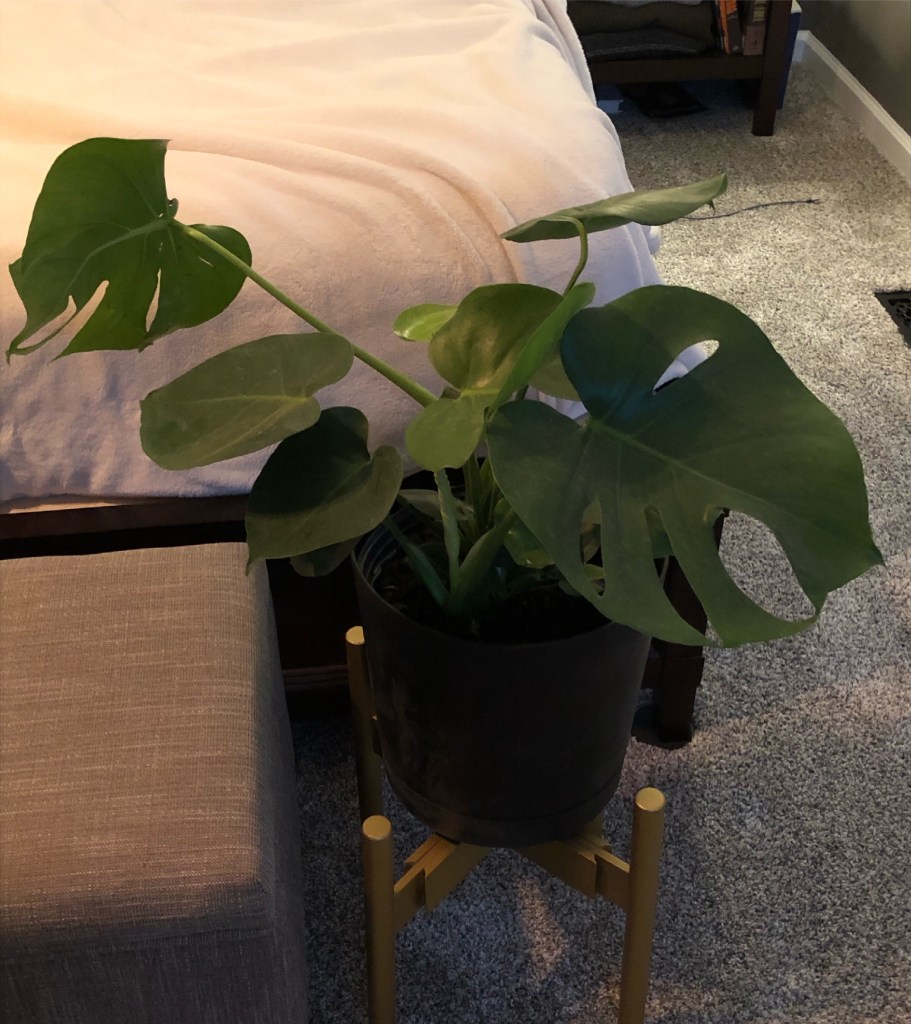
Target Carter Hilton live monstera before (left) and after (right)
I had to run to another local Target for something our Target didn’t have and they FINALLY restocked their live plants. I grabbed that monstera and put it in my cart so fast! This one has done so well and loves its sunny spot at the end of our bed. At this point I don’t even know how many new leaves “Monty” has at this point. Oh yeah… that’s his name… Monty the Monstera. By the way, the small one is now named Monty Jr. We get mad creative with names in this house, folks (that was sarcasm if you didn’t catch it… subtle…). Now that you’ve been introduced to the Montys, I’ll add some information that I’ve found very helpful.
Monstera Care
Monsteras are rather forgiving plants. Light, water, pot size, and soil type don’t need to all be perfect for them to thrive.
Light: They love light, so find them a sunny spot.
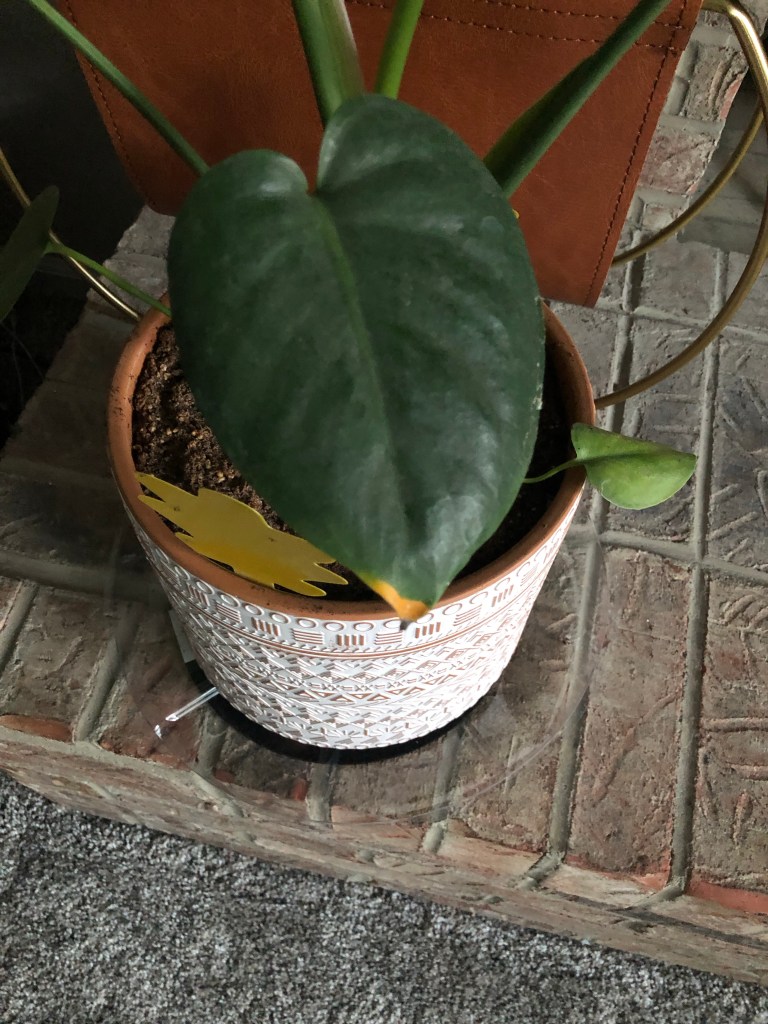
Yellow leaves due to overwatering
Water: Water them when approximately the first 2 inches of soil is dry. Make sure not to over water them or their leaves might yellow on the edges. Make sure their pot has drainage holes to make sure they drain properly.
Pot Size: They don’t seem to become root bound very easily. They don’t need to have a huge pot to be happy, but if you see roots coming out of the drainage holes, repot that sucker! Their leaves and stems seem so large that sometimes it seems like they need much larger pots than they actually do.
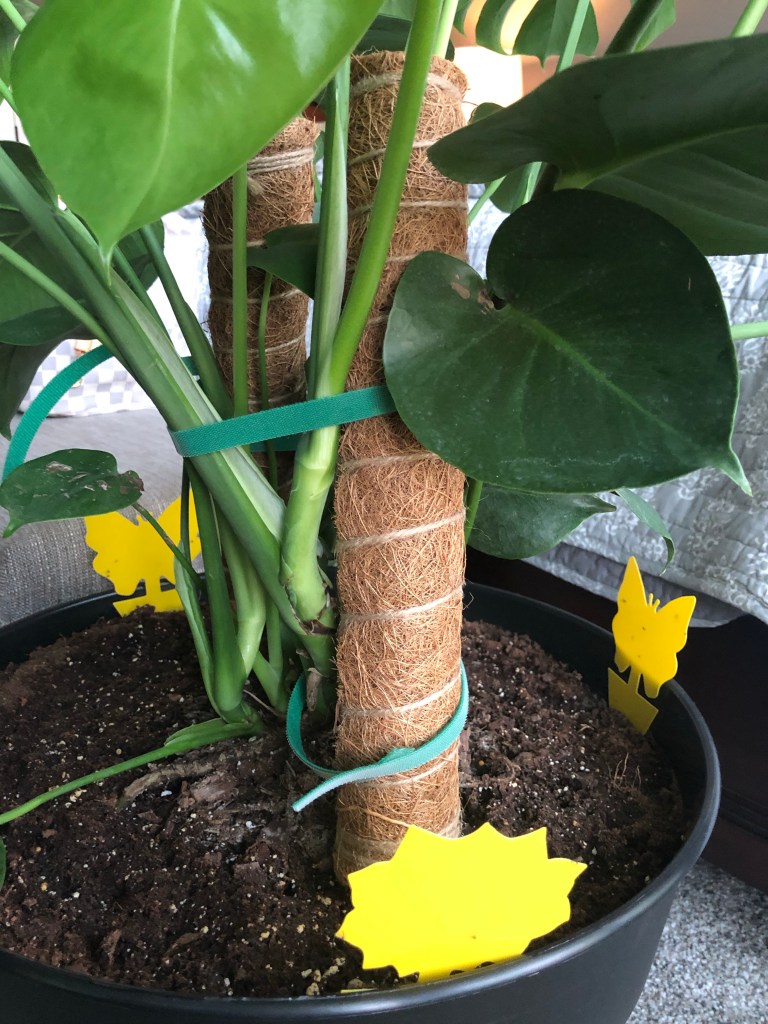
Moss pole to support monstera leaves
Climbing: Monsteras naturally find things to climb in the jungle. If your monstera starts to lean or flatten out, you may need to find something to support it or allow it to climb. Amazon has great moss poles that are cheap, sturdy, and do the trick.
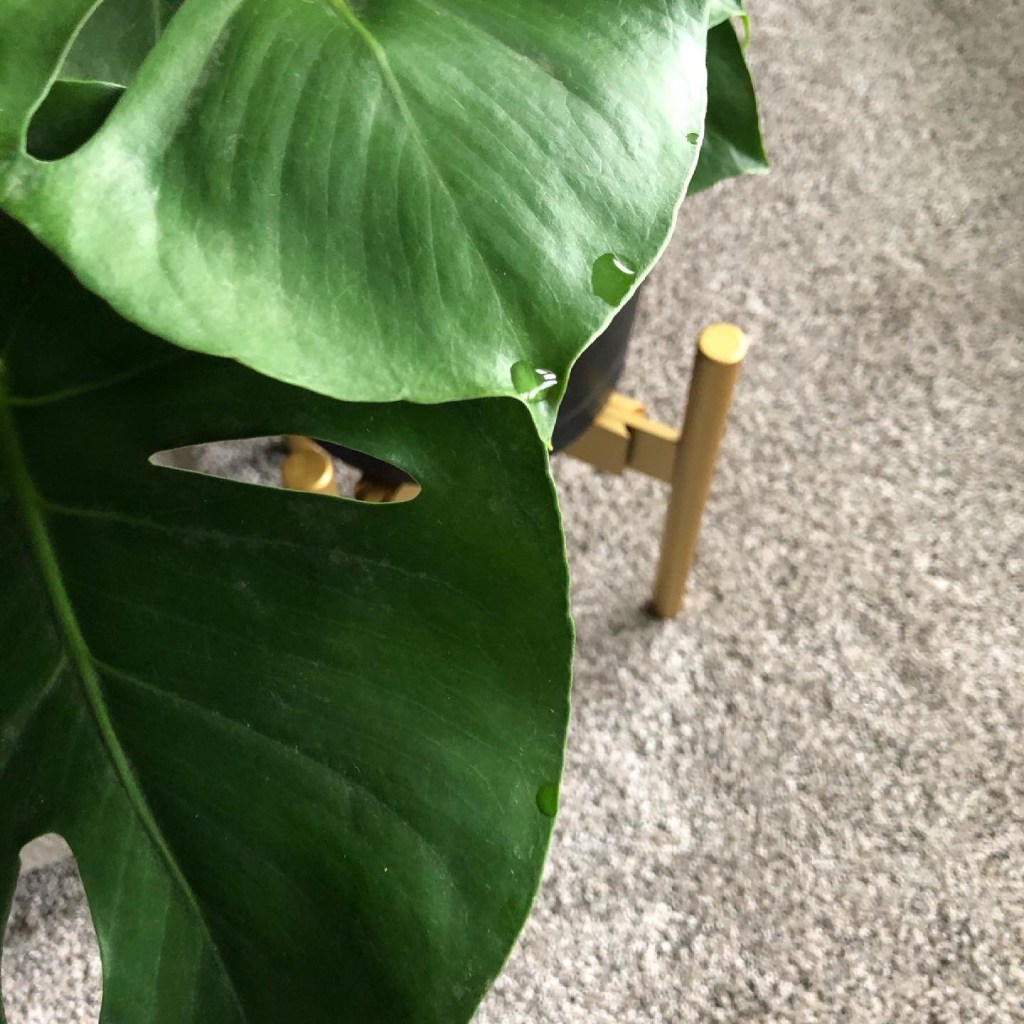
Dripping: Sometimes monstera leaves drip. No, your monstera isn’t crying-it is getting rid of excess water or moisture.
Dripping monstera leaves due to excess moisture
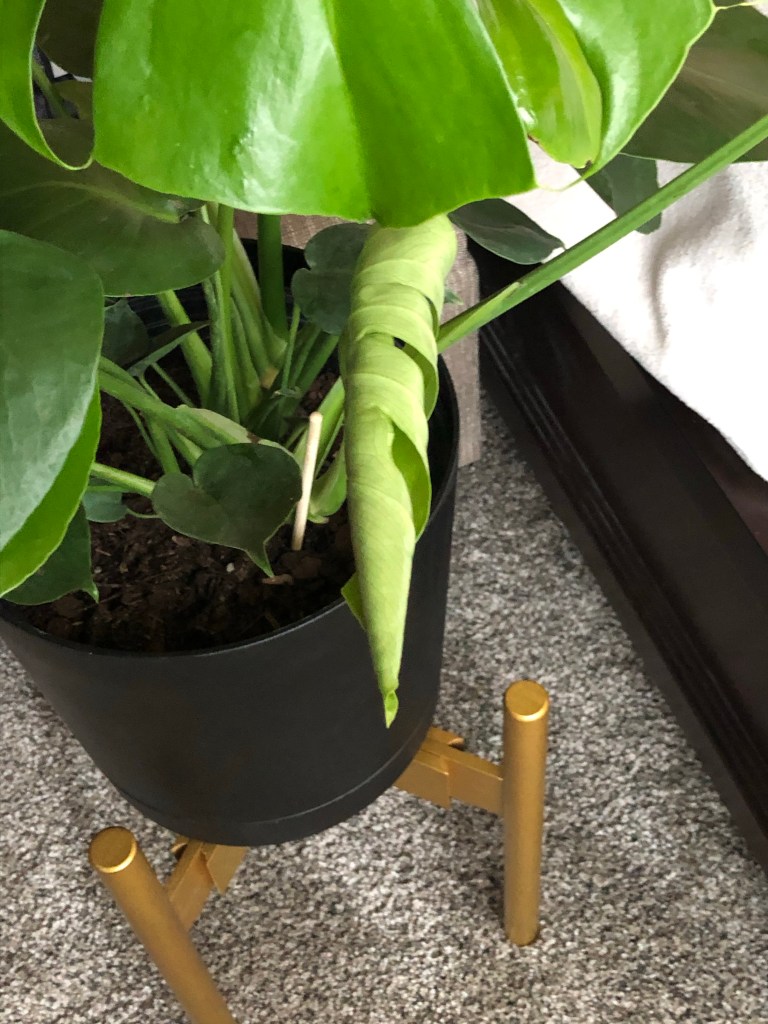
Unfurling monstera leaf
Unfurling Leaves: I had NO idea how monstera leaves grew. It’s the craziest looking thing I’ve ever seen! They appear as a shoot and unfurl over a few days. When you see new shoots, be patient! It takes several days for them to unfurl, then they’ll be a light green color for some time.
Aerial roots: This one is bizarre… roots that aren’t, well, in the dirt. There will be roots that don’t root into the dirt, but kind of hang in the air. This is for stabilization and these roots reach for water in the jungle. You can stick these roots back into the dirt or leave the be. Either way will be fine for your monstera. If you plan to propagate your monstera, these aerial roots are great! I’ll create a new post on that sometime soon!